Showing posts with label ribbons. Show all posts

Sunday, 31 May 2015

Lace & Hessian Jar Wrap - Just Experimenting

Hi Everyone,

I hope you've had a great weekend. We certainly have here. Yesterday we took a trip up to Garelochhead, a small village on the Gare Loch in Argyll and Bute ... a lovely trip through some beautiful countryside ... and today we went along to Ayr Town Hall to see The Great Tapestry of Scotland. This was our second visit, it's so big it took us two days to see it all. Posts will follow once I've sorted out the many photos taken.

This evening I've been experimenting with how to make a wrap to prettify a jam (jelly) jar.
The base is a piece of white on white fabric from the scrap box. I added white lace borders, hessian (burlap), white satin ribbon, cream embroidered ribbon, a cream crocheted flower and a pearl to finish it off.
I decided to leave the ribbon fairly long so that the wrap could fit several sizes of jars.
As I'm always looking for a new container for flowers this is a great way of creating something different quickly and inexpensively. It would also make a pretty container for a tea light.

This was so easy to make and it's a great way of using scraps of materials that I may just make one or two more.

Many thanks for visiting. I wish you all a good day tomorrow.

Happy Crafting

Thursday, 23 April 2015

Purple Drawstring Bag

Morning Everyone,

Happy St George's Day!

Apologies for being a really bad blogger at this time but blame the garden! I've been weeding, digging, raking, planting and sowing seeds, all of which takes a lot of time. And let's not forget the watering ... it's been so hot and dry here that I've been out with the hose every evening making sure those seeds survive! All this physical exercise leaves me totally jiggered by the end of day with no energy for crafting. Normal service will be resumed eventually ... just don't ask me when!

I did, however, take a quick couple of hours out recently to make this little drawstring bag for my sister's birthday.
Made from Debbie Shore's Bag's Galore Molly bag pattern, it took only two half fat quarters, some adhesive applique paper for the heart shape, satin ribbon, scissors, thread and a sewing machine. It's fully lined. The pretty purple/pink flower patterned fabric is a Kirsty Allsop's design - a fat quarter which came free with Love Sewing Magazine - and the plain purple fabric was just a piece left over from another project.

I fringed the square on the front before attaching the heart shape with a satin stitch ... not perfect but I was in a hurry :)

That's it for now ... off to sow a few more seeds in the cutting patch.

Have a great day whatever you are doing.

Happy Crafting,

Thursday, 23 January 2014

Little Bird and Ribbon Card

Afternoon Everyone

This is going to be the quickest post in history of this blog.

This card was made for a challenge which called for the use of ribbons, lots of ribbons. Now I like ribbons, that's evident by the hoard I have gracing the craft room, but it's rare for me to use more than one on a card ... could that be because I am so loathe to part with even the tiniest snippet :)  However, as ever, I rose to the challenge and, going completely crazy, picked out some of my most cherished beauties. The unusual colour combination, that is, unusual for me, was taken from the gorgeous embroidered ribbon from Anna Griffin.

No 'how I made it today' ... I desperately need to finish off sorting out the stamps or I'll never see the top of my desk again ... suffice to say there's dry embossing, colouring and stamping with a little bit of silver waxing thrown in for good measure. Oh, and the pink topper mat has a pierced border too.


Materials used:

  • card - teal (Papermill Direct), deep pink (Papermania) and white (Neena Solar)
  • stamp - Inkadinkado Bird Streamer
  • inks - Memento Markers, Rose Bud, Bahama Blue, Bamboo Leaves and Ranger DI, Crushed Olive
  • gilding wax - Pebeo Silver
  • tools - Cuttlebug; embossing folder - Cuttlebug Cindy Loo; dies - Docraft's X-Cut Squares and Butterflies; Dovecraft piercing ruler, piercing mat and a pokey tool

Because the base is such a strong colour, I created an insert from printer paper stamped up in the same combination of inks as used for the front.

Almost the entire card is made from snippets - the exceptions are the teal card used for the base, the white rose ribbon trim and the embroidered ribbon - even the green velvet ric rac came from the snippet box, so I'm skipping over to Pixie's Snippet Playground - Week 108 - where snippets are the name of the game.

Graveling update: almost done but we've run out of gravel for the driveway - surprisingly, a ton was not enough!

Update on goal to buy no new stuff but to use Only Goodies out of Stash (OGooS) - it's Week 3, 2014, and I've still not succumbed to temptation - so far all materials have been sourced from stash. I know, it's early days but so far, so good :)

Right, time for a quick bit of lunch and then back to the stamp sorting - photos may follow :)

Take care everyone. Happy crafting,

Wednesday, 18 September 2013

Spring Broom Wall Hanger

Evening Everyone,

It's been another busy and disruptive day at the present Casa Worthington ... I may have said this before so at the risk of repeating myself, I hate moving house!?!?

So it's been a case of NOMWW - Nothing on My Workdesk Wednesday - and no time to play, sigh, or not much time because I did sneak in for a few minutes to finish this small wall hanger.
 I've rather tired of making cards for the time being, besides I have a drawer full, so I thought I'd make something to hang on the wall instead. And I know Spring feels as though it's a long way off but it will come again, surely!

The base is a 6" square piece of recycled cardboard packaging covered in a patterned paper, the design is a paint distressed looking one, perfect for this project. The background is stamped with the Broom stamp from A Country Diary of an Edwardian Lady set, first in Versafine Vintage Sepia and then VersaMark brushed with gold mica powder. The sentiment, stamped in Momento Rich Cocoa, is from Sheena's A Little Bit Sketchy Spring.
To make the topper, a stamp block was inked with three shades of Adirondack, Sunshine Yellow, Peach Bellini and Willow, then sprayed with water to create the background. Once dry it was stamped with the same Broom stamp as used on the background. This was then coloured with Memento markers in yellows and greens.
The ribbon and the embellishments, gold die-cut butterflies, gems, pearls and sequins are all from stash.

I'm submitting this to Pixie's Crafty Snippets Playground Week 90 - the topper is made from snippets of white and brown card. While I'm over there I'll take the opportunity to see Di's first Zentangled project ... something I have yet to try, and as it looks so complex and arty, I may never try :)

I hope you are all well and that Wednesday has been good to you.

Take care and happy crafting,

Thursday, 30 May 2013

Thanks - William Morris style

Evening Everyone,

I hope you have all had a brilliant day.  It's not been too bad here - my feet/legs are improving with enforced rest but I'm bored to bits. I haven't been able to go into the craft room so my desk looks exactly the same today as it did yesterday and I haven't made a thing. But, in true Blue Peter fashion, here's a card I made earlier.
Years ago, on a visit to Manchester Art Gallery, I bought a pack of postcards featuring old masters, that came wrapped in this packaging decorated with this William Morris design. I've kept it all this time for no better reason than I think it's beautiful - the muted greens, creams and the splash of orange against a black background are just the perfect combination to my mind, and I love the stylised design. If I could, I would have one wall in the lounge papered with it.
The card is made up almost entirely of snippets - the only exception is the ready made card base. Even the ribbons are titchy little lengths leftover from previous projects.

And, of course, the tiniest leftover strip was split in two to decorate the inside and the back.

Materials:

  • square white card base; 
  • black cardstock; the packaging; 
  • 1" wide cream stitched grosgrain ribbon; 
  • narrow green velvet ribbon; gold card for greeting mat; 
  • VersaMark and gold heat-It-Up embossing powder; 
  • greeting stamp; 
  • gold Liquid Pearls

All those snippets make it a certainty that I'm heading over to Di's playground - Pixies Crafty Snippets Playground - Week  74.

That done, I'd better adopt the prone position again (sigh). I do have the biography of Edith Holden, author of a Country Diary of an Edwardian Lady, to read - that should keep me amused for a while.

Take care everyone,

Happy crafting,

Monday, 22 October 2012

One Moment In Time - Mini Photo Album

Hi Everyone

Happy Monday to you all - we have dry and cool weather today which is heaps better than the wall-to-wall rain that is the norm. Hope you are enjoying good weather, i.e. for the time of the year, wherever you are and, if it's not so good, as if we need an excuse, then it's perfect crafting weather :))

As you might know, if you've been following my posts, I haven't been able to do much in the way of crafting for several days but, in true Blue Peter tradition, 'here's one I made earlier' - want to know more about Blue Peter and the origin of the phrase, here's a great article published in the The Telegraph. (for non-UK readers, Blue Peter is a famous and much loved childrens' programme.)

To celebrate her birthday in September our friend, Margaret with her husband, Brian, took a coach trip to the Highlands. The pick-up and drop-off point was here in Ayr which gave us the opportunity to meet up and catch up on all our news. I made this mini album in which she could keep her favourite photos from the holiday.


I chose a colour combination of teals, creams and browns with just a touch of green, rust and amber to mirror the colours found in the lochs, hills, glens and forests they would have seen on their trip at that time of the year.


There's four pockets with reversible photo mats - space for eight photos altogether.

To make the album I raided my stash and used a 12"x12" sheet of each of the following - Fancy Pants True Papers collection, True-Blue; The ScrapCake's One Moment In time collection, If You Seize That; Papermania's Boutique Paper Pack. For the matting I chose a 12"x12" sheet of Stampin' Up cardstock, Early Espresso. The trim was punched with one of my two Martha Stewart edge punches - I forget its name. 


The embellishments consist of brown ribbon, Prima flowers, Papermania gem brads, a metal flower brad and   the amber gem flourish from cArt-Us Christmas.


I've made a number of these little albums now and they are always popular with the recipients because they can be slipped easily into a bag/purse, don't weigh a great deal and hold just enough photos to show to folks without boring them rigid :))

I'm off to the docs ... again ... you'd think after my experience on Friday that I deserved a break! This time with a rash all over - I'm itching and scratching, pretty much like a cat does when it's got fleas!!!

Take care and have a great day whatever you are doing. 

Happy crafting,

Saturday, 17 December 2011

More Tree Decorations

Afternoon Folks

Happy to report that the weather has improved here ... the wind has died down, no snow to be seen, and the birds have come out to play again. I believe there's been a snowfall down in the Borders - hope it isn't too bad for those of you down there.


Between working on all the other stuff that has to be done at this time of the year I've managed to pop into the craft space now and again and make more tree decorations for family and friends.  Aren't they pretty? I've had a great time raiding my stash for ribbons and embellishments - and I've plundered the snippet pile too. The backs are also decorated so using up more snippets - as long as a piece was big enough to punch with either the 3" circle or the 2.5" scalloped circle punch it was suitable to use. I've even decorated a couple of them with lace and more ribbon to give a more vintage look to them.


Here's a close-up of the one with buttons. I got the idea for this one when Jules, Always With a Heart, made a card featuring a garland made up of an awful lot of buttons - you can see her card here. Jules took her inspiration from a tag featured on the Hero Arts blog -  you can see it here - and advised us never to copy someone else's work because it took so long to place all those buttons, etc. to her satisfaction. Needless to say, I took no notice of her advice because I liked the effect she achieved. However, I did simplify things by using only buttons -  all from Dovecrafts, Back To Basics Christmas pack. I love the colour mix, very festive looking and perfect to give to my little great-granddaughter - it's her first Christmas this year. I plan to make her a different one each year so that eventually she should have quite a collection to decorate the tree each year.

And talking about Jules, more snippets have been used so I think they are perfect to submit for Jules' Crafty Snippet Challenge - Wks 48 & 49

According to the news this is the busiest day for retailers in the year - so I suspect many of you have been out doing the last of the Christmas shopping today. I hope you were successful and found everything you were looking for and now that it's all over you will be able to put your feet up and take some time out.

For me, that's getting settled down to watch the final of Strictly this evening. Although, I almost had no television at all this week. Sky TV went down midweek, and we were not the only ones so the engineers are working flat out to get round everyone - the earliest they could come to us is tomorrow, Sunday - too late!!! Help! The EM to the rescue - of he went in search of an aerial for Freeview, set it up and, voila, this Cinderella will get to see the ball :))

Right, I'm off to continue with the present wrapping - typing up this post is simply my way of procrastinating :) I'm good at that - I've dusted the lounge furniture, cleaned the back door (the Boss leaves scuff marks scratching to get in), filled a bowl with potpourri, dust mopped the lounge floor, and so on. Yes, definitely and expert and putting off jobs I'm not keen on :(

Maybe I should make a cup of tea first before I get stuck in again :))

Have a wonderful weekend everyone and happy crafting (if you can find the time),

Saturday, 22 October 2011

Christmas Alphabet - F for Fairies

Hi Everyone,

Another cold and windy day to start this weekend. Fortunately, I don't have to go anywhere today so staying safe and cosy in the craft space. Trying to get as much done as possible today because we are off out to visit friends in Kirkcudbrightshire tomorrow.


And today's card is all about the Christmas fairy ... well there are two of them here. As this card is clearly only suitable for a very girly girl I thought it would be nice to put a charm on it that could be kept ... even if the card does get tossed after Christmas :)

It doesn't show up well in the photograph but perhaps you can just about see that I've been paper piecing again ... this time I made the fairy's dress from DP from the same paper pack as used on the card. She's also blinged and sparkled as surely befits a Christmas fairy.


There's three different papers gone into the making of the background, two character ones trimmed to create the borders, top and bottom, and the dotty one as the base.


I had fun with the ribbon, pleating it down onto the very tacky red tape and finishing it off with two bows, a pink tipped hellebore and turquoise cherry blossom ... OTT girliness!

Inside

Back
The inside and back are decorated with some of the leftover trimmings ... can't let them go to waste :)
 
Materials used:
  • Cardstock: Ready-made 5.5" square cream card base; scraps of Docrafts Papermania textured card in deep pink and light turquoise for matting; smooth white card, 3"x2.25", for stamped image
  • DP: Docrafts Papermania Festive Frolics 6x6 paper pad
  • Stamped Image: Christmas Fairy from set free with Let's Get Crafting, Issue 26; Memento Tuxedo Black ink pad; Promarkers - Blush, Ivory, Vanilla, Sandstone, Tea Green, Blender; Crystal & Yellow Stickles; White Opal Liquid Pearls; corner punch
  • Embellishments: The Ribbon Girl Fairy charm; Wild Orchid Crafts flowers; Dovecraft printed Christmas ribbon (pink); Charlotte Ribbon by Anna Griffin (turquoise)
I'm not really much into pink but, as some of the papers had pink in them, I just went with the flow ... it's a bit too sugar almonds perhaps, and definitely not traditional Christmas colours ... but, much to my surprise, I think this colour combo works quite well. 
 
Right, off to tackle the next letter in the alphabet ... hope to be back soon :)
 

Saturday, 11 December 2010

T for Christmas Tree + A Baby Girl Card

Happy Saturday everyone,

And a warm welcome to my new followers, Stamponme, Alex, Jean, Angie and Crazycoops. Hopefully, you will enjoy popping in now and again to see what I've been up to.

Today I've got the next in the Alphabet series - T for Christmas Tree - and a card to welcome a baby girl into our neighbourhood.


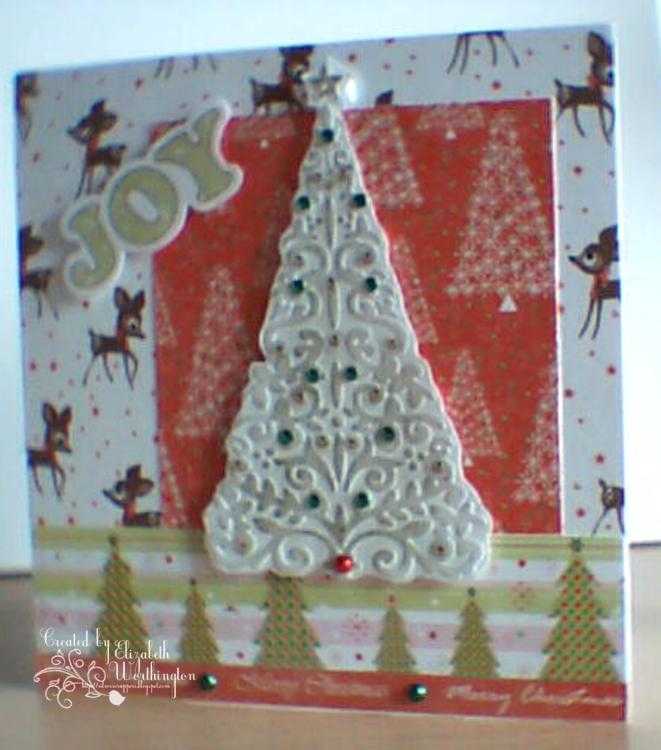
Materials used: 3 design papers from Papermania's Festive Frolics pack; embossing folder of Christmas tree; white card; Perfect Pearls in Forever Green; die cut, sentiment and border from Papermania's Henbury Lane Poinsettia A4 pack; flat-backed pearls in green, gold and red.


I used an embossing folder that came free with a Creativity magazine. I embossed on to smooth white card, dabbed a Versamark pad over the top, then brushed the Perfect Pearls over that, sprayed it with hairspray to set and embellished with the pearls.

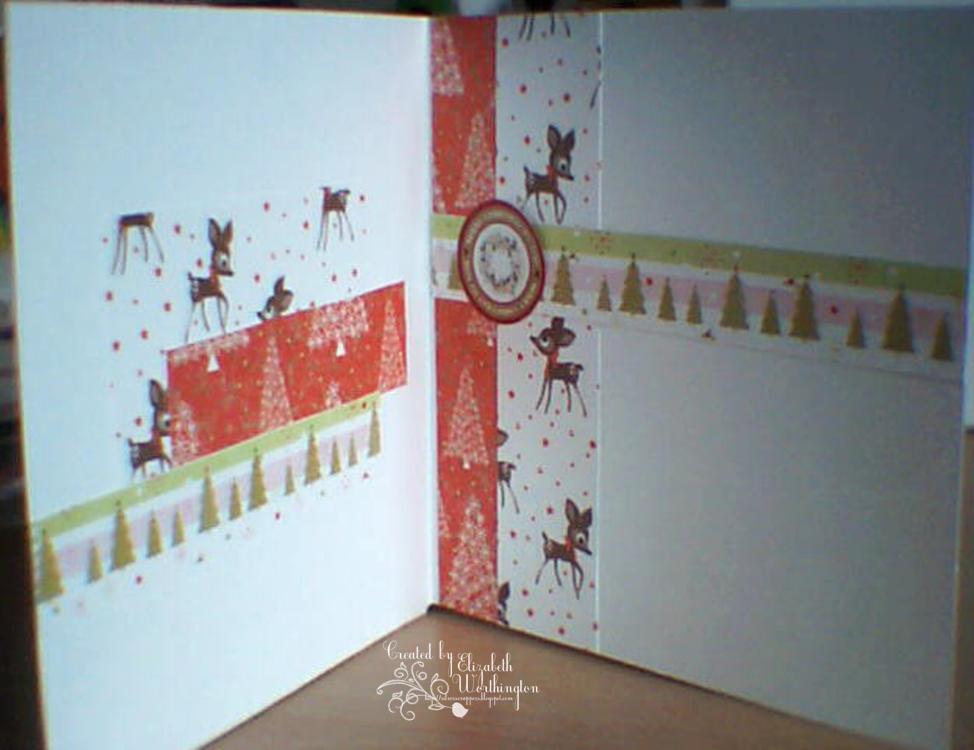
I mixed and matched the papers and finished off the topper with the border and the JOY sentiment. Inside and back got the Elizabeth treatment too.


The second card was a quick make for a neighbour's baby daughter who decided she couldn't wait for the ambulance and was born at home. 


Materials used: Pink Petticoat digi stamp 'Baby Buggy'; 'Congratulations' from SWALK Series 1; design paper from Papermania Summer Bloom pack; Magnolia lace trim; ribbon, and a corner rounder.


Love the Pink Petticoat digi stamps and this baby buggy is so cute with the little head just peeking out. It is also very quick and easy to colour which is a bonus when time is short. The checks and polka dots go together really well and I decided that this time, just for a change, I would round most of the corners.

I've had the ribbon for sometime - bought on impulse with the thought that it would come in useful some day!


I found an appropriate verse in the Judith Wibberley book - how did I ever do without it?


So there you are, two quite different cards which I really enjoyed making.

I don't know about you but I'm beginning to feel quite pressured now that Christmas is only 2 weeks away. I seem to have given myself a real task making cards for all the family. I did want to make some personal gifts too but time seems to be running away from me now. Note to self:  make  a  plan to spread it out over the 52 weeks and not cram it all into a few short months.

Ah well, onwards and upwards - a few more cards to make yet, but time for a cuppa first, I think.
Bye for now.

Wednesday, 8 December 2010

WOYWW - Week 79 + S for Snowkisses

Good afternoon fellow WOYWWers,

Well, it is still Wednesday but I'm running really late today. I don't think there will ever be any chance of me getting to be 'numero uno' on Julia's list. If you are wondering what this is all about, Julia is the organiser of What's on Your Workdesk Wednesday, an international desk hop you will find access to on her blog, Stamping Ground.


So here's what my desk looked like first thing this morning - just as it was last night when I called it a day. Yes, no little brownies came in during the night to work their magic and clear up.  There's some silver snowflake trim that I thought about using but decided against so really should be put away. Scattered around is the detritus that accumulates around me while I'm working. The bunch of stamps are there because I have plans to use them and the embellishment box is full of assorted Christmassy stuff - I'm keeping it separate from all the other embellishments just to save wasting time looking. Mostly, what's on the desk is the card I was working on, off and on, yesterday so you can see the topper sort of set out ready to stick down. Under the scissors is the card base and the insert ready to stick inside.

Here's the finished card.


The image is another Mo Manning digi , Kai in the Snow - love it - coloured with Promarkers as usual. When I saw the 'Snowflake Kisses' sentiment on Sentiments 4 You I immediately thought it would be great with this image.


I made the background by stamping a mix of snowflake stamps with Versamark and then brushed Forever Blue Perfect Pearls all over - another first for me. I altered the 'Snowflake' digi image from black to pink before printing out. There's not much more to it really, a square doily, some die cuts - snowflake, fir tree, snowman and a buckle all cut out of blue pearlescent paper - and some really pretty blue iridescent ribbon from my stash. The image and the die cuts got the glitter treatment.

I decided to make the card tent shaped like this:


Because I didn't use a design paper for this card I decided to print out a vellum insert using one of the Bearly Mine Design papers. I used the digital punch to cut out a square to write in and added some text saying 'Let it Snow'.

Oddly, although this card is intended for a baby girl, there's a lot of blue in it. I think too much pink just would not have looked so good.

A short weather report - still old snow lying and ice here which is affecting the M77 badly and stopping mail from getting through although DH is able to drive down to the supermarket. Which is just as well as we were getting very low on tea and I only function on tea : )

Off to get my next cuppa,

Elizabeth