Saturday 30 June 2012

Rudolph Day Challenge Cards

Hi Everyone,

I've just been watching a lone corbie - raven in English - tucking into the fat balls the EM has put out for the birds ... quite a rare sight in our garden and I'm wondering if it's a youngster whose just found a easy food source!

It's raining and the evening sun is shining ... at the same time! Everything in the garden is lush and there is definitely no need for the watering-can :)

If you read yesterday's post you will know that I boobed when making a card for Sandra's Rudolph Day June Challenge. I didn't read her post first, assumed one card would suffice and, of course, I was wrong :( The requirement this month is to make SIX cards!

After seeing the ONE card I did make, Sandra suggested that, if I still felt inclined to enter, I make another FIVE simpler cards ... simple cards, Moi! ... a challenge, but I've risen to it :)


Actually, I made SIX ... well, why not?

Kraft and white ... any time I spot this colour combination on a blog I always stop to admire! So I decided this time that I'd make a few cards using this combo.

There's not much to the cards ... a base of the kraft cardstock, stamped with polka dots ... another favourite ... and embossed with white powder.

The topper is made by stamping and embossing the greeting on to the kraft card then punching it out with my recently acquired Stampin' Up oval punch. It is then matted on to a white scalloped oval ... also a SU punch but I've had this one a long time now. The topper is adhered with tiny dimensional foam squares.

The final touch is the white satin ribbon tied, raided from my stash so it isn't all the same ribbon, around the top of the tent-shaped cards.

Voila! SIX very handy little cards to add to my Christmas Card drawer.

Materials used: SU Crumb Cake cardstock - I think this may have been renamed now; Neenah Solar smooth white card; VersaMark ink; Seafoam White embossing powder; SU Dot,Dot,Dot stamp & Seasonal Greetings stamp from Anita's Magical Christmas set; SU oval-shaped punches; narrow white satin ribbon.

Unfortunately, my feet are giving me gyp at the moment so I'm not getting around much and spending an inordinate amount of (wasted) time with my feet up ... sounds rather grand but it is only temporary, as soon as I'm able I'll be up and about again and perhaps get a bit more crafting done. 

In the meantime, I'm catching up on my reading, just finished a gripping whodunnit set in the Cotswolds, not all that far from where we holidayed, and watching a bit more TV than usual ... tonight I'm planning to watch Forrest Gump ... again :)

I hope you are all well and looking forward to the summer ... here in Scotland school's out already ... here's hoping the weather cheers up a bit so the kids can get out to play!

Right. Off to get these perishing feet up again.

Crafty hugs to you all,


Friday 29 June 2012

Shabby Chic Christmas Card

Hi Everyone,

Spurred on by wanting to join in this month's Rudolph Day over at Sandra's I finally got down to some crafting.


I didn't really have much of a plan before I started on this card - just Christmas and shabby chic with some distress ink somewhere. However, I did use the red gardenia as my starting point.  Originally intended for another project, I'd edged the petals with silver embossing powder ... well, it seemed a good idea at the time but then it just didn't work ... so in the end decided it wasn't suitable ... happens to me all the time :)

Anyway, I really wanted to make use of it so searched through the paper stacks and found what I was looking for - red and gold polka dots. This and the coordinating paper suggested a Kraft card base and I found the gold card used for the mat in the snippet drawer.

After that the design came together pretty quickly ... except that tying the bow in the seam binding was a nightmare, no matter what I did, it refused to sit pretty.


Materials used:
Kraft notecard for baseGold cardstock for matting
DPs from the Memory Box Spiceberry 6x6 collection
Stamps - the edging stamp (stamped in Memento Rich Cocoa) comes from a Buttons, Stitches and Zips set - I've forgotten who produced this set - and the snowflake and greeting are from a Basic Grey Value set - no name but there is this identification code - sta-2323 on the packaging
Barely seen but nevertheless there is a bauble die-cut under the gardenia - it was white but it's been inked with TH DI in Pumice Stone - currently my go-to colour of choice - and Fired Brick 
The gardenia, tiny roses and ivy leaves are from Wild Orchid Crafts
Everything else, lace trim, ribbon, pearls, gems, black beading trim all from stash


I started off by saying I wanted to make a card for Sandra's Rudolph Day Challenge ... well, I didn't check the requirements and have just been completely thrown ... she wants 6 of the same - SIX ... that'll teach me to check first!

Never mind, next month I'll do better :)

Fortunately, I can still submit it to the following:

Hazel's Crafty Hazelnut's Christmas Challenge 78 - let's get inky - the ink is not immediately visible but I assure you it is there - I have the inky fingers to prove it :)

and

Pixie's Crafty Snippets Challenge - 26 - just the gold cardstock used for matting is a snippet Di, but it is still one bit less to store in the snippet drawer :)

And that, as they say, it that! It's late and I'm desperately in need of some shut-eye so I'm off to bed just as soon as I've linked with the two challenges.

However, before I do, I just wanted to say that I've heard about the storms down in the southern parts of England and I do hope those of you who live in that region have escaped the worst of the damage that seems to have been done. What a disaster this summer is turning out to be!

Crafty hugs to you all,


Thursday 28 June 2012

Queen for the Day Birthday Card

Morning All,

I hope this finds you all well and perhaps enjoying rather better weather than we are ... here in Ayr it's what is becoming the norm, wet and miserable :(

I'm trying to make this a quick post today ... now that's a challenge ... my to-do list is a mile long so I have to get a wriggle on :)

I have the birthday card made for my granddaughter, Shari-Ann.


As usual, for Shari, I went pretty, lacy, sparkly and girly. Current favourite colours are pink, of course, and lemon, and the DP from Fancy Pants Beach Babe Collection (free with Cardmaking and Papercraft Magazine some time ago) was ideal for that.


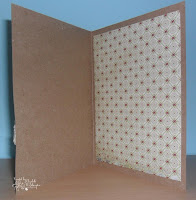
The inside shows the sheet used without embellishments.

The topper is made by layering a doily over a scalloped circle of pale blue card, then a punched circle of spotted DP and finally the scalloped punched circle of white card, stamped and coloured.

The stamp set used is another magazine freebie - Cool Britannia designed by Louise Allen. I used the Queen for the Day and the banner stamps, all coloured with ProMarkers - shades used, Buttercup, Duck Egg, Rose Pink.

The deep pink base is cut from some 12"x12" cardstock I've had forever - it has a lovely texture which might just see in the photo of the inside.

The butterflies were stamped from some lemon cardstock and the spotted DP and then glued together. Once the glue had set the wings were shaped upwards.

Difficult to see but there is yellow Stickles on the backs of the butterflies and also on areas of the Queen for the Day topper.

A bit of two-tone organza ribbon that matches perfectly and a matted greeting (another magazine freebie) completes the card.


We had a lovely birthday tea with the family to celebrate this ninth birthday ... I probably say this every year but I can't believe it's nine years since she was born, it seems like just yesterday! Of course the camera came out and here's a lovely photo of the lovely birthday girl with her equally lovely older (and tall) brother, Alun.


Okay, now it's back to that to-do list!

In the meantime, I'll leave you with some crafty hugs,


Wednesday 27 June 2012

WOYWW 160 - Holiday Crafting ... a few cards I made

Hello Everyone,

As I write this post it's late Tuesday evening and whilst the day started of lovely ... sun shining, temperature good ... it changed completely by mid afternoon, the rain came down and it's decidedly dull and miserable now ... boohoo :(

Happily, tomorrow is Wednesday and that means it's WOYWW day, that's the acronym for What's On Your Workdesk Wednesday ... the day a goodly number of us reveal all, well, all that's on our desk ... anything else might frighten the horses :)  Don't already participate but would like to join in? Just click the WOYWW icon (in the left sidebar) and you'll be transported to The Stamping Ground, the admirable Julia Dunnit's blog, she's the genius who dreamt up this massive weekly snoopathon.

Now I know that Julia likes us to keep our posts brief but I hope she will forgive me if I go on a bit this week - I've such a lot to show and tell :)

Having been on my travels around England for the last two weeks, I've had to forego the pleasure of peering and peeking around your desks. However, I didn't miss out on all the fun, not entirely, because Jan (Lunch Lady Jan) kindly arranged that we meet up for lunch last Wednesday and to my delight Julia, herself, and Di of Pixie's Crafty Workshop and Sunday Snippet fame were there too.

Me, Jan, Julia and Di
Everyone came bearing gifts, a desk tidy for each of us from Jan, essential goodies for any crafter from Julia and,  Di brought along her delicious Raspberry Tiramisu for dessert- click here for the recipe - I know I shouldn't have but it was truly mouthwatering and raspberries are my favourite fruit :) 

 
After lunch, Jan's husband, Gordon, took the EM off to look at steam engines - his idea of bliss! While we went off to Shopkeeper Gal's emporium ... needless to say I did not leave empty-handed.  She's moving to bigger and better premises soon - see Julia's post here for the full info -  so I'm sending good wishes for a smooth and trouble-free move. Here's a couple of photos of what just had to come home with me :)


The other side of those 12x12 papers
Quite a pile! I'll be scrapping and crafting for months with this lot!!!

All-in-all it was a fantastic day and I had the best of times getting to know these lovely ladies even better ... I wouldn't have missed meeting them for the world. 

I did take a stocked tote away with me thinking that if the weather was too bad I could maybe find a wee bit of time to craft. However, the weather was kinder to us than anticipated and we were out and about a lot so crafting time was minimal but I did manage to make a few cards.

It was difficult deciding what crafting supplies to take ... there are so many items I think I can't live without!!!

I generally resist collections but thinking it would make things easier I bought a designer collection ... Dawn Bibby's Classical Bloom. I quite liked the look of it when I saw it on TV and visualised myself dashing off a huge number of cards ... they'd be great to donate to charities, etc. So what did I do? I made FOUR ...  here they are.


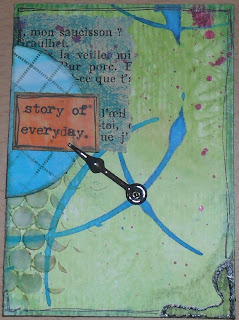
Finally, I returned to a pile of mail and in it was this super ATC made by France to celebrate WOYWW's third anniversary - lovely :)


A mammoth post this week - I promise I will keep it brief next week :)

I hope you are all well and perhaps even enjoying better weather than we are experiencing currently ... it would be nice to get out into the garden now and then ... never mind, there's always the tennis to watch :)

I will, as usual, do my level best to visit you all ... however, I have a lot of visiting to do this week - taking souvenirs to the family ... and it's my beloved granddaughter's ninth birthday tomorrow too ... nine, I can hardly believe it!

Happy Crafting to you all and have a lovely WOYWW,


Sunday 24 June 2012

Home From the Holiday ...

Hi Everyone,

I'm back ... did you miss me? I certainly missed you ... although I did have the most wonderful time :)


And just to show you how much I missed you all here's a sweet souvenir photo ... meringues of many colours from Betty's of Harrogate ... absolutely yummy!

The weather wasn't bad all the time, the sun came out to play long enough for us to have some really gorgeous days out along the way.

It was a holiday peppered with highlights and I have the photos to prove it ... I took about 300 and the EM has a good few on his camera too ... once I've sorted through them I'll blog a few - I'll try not to bore you rigid though :)

However, I must just tell you about one of those highlights today ... the lunch meeting in Wiltshire with fellow bloggers and WOYWWers arranged by Lunch Lady Jan, our terrific hostess (ably assisted by her husband, Gordon and her son, G3). Julia, Head WOYWWer, was there with Di of Pixie's Crafty Workshop - pop over to Di's blog to read what she has to say about it and even see a photo of the four of us altogether. We had a lovely afternoon, ate good food, conversation flowed, we laughed a lot and totally forgot the time ... and the EM thoroughly enjoyed meeting Gordon too - I promise to blog a bit more about the meeting on Wednesday's WOYWW post.

We arrived home just after lunch time and since then the bags, cases and craft tote have been unpacked, the washing machine has been loaded, the mail sifted for junk and genuine mail read, voice-mail listened too, and over 400 emails trawled through ... phew!

Most importantly, The Boss has been collected from the cat hotel ... boy, did she scold us for leaving her so long!?!? We indulged her with a dish of tuna before she stalked around the house and garden ... checking for trespassers, no doubt ... now she's curled up on her blanket sound asleep, all's well with her world once again :)

And so is mine ... it's nice to go away but it's even nicer to come home!

As I failed to find even one cyber-cafe while on my travels, and my mobile network was a miserable failure much of the time, I'm scheduling some time tomorrow to do a bit of blog-hopping in the hope of catching up with what you have all been up to while I've been away.

In the meantime, I hope you are all well and have had an enjoyable weekend ... I'll gloss over the floods, the banking debacle and the football ... the EM watched the game tonight - enough said! 

Goodnight All,


Saturday 9 June 2012

Still No Project ... but here's a smiling cat instead

Hi Everyone,

Still nothing to show project wise ... just too busy prepping for the holiday.

The Boss was at the vet again yesterday and she still has an infection in her ear ... it's taking a bit longer to clear than anticipated. Even if it was possible that the folks who are going to be caring for her while we are away would be happy to administer the drops in her ear, she would most definitely not!?!? So the vet decided to give her an antibiotic injection and she sulked all day. Here is how she is on better days:


Yes, that's her smiling for the camera ...


... and laughing :)


... and just taking in the sun.

Sorry it is so short and sweet today but I have a ton of stuff to do in what is now a very short time.

We do have the house sitter sorted out,  the next door neighbour has been told about the strange car that will be parked in our drive for a while, and the dentist has been notified of our absence ... we don't want to return to find we've missed an appointment! The stuff you have to think of just to go away for a couple of weeks!?!?

I can't close without mentioning the flooding in Wales. My heart goes out to all who have been affected.

Wishing you all a lovely weekend.

Happy Crafting,


Thursday 7 June 2012

No project today - but some photos of Arihanna at 6 months

Good Evening Everyone,

No project today because I've been out visiting my wee great-niece, Arihanna, before I go off on holiday ... we just had to see her before we go away :)


And she is growing fast now ... she is a tiny six months old and still wearing clothes intended for age 3 months. You can just about spot one of her two teeth ... she loves showing them off when asked :) Her mum, Louise, tells me that she loves the taste of toothpaste!


Her favourite toy is her toes ... and happily showed her great-aunt just how it's done. Don't you wish you could still do that :))

Another reason for going out today was to visit Tesco supermarket to test out the photo printing machine there.

Ordinarily, I would print out any photos I want for scrapping from my Epsom printer but the EM suggested that I might find it quicker, easier and even more cost effective if I took my SD Card to the supermarket and had them developed there.

To test out his theory I copied over 60 images from the computer to my camera, and I mixed it up a bit with some shots taken using this camera, some with my old camera, some scanned photos (a couple black & white) and some that I had cropped. I chose to print all of them out at 6"x4"

The printing machine did an excellent job in a fraction of the time it would have taken me - the print quality is very good although some of the older and scanned originals were not perfect - can't expect the machine to be able to do anything about that :) The cost wasn't too bad either - £20 for 67 photos - the extra 7 were those taken of Arihanna today ... that is approximately 30p per print. Apparently, if there had been 100 or more photographs the cost per print would have been half that at 15p - an incredible saving.

On the whole, I'm very pleased with the test and, though it pains to me to write this, the EM is right :))

Now all I have to do is get scrapping!

The EM has just brewed so I'm off to have a cuppa, then I might just do a bit of crafting :)

I hope you are all well and that, despite the horrible rain - oh yes, we are getting it here too now - you have had a good day.

Happy crafting,


Wednesday 6 June 2012

WOYWW Week 157 - ATC for Week 156 Revealed

Good Morning WOYWWers, Friends and Followers,

What a week last week was ... what with Julia celebrating three years of WOYWW and the Queen celebrating 60 years on the throne!

Apologies to those of you I didn't manage to visit. Although I failed miserably to get around all 181 WOYWWers I did rather better than my usual. And if it hadn't been for Mr Google preventing access to quite a number of blogs, because of a possibility that they had been infected with some malware through connection with shabbyblogs.com, I would have visited many more.

Not to mention that my PC has been acting up - refusing to switch on over the last few days but today behaving impeccably!

And then there has been the Jubilee celebrations ... got to admit I've spent far too much time on the sofa watching the pageant one day and the concert yesterday ... but it was worth it just to see Madness on the roof of Buckingham Palace ... loved the way the facade became a huge screen :)

But here we are, all the jubilations are over ... thank goodness for Wednesdays, otherwise we'd all be feeling quite deflated :) Anyone still not familiar with WOYWW, this is the day we reveal to all and sundry what is on our workdesk. Julia of Stamping Ground fame kindly arranges this weekly desk fest ... do join in, it's fun :)

And so with no more ado, here's what's on mine this week.


I've just begun to make a card so all the supplies are out. I've decided on the paper and card, the stamps, ink pad and ProMarkers colours I'll be using, and there are a few possible embellishments out too, flowers, ribbon, buttons, gems and pearls. Not much else to talk about ... I see one of my rulers can be seen at the back of the photo and there's a pair of scissors out too - essential tools of the trade.

So on to the ATC I made to celebrate the third anniversary of WOYWW. Hopefully it will have reached Belgium by now and France will have received it.


As you can see, I went all red, white and blue - well, it just seemed right to celebrate both great British institutions in the one ATC :))

I was lucky enough to be paired up with April and received this beautiful ATC from her.


April tells me she is something of a novice at making ATCs but I see no evidence of that here. The colours are beautiful and have been blended perfectly and the dandelion stamp is one of my favourites.

I also was very lucky to receive an ATC from Alipeeps too.


Gorgeous - again, beautifully blended colours and I love the sentiment.

Both ladies have an ATC on the way to them and thank you to you both, April and Ali - your ATCs will be treasured always and I'm now busily thinking what I can do to best display them in the craft space.

Julia would like us to brief in our postings but this week that would have been nearly impossible with so much to show. I hope she will forgive me.

I won't be here next week, or the week after that either. We are off on our holidays, yippee!

I'm more than a little excited about it as, not only are we going to be visiting Harrogate, Chesterfield and Wiltshire, but there's plans afoot for me to meet up with one or two WOYWWers whilst on my travels. I'm saying no more at present but I promise to report back and, of course, I'll be taking my trusty camera to record the places and the people I see. However, because I'm going to be on the move a lot, I doubt I'll be posting much, if at all ... that is, unless I stumble on a cyber cafe on my travels.

In the meantime, I'll be doing my level best to visit as many of you as possible this week, in between packing my cases and the craft tote ... you didn't think I could manage two whole weeks without crafting, did you? ... and I wish you all well and hope that you find lots of crafting time too.

Happy Crafting,


Tuesday 5 June 2012

A Cat's Pause - a snippet card

Hello Everyone

Two posts in one day ... and all because the weather has changed ... we have gone from sunny and bright to dull and rainy in a few short hours. I'm consoling myself with the thought that the garden needed it :)

In the meantime, I've been happily crafting away in the warmth of the craft space and here's what I been up to.

When I first saw this stamp I had to have it because the image is so much like,The Boss. She has a tortoiseshell coat too, so I just had to have it.

That was some time last year. Sadly, it wasn't until I was putting together the At Home in the Garden layout, as seen in my earlier post today, that this seriously neglected stamp was inked up for the first time. And, of course, I liked it so much I just had to ink it up again, 'toot sweet', and this time I thought I'd give it a central spot on a card.


I've used up quite a few snippets in the course of putting this card together. The image is stamped on to the last remnants of some HOTP 8"x8"cardstock bought years ago - only one whole sheet left from a 24 sheet pack ... great vintage colours so I'm going to miss it when it's all done. I used a spellbinders label die for the topper, inked around the edge with some Tim Holtz DI, then traced around the outer edge to make the mat for it.


The card base is a lovely printed cardstock from Kanban - you can see it better in this shot of the back of the card.

Materials used:
  • Kanban Background Card, Carnival - Gold
  • Walking Cat stamp by Craftfairy.co.uk - stamped with Memento Rich Cocoa, edges distressed with Tim Holtz Brushed Corduroy DI
  • Hot Of The Press Textured Cardstock for Retro cut with Spellbinders Labels Twenty-Five
  • Smooth white cardstock embossed with Darice Scrolls Background folder
  • Cosmo Cricket Earth Love Borders - flower border
  • The flower was one from Wild Orchid Crafts enclosed with an order as a thank you ... really nice of them to do that :) I just added some yellow Stickles and an orange Candi 
  • Craftworks Candi - Oranges and Lemons
  • Ribbon and lace left overs from stash 
Using leftovers and snippets means that I'll be submitting this card into Di's Crafty Snippets Challenge #23 - though I'm not sure how she feels about a cat let loose in the playground.

And with Di's encouragement I'm entering the card for the St Luke's Charity Cards Challenge too - the theme this month is to feature furry animals.

After all the excitement of the weekend Jubilee celebrations, I've had enough lounging about in front of the television. The enjoyment of the endless news coverage has worn a tad thin and I'm only too happy to escape to my craft room - and to the peace of BBC radio 4.

Wishing you all well and hopefully I'll see some of you tomorrow on WOYWW.

Happy Crafting,


At Home In The Garden - Scrapping My Stash

Hi Everyone,

It's been a fantastic holiday weekend and I know for many it's not quite over yet ... some are still enjoying the extended Jubilee holiday ... but unfortunately a lot of you had to return to work. It was nice while it lasted :)

Wasn't the Jubilee concert terrific ... loved when Madness were on the roof - the special effects were fabulous :)

When I haven't been glued to the television watching all the celebrations, I've been busy putting together my DT project for the month of June, Homecoming being the theme, for the Scrap Our Stash Challenge.


Sitting here at the computer, I'm very fortunate in that I can enjoy a bird's eye view of what is going on in our back garden/yard. Only a few days ago I spotted the EM chatting to The Boss as she teetered on top of the gate post, undecided which way to go, and just had to take a few snaps for scrapping.

I used the May sketch from Sarah's Cards as my starting point for this simple layout. It's intended for a 12"x12" layout but I've adapted it to fit an A4 layout instead. A4 is a format I've mostly avoided up to now but I think there are several good reasons to create A4 layouts.

One, there are a lot of manufacturers out there that create the most beautiful cardstock and DPs in that size, e.g. KanBan, Hunkydory, etc., two, most of the paper packs offered as free gifts by magazines are in A4 format and, finally, three, A4 folders are not only much easier to find in shops and stores but they are also an inexpensive alternative to 12"x12 albums.

The papers used are a mix from two different magazine's freebie collections - the colours in each compliment the other perfectly. The cat stamp is one I have had tucked away for the best part of a year, never used! I feel chuffed to have finally inked it up :)

Materials used:

  • Dark Green textured cardstock from Papermania
  • Raspberry Road Designs Luxury Paper Collection - free with Cardmaking & Papercraft
  • Serif Spring Paper Collection - free with Scrapbook Magazine
  • Walking Cat stamp - Craftfairy.co.uk; Paw Print - Magenta (bought in 1996 in Boston, MA!)
  • Ink pads, Memento Rich Cocoa; Tim Holtz DI, Brushed Corduroy
  • Alphas a combination of Bo Bunny Combo Stickers, Gabrielle (pink) and Weekend Market (yellow) - from Funky Farm Scrapbook Barn 
  • Ribbon, buttons, twine, floral washi tape - all from stash
Short and sweet today ... after yesterday's mammoth tutorial post it has to be :) 

The weather here is as lovely as can be, sunny, dry and nowhere near as hot as it was recently. Makes sitting out in the garden very pleasant indeed. It's a shame that it isn't the same for the whole country - hopefully it will brighten up again for you all soon.

However, whatever the weather and wherever you are, I wish you well and hope you have a happy day.

Happy crafting,


Monday 4 June 2012

Mini Photo Album - Handy Hippo Monday

Hello Everyone ...

... and a Happy Handy Hippo Monday to you all!

And it's a holiday Monday for many of you too - here in the UK folks have been celebrating the Queen's Diamond Jubilee. I watched yesterday's Thames flotilla on television ... it was a fantastic site marred only by the rain ... such a shame that it didn't stay bright and dry for such a special event. I was glad to be watching in the comfort of my own home as most of the onlookers, and not a few of the participants, were absolutely drenched!

However, the weather looks better today, perfect for the picnic partying and the Jubilee concert at Buckingham palace later today ... again, I will be watching from the comfort of my sofa :)

Right, on to the project for today, a mini photo album. This is going to be a photo-heavy post from here on as there is a lot to show you.

A perfect gift at any time of the year, depending on the papers and embellishments used, this project is an easy made album containing 4 double-sided photo mats - room for 8 photos altogether.

Using one double-sided 12”x12” sheet of a beautiful floral design paper from the K & Company Flora and Fauna pack to create the base and a further sheet (there are two of each design in the pack) for the mats.


A second sheet of 12"x12" DP is used to make the 4 photo mats, two for inside and one for the front and back pockets.


The photo mats tuck neatly inside the pockets.


A close up of the back showing the decorated pocket and mat.


As usual materials used for this project are available from Handy Hippo and if you would like to make the same project then simply click on the magic button below and it will take you directly to a shopping cart that contains everything you would need to make it. Once there, you can simply and easily remove any of the items that you already have in your craft stash. 


It’s easy to add to your basket any other purchase that you might like and if something is temporarily out of stock you can request to be emailed once it is back in stock.


How the album was made:

Step 1.

Using a scoring board score and taking the first 12"x12" sheet of paper, score at 6" both horizontally and vertically so the the paper can be folded into 6" squares. Next, draw a faint pencil line from the two bottom corners into the central point - now cut out the triangular section formed by inside the pencil lines and retain this - you will need it later. I hope you can see the markings - this was the best shot I could get at the time :(

Step 2.


Here you can see the the base of the card with the triangular section cut out. The cut-out section is then cut in half to form the base of the pockets for front and back of the album.

Step 3.


This photo illustrates how the inside pockets are formed - fold back the triangular shapes left when the inside section is removed. However, before these sections are stuck down the ribbon that will form the closure has to be fixed in place as in the next step.

Step 4.


Use the ultra-sticky tape (the red one) to fix the lengths of ribbon in place. About 12" lengths of ribbon should do it - this will be trimmed down once the bow has been tied. Once the ribbon is in place you can then adhere the pocket pieces in place down the side edges - again using the ultra-sticky tape for maximum adhesion.

Note: the inside edges are not stuck down - they form the pockets ... I know, you're probably thinking that's obvious, but it's an easy mistake to make, believe me!

Step 5.


You can go as fancy or plain as you like when decorating the albums. Here the pocket edges are edged with white cardstock decorated with a Martha Stewart edge punch and ribbon trim in a coordinating colour.

Step 6.


Do the same with the two pieces cut to form the pockets for front and back before adhering them in place, down the side and bottom edge only. All that remains is for you to decorate the front with a selection of flowers and embellishments.

Step 7.


This floral embellishment is made up using a variety of flowers from various sources.

At the base are flittered flower sprays that have been fussy-cut from one of the DPs to be found in the Flora and Fauna paper pack.

The central 'rose' was made by cutting out a circle of coordinating paper, spiral cut and then rolled to form the flower.

The remaining two flowers were made by layering up punched paper shapes, topped off with purchased paper flowers ... these were white to start with but with lots of heat embossing, using a mix of several embossing powders, white, pink, irridescent and clear, the colour has been transformed. (You'll find the EPs used by clicking the Handy Hippo button.)

Even the letter J that has been used to personalise the album is cut from one of the sheets in the Flora and Fauna pack – it has also been embossed using the same mixing technique. Gems and pearls provide the finishing touch.

I did say it was going to be a photo heavy post, but I thought it would be better to illustrate the process of making the album rather than try to explain it all in words. I hope I've succeeded in making it as clear as possible.

Finally, I haven't been around much over the weekend, not because I've been out enjoying the Jubilee jollies and neglecting the craft space, but because my PC has been acting up and proving difficult to simply start up after being closed down overnight. I'm very much afraid that it may need more than my pathetic attempts at troubleshooting ... I might just have to get my techie guru in to take a look at it ... there goes my new stash money for months to come, sigh :(

Anyway, instead of crafting and blogging as I would like, I've been hurriedly ensuring that I've got all my photos and documents sorted out and backed up just in case something dire happens - I'd really hate to lose any of it.

So if my appearance are spasmodic over the next wee while, you will know the reason why :)

After this heavy post, I think a tea break is called for and happily it's lunchtime anyway.

Best wishes to you all, I hope you have a lovely day and happy crafting,