Showing posts with label NBUS. Show all posts

Monday, 30 January 2017

Snippet Monday

Hello Everyone

I have this little card to share with you today. It was made for this month's UKPC Swap for which we were challenged to create a card/ATC/ tag/etc., from some new or as yet unused stash. This card is what I came up with and, as I was able to use several snippets as well, I'm submitting it to Di's snippet challenge on Pixie's Snippets Playground.
As it is late and to keep this post short I won't go through all the steps for making the card. Instead, here's a list of the materials used:

  • White card base measuring 4"x 5¾"
  • Satin finish card, mauve & scraps of white for die-cutting
  • Embossing folder - Crafts-Too Trellis
  • Dies - Spellbinders Designer Series, Renaissance Jubilee & Die'sire Edge'ables Mini Victoriana
  • Stamp from Summer in the Garden - free with a magazine
  • Ink pad - Memento Tuxedo Black
  • ProMarkers - Bluebell, Lavender, Lilac, Marsh Green, Pear Green &  Ice Grey1
  • Embellishments - Crystal Stickles and purple satin ribbon

This is a photo of the new/unused stash I used.

Having used so much Never Before Used Schtuff, a term coined by the fabulous Darnell,  I'm submitting the card to her NBUS Challenge #10 . Darnell is celebrating her 5-year blog birthaversary - now that's worth celebrating!

I'm feeling pretty chuffed with myself as this is my second post today. I think I need to go lie down in a darkened room now.

Thanks to everyone who visits and if you leave a comment I consider that a bonus.

Take care everyone,

Sunday, 9 August 2015

Sunday Snippets

Evening Everyone,

After a very quiet day, doing not much all, I finally got my mojo on and dipped into the catch-all box again to create two cards. Surprisingly yellow cards too ... I think it's well documented on this blog that yellow is my least favourite colour. I also managed to use up a bunch of snippets for Pixie's Snippets Playground - Week 189. It's always a bonus when the snippet mountain is reduced, even by a little.
For this card I've used one of the NBUS twinchie stamps that came free with an issue of Craft Stamper magazine, coloured using watercolours. The background is a scrap from a Gelli plate print - created some time last year! A scrap of orange card, some very old ribbon, butterflies decorated with Stickles and amber dew drops make up the rest of the materials on this card.  Apart from the colouring of the stamp this was a super quick card to make.
This card was even quicker to make. The topper is recycled from a bought card I received last year. I like the image so much that I trimmed it down and saved it. The yellow textured card, left over from a project, was the perfect match. Some orange cardstock, amber dew drops and a polka dot flower were all that was needed to complete the card.

And that is that for this evening. I'm off to have a cuppa with the EM and watch David Walliums get up to some jolly japes as an amateur detective.

I hope you are all having a very enjoyable evening.

Friday, 27 March 2015

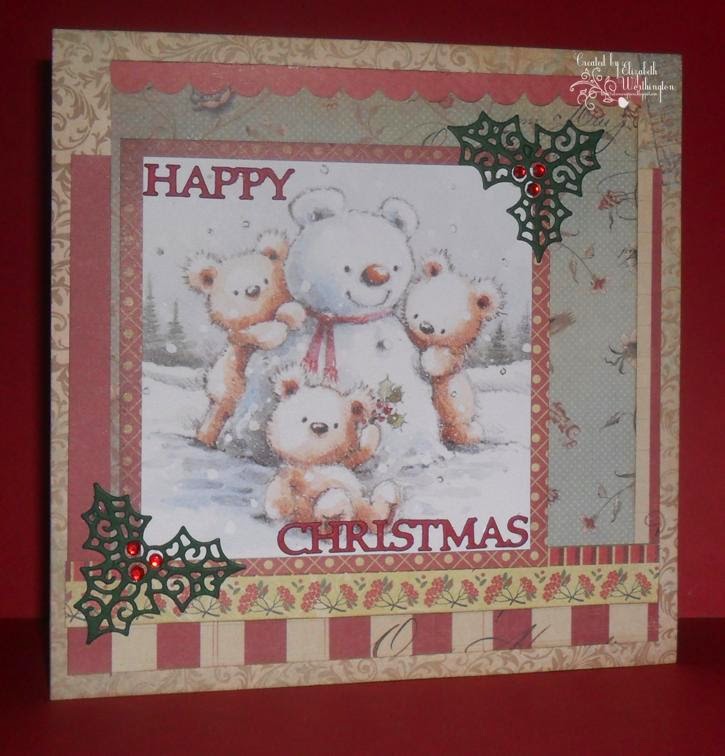
March Rudolph Day Card

Hello there, thanks for popping in! It's a late card for ScrappyMo's March Rudolph Day I have to share today.
As I've been finding it difficult getting back into the crafting groove of late I thought I'd give myself a challenge that might just flick the switch again! That was to try the layering technique I normally use on photos when creating a scrap page on the LOTV Cute Square for this card. I think it worked quite well. All the papers are from Kaisercraft Christmas Collections 6" paper pad ... it's an old one so I'm not sure it's still available. I cut the scalloped edge and berry printed strip from one of the sheets of patterned paper to add a bit of decoration to the layout.  The greeting and the holly embellishments were die-cut from snippets of red and green cardstock using Tattered Lace mini dies.


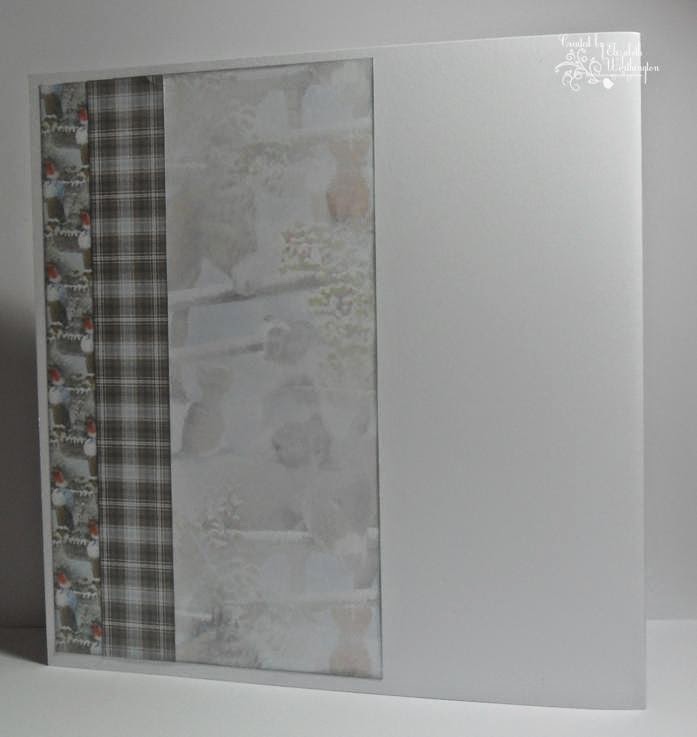
Off-cuts of the patterned paper were used to decorate the inside and back.

Having used a couple of teeny tiny snippets of red and green cardstock I'm submitting this to Pixie's Snippets Playground - Week 169 too.

And as it was the first outing for those Tattered Lace Mini Dies I'm submitting it to Darnell's NBUS challenge #4

I think this little exercise might have revived my crafting groove ... just :)

Wishing you all a lovely day.

Happy Crafting,

Sunday, 26 October 2014

Two Rudolph Day cards for Sunday Snippets

Afternoon Folks

Hope you are having a wonderful weekend.

I don't know about you but I feel well rested after the extra hour in bed this morning! Not only that, but it's filthy weather here, perfect for staying in and doing a spot of crafting :)

I have two cards for both Pixie's Snippets Playground - Week 148 and the PENULTIMATE Rudolph Day Challenge over at Sarn's Stamping for Pleasure.
- For this first card I've used one of my watercolour pieces. Not that you can see much of it now that I've stamped trees in black Archival on it and then faux 'Frantaged' it with white and crystal embossing powders and blue glitter. It was matted on to white card found in the snippet mountain.
- The shiny blue card used for all the matting has been in the NBUS (Never Been Used Stuff) pile for simply ages. Much as I liked it, I could never find a project to use it on until now! 
- The greeting, from a Sheena Douglas Christmas stamp plate, is stamped on to a snippet of white card and the folder used for the white embossed layer is from the Twinkle set from Cuttlebug.
- I've used another piece of card from the NBUS pile to make the base of this card ... Darnell will be proud of me :) It's a lovely printed and embossed sheet from Kanban - I think it came with a stamp kit but can't be sure because it's been in my stash for so long. 
- The winter scene topper is the recycled top of a card received last year which has been trimmed, edges embossed with silver powder and glitter added here and there - hard to see in the photo but it's definitely there. 
- The matting layer was constructed from two sheets of DP from a Kaisercraft 6" Christmas paper pad that came free with a copy of Simply Cards & Papercraft. Again the edges have been edged with silver embossing powder.
- The poinsettias were cut out of yet another sheet or two of DP from the paper pad using a Spellbinders die set, edged with Black Soot distress ink and pinned together with black gem brads from stash.

I'm feeling quite virtuous now ... I've managed to use up snippets, goodies from the NBUS pile, and those ancient brads - I'm sure they have been in my stash for at least four years - while making of these cards. I wish, though, that I could say it's made a lot of difference to the amount of stuff here in the craft room but I'm afraid not ... must try harder!

I'm also going to submit the cards to Hazel's Christmas Extra Challenge for October where anything goes as long as it's Christmas themed.

Right, that's me done for now. It's been a busy few days for me. There was the craft show in Glasgow in Thursday, fun but exhausting, which meant Friday was a complete write-off ... it takes me 24 hours to recover! Then The Boss took ill late Friday afternoon which meant a visit to the vet on Saturday morning. Because she is so old I was fearing the worst so was mightily relieved to find what ailed her was treatable :)

After all that, I'm being taken out for tea today so must get a wriggle on or I'll be late.

Happy crafting,

Tuesday, 21 October 2014

Watercolour Poppy Tag

Afternoon Everyone,

I hope this finds you well and enjoying your day.

Here, the hatches are battened down and we are hunkering in just waiting out the storm. I can see the old sycamore from the window and it is being battered about really fiercely. So much so, I fear it may be just facing one gale too many this time. I hope it survives, not least because if it comes down it will be right on top of the EM's new shed!

So it's going to be a day of crafting for me or, more correctly, a day of tidying up in the craft room. There's so many odds and ends lying about, bits of my experiments, snippets of card, photos to be scanned, etc., etc., that I've decided it all has to be dealt with before I do anything else. Which brings me to this tag:
The grey textured base has been sitting in my 'to be used' box on my desk for, well, I can't remember how long. It could be as long as two years! It was part of an embossing experiment, you might have gathered by now that I like to experiment, a technique using leaves and flowers sandwiched in cardstock and put through the Cuttlebug. This resulted in some interesting textures, most of which I did put to good use at the time but I could never think what to do with this piece. I can't even remember what type of leaf this was but the card was white scrap which, after embossing, was inked with a grey ink pad, possibly Memento London Fog. 

Determined to use it in this tidy up and to try out my newest find, Poppy Field from Rubber Necker, a stamp designed to be used specifically with watercolours, or inks that can behave like watercolours, e.g. Ranger's distress inks. I've never tried this type of stamp out before so it was quite a revelation! The stamp comes in two parts, the first is for the flower part and the second is for the outline and stem part. There's a great set of YouTube demos on how to use these stamps - check out the Poppy Field one here. I used a selection of lavenders and mauves to colour the flowers, Ranger's Milled Lavender and Memento Elderberry, Lulu Lavender and Grape Jelly, and Archival Black for the stem section.
Once dry, I painted in some gold detail with Aquatint paint - better seen here in this photo. The sentiment, from the same stamp set, was stamped in Archival Black too. The butterfly was created using a snippet trimmed from the background, inked over with the Milled Lavender and Elderberry inks and inking the stamp, an IndigoBlu freebie, with the gold paint ... it's a thick paint so works quite well for stamping. Once dry it was cut out and attached to the tag which was then adhered to a base of mauve card - yet another scrap from the snippet mountain. Eyelash fibres and purple gems provided the finishing touch.

I'm submitting the tag to the following challenges:

Butterfly Challenge #16 - Butterfly with a Tag.

Pixie's Snippets Playground - Week 147 - anything as long as there's a snippet used somewhere


That's me done here for now but the storm is still raging outside. Despite that, the EM has ventured out, though only to the local shop in search of a newspaper. One of the plastic pails we use in the garden has blown into the long border, coming to rest under that sycamore tree ... it will stay there until I think it's safe to go out again!

I hope conditions are rather better where you are, but if not do take care and stay safe.
 
Whatever, I wish you, as usual, much Happy Crafting,

Friday, 3 October 2014

Rocking Santa ... for CHNC 196 - make it colourful

Evening Everyone,

I've been playing with the Cuttlebug and circle dies and this wee rocker card is the result which, as it is colourful, I'm hurrying to submit to Hazel's Christmas Challenge.
Here's how it was made:

1. I began by cutting a circle out of red Papermania Textured Cardstock, using the largest die in the X-Cut Nesting Circles set.

2. I laid the die on to the polka dot patterned paper, old stash from BoBunny Silver & Gold Collection, and traced round the inside with a pencil then cut out the circle. 

3. The edges of the circle of patterned paper was inked with Rangers distress ink, Festive Berries, not that it shows up very clearly in the photo. 

4. The polka dot paper was adhered to the circle of red card which was then folded in half to form the rocker shape. A bone folder was used to create a crisp fold.

5. To add a bit of sparkle I edged the polka dot paper with Platinum Stickles.

6. Finally, I got to use some NBUS (never before used stuff), the Santa and greeting toppers, from Docrafts Noel Chipboard Shapes, which were carefully adhered to the rocker card base to maintain the balance ... too much weight either side would ruin the rocking motion - if you see what I mean. 

The rocker shape card made a nice change from all the basic shapes I usually make. And the bonus is that it's a shape small children will enjoy playing with ... I may make a few more. There's plenty more of those chipboard shapes tucked away in my crafty staff ... they really need to be used up. For some inexplicable reason I rarely find a use for them.

I'm also entering this for Hazel's other challenge - CHNC Challenge Extra for October 2014 - where anything goes as long as it's Christmas.

Many thanks for taking the time to look ... any comments are most welcome. Wishing you all a very happy weekend.

Happy Crafting,

Thursday, 25 September 2014

So Many Books - A Snippet Make

Good Morning Everyone,

I can't believe it is so long since I last posted and I've missed Annie's Friday Smiles, Di's Sunday Snippets, Cathy's In A Vase on Monday and Julia's WOYWW to name just a few of the my favourite things ... sounds like a cue for a song :)

I feel such a slacker but there's good reason for my absence, nothing craft related but other stuff that has kept me away from the craft room and, as it's in the same room, from my computer too.  I hope to be able to tell you about some of what has been going on over the next few days but in the meantime I have this bookmark made from snippets to show you.
After making the EM's birthday card there was a couple of strips of the Brusho background left over. Really too good to toss but not enough to make another card. After much deliberation, rumination and cogitation, not to mention a fair bit of head scratching, I got the idea to make a bookmark. It's quite big, measuring 8½" x 3½" (21x8.5cm) - the perfect size for using with larger books and hard to lose too. I'm forever losing bookmarks, often creating a house-wide search!!!

To make the bookmark, I tore round the strip of background paper and adhered it to the black base. The stamp is an old one (NBUS) from Stamptivity ... so old I believe the company is no longer around. It was stamped with Memento Tuxedo Black and coloured with a mix of Sharpies and ProMarkers then cut out and adhered to a black mat. The sentiment, found on Pinterest, is made up from letters from Jillibean Soup Alphabeans, Newberg Navy. The silk tassel is from a pack of mixed colours that I was sure I found at Joanna Sheen's but, if I did, they don't seem to be available there now.

So there it is, my Sunday Snippets ... just a few days late ... for Pixie's Snippets Playground - Week 143.

Now, at the top of this post I hinted that I might be able to share some of the stuff that has been occupying - to the exclusion of crafting - of late. Well, here's just one of the them.
Yes, the EM's birthday present finally arrived yesterday ... yippee! We had begun to give up hope. Only a week late and after Argos had changed the delivery date several times. Flat pack of course, so we spent a fair few hours putting it together and positioning it just right in the Snooker Room ... was the spare room, now his happy place! Our grandson's are going to be delighted too ... I can foresee more frequent visits from them :)

Many thanks for popping in. I hope you are well and having a good week.

Until next time, happy crafting,

Tuesday, 16 September 2014

Hot Shot Card

Evening Everyone,

Today has been a day of celebration for us. It's my husband, the EM's 76th birthday and our friend Margaret's 73rd ... the perfect reason for us all to get together for a day of fun, laughter and food :) Indeed, we enjoyed ourselves so much the day just flew by.

So card #3 is the one I made for himself ... and here it is.
It's really quite a simple design relying on lots of matting and layering in silver, black, green and red cardstock. The pool themed toppers are from a Kanban sheet, Happy Hour. I did take the opportunity to have a play with some Brusho crystals to create the background ... I think I might have overcooked it a little but I love the way the powders react to water. I only sprinkled two of the colours, Brilliant Red and Leaf Green, on to wet watercolour paper and was stunned at the colourful result ... especially as they made the perfect background for the toppers. Can't wait now to experiment with more colours :)
The inside - there was one small topper left to decorate the inside.

You might have guessed from the card that the EM likes a game of pool. And as our grandsons also like a game I decided that a pool table would make the perfect birthday gift. As we were going to be out all day today, I arranged for it to be delivered tomorrow but a message from the supplier tells me that it won't be delivered until 23rd now ... so disappointing :( Finger's crossed it will be safely delivered next week as arranged.

I'm submitting this card to Pixie's Snippets Playground - Week 142 ... the snippets are green and red cardstock used in the matting.

I hope you had as good a day as we have had.  Thanks for dropping by.

Happy Crafting 

Sunday, 14 September 2014

Peony Bouquet Card - Old Fashioned Decoupage for Sunday Snippets

Evening All,

Oh dear, the weekend's nearly over ... I hope it's been wonderful for you. I'm back with card #2 of the three I need to make before the 16th. This time it's one with floral decoupage that was cut from this Anna Griffin paper.
I've had 4 sheets of this gorgeous paper for several years. There's no name on the back for this design and even after a lengthy online search I'm none the wiser. When paper's that old, it's not even on Ms Griffin's website, it is time to put it to good use.
So, I fussy cut out the central bouquet on one sheet, and then cut out individual flower heads on another to create the decoupage. 

To make the background I started with a pre-made die-cut card base (from Creative Crafting World) and using an ink duster, I inked the front with Tim Holtz Stormy Sky distress ink. I then stamped randomly with two stamps, a small leaf stamp (from the much used IndigoBlu stamp set that came free with a magazine) in Brushed Corduroy, and Hero Arts 'Flowers Are Poetry' stamp in Stormy Sky. The next step was to stencil butterflies in Weathered Wood over the front using a Prima Elementals stencil. That done I then decided to edge the card with gilding flakes, Sunshine from Crafty Notions. This was prompted by watching Sarah, on UStream, edging the front of the lovely 80th Birthday Wishes Book she made yesterday - it reminded me that I had gilding flakes tucked away and not being used!
Once all that was done, I attached the decoupaged spray to the front. The greeting was made by stamping the greeting with Crafty Notions craft adhesive on to a snippet of white card and finishing with gilding flakes. The matting for the greeting is another snippet of white card and covered with gilding flakes. Both the greeting and the matting were created using Stampin' Up punches. 
 
I'm submitting this card to Pixie's Snippets Playground - Week 142 ... it's only two teeny-weeny snippets but every little bit helps keep the snippet mountain in check :)

Only one more card to do, the most important one of the three ... it's the EM's birthday ... and I still haven't a clue what I'm going to make yet! 

Better go and think about it :)

Wishing you a lovely evening whatever you are doing.

Happy Crafting,

Friday, 1 August 2014

First Photoshoot Together Scrap Page

Afternoon Everyone

It's Friday - the start of the weekend - and I keep thinking it's Saturday! Being retired means that there really isn't a great deal of difference between weekdays and the weekends - whatever, I still don't have to get up and go out to work. I do have to work of course ... that's the dreaded 'h....work' ... but, happily, there's just no rush like there used to be back in the day. And I still haven't got used to such freedom!!!

Anyway, I've digressed long enough. I hope you are all well and enjoying your day. I have a scrap page to share today.
Ever since my granddaughter, Jenny, passed on this lovely photo of my two great-grandchildren, Rhian and Brodie, I've been wanting to make a scrap layout with it. The way big sister Rhian cares for her baby brother, making sure he doesn't fall forward, just shines out of it and I think they look adorable ... but then I'm totally biased :)

I matted the photo on to several layers of patterned paper that include varying shades of pink, green, grey and sand. Once that was done it was all adhered to a sheet of coordinating patterned paper, which has been trimmed down (by about ¼" all round) and matted on to a base of plain green cardstock. I then added the title and three clusters of embellishments. Here's a few close-ups that make them easier to see:


The clusters are made up with die-cut labels, stickers, punched shapes, Baker's twine, wood veneer shapes, enamel dots and Washi tape. I'll put a list of materials used at the end of this post.

So another page for the album, loads of stash used up and even a NBUS or two ... now on to the next page. So many to do and so little time :)

Thanks to all who take the time to look at my projects, read this blog, and leave comments when you can - I know you all lead busy lives so appreciate any time taken. I think too that many of you must be on holiday, either vacationing or staycationing,  ... whichever, I hope you are having a whale of a time, even if it is just that you are taking time out to rest and relax and not do much of anything :)

Happy Crafting,

Materials: green cardstock for base; Patterned papers: Scrapcake One Moment In Time collection - In My Hands, Papermania Vintage Notes (green doily & hearts), K&Company Cuddly Friends Chenille (pink dot, Paper Adventures Holly Pond Hill (leafy lattice); green chevron & grey lace patterned Washi tapes; Alphas: Papermania Alphamania Curly Font (pink); Punches: Stampin' Up 1" circle and Woodware tiny heart; Memento London fog ink pad; Enamel Dots: Teresa Collins Summer Stories, My Mind's Eye Winter Wonderland; wood veneer shapes; Vintage Notes Sentiments; green/white baker's twine.

Thursday, 31 July 2014

Rudolph Day

Hi Everyone,

Because I missed Rudolph Day over at Sarn's (Stamping For Pleasure) last month, I was determined to make a couple of cards for this one. Otherwise I'll be desperately making cards right up to the last posting day and that would never do!!

That said, I have two different cards ... it's a character flaw I'm sure, but I really struggle to make two cards exactly the same!  However, what both cards do have in common is that the toppers and patterned paper sheets were printed from a CD, and oldie but a goodie, Magical Christmas Moments from cupcakecrafting.co.uk.
First, a Christmas bauble with a cute snowy scene on it. To the topper and patterned paper from the CD I've added some pale blue cardstock for matting and layering, some blue card candy and a bow made from a snippet of blue seam binding. I used a Tonic punch to create the diamond patterned strip of card that I've used to decorate the panel.
I'm not sure what you call this type of layering, it's not decoupage but the technique is similar, as is the effect.

The inside and back of the card are decorated using a sheet of matching insert paper from the CD plus some strips of paper left over from decorating the front.


The second card has a wee kitten sheltering from the snow - cute or what :) I've added red textured card (Papermania) and a NBUS, white snowflake embossed paper that I've been hoarding for a very long time - so long I've forgotten where it came from - more card candy, red this time, and gingham ribbon. Sparkle has been added using Stickles Xmas Red on the holly (behind the kitten) and the sentiment, and Crystal on the coloured beads hanging on the cord.


The inside was decorated with the insert paper to match the design and a smaller image, and for the back I've used a strip of the plaid pattern with the smallest image from the topper sheet.

As well as submitting this to Sarn's Rudolph Day Challenge - July 2014 I'm submitting it to the following challenges:
CHNC challenge 187: Cute - donkeys, kittens, and a puppy dog - couldn't be cuter.
Craftyhazelnut's Patterned Paper July challenge
Pixie's Snippets Playground - Week 135 - that snippet of blue seam binding must surely count.

The little kitten sheltering from the snow looks just as I imagine Bonnie looked when she was tiny ... as she was about 9 years old when we adopted her I'll never know for certain. 

That's me done for this evening. I'll just publish and link this post to the challenges and then I'm off to bed. 

Goodnight dear friends, sleep tight and don't let the bed bugs bite - want to know the origin and meaning of this phrase - check this link out here :)

Edited Note: I forgot to mention that the greetings on both cards are also digital, from Pink Petticoat's Traditional Christmas Greetings printed onto white lightweight card - my printer can't cope with anything heavier.

Tuesday, 22 July 2014

A Family Wedding Scrap Page plus a card made with the leftovers

Morning Everyone,

It's another bright and sunny day here in my little corner of the world and I hope your getting it as good wherever you are.

Today I have the scrap page that appeared briefly on my desk a couple of weeks ago - WOYWW 266. I finally finished thinking about it and got down to putting it altogether.
Sigh ... it wasn't the easiest page to photograph. It's difficult to take a shot of those over-sized photos without producing glare. Anyway, I hope you can see it well enough. The patterned paper kit is from Hot of The Press (Botanical Etchings). The kit came free with Scrapbooking Magazine so it is A4 (8.27" x 11.69"/21.0 x 29.7cm) and  I wanted to create a 12"x12" page so I chose a sheet of American Craft smooth cardstock as the base.
Once I decided what the layout was going to be, I stamped the area of base card that was still going to be on show with a word stamp - from another freebie, this time a Special Occasion stamp set from Cardmaking and Papercraft - with VersaMark to create a watermark effect. The labels were computer generated, printed on to white card, and punched out with a Stampin' Up label punch which I think is called It's Only Words. To make the flowers I punched out circles in two sizes, scrunched them up and then inked with Rangers Tim Holtz Old Paper distress ink. Probably the easiest flowers to make, ever!
The butterflies and other labels used to embellish the page all came from the HOTP paper kit.

I did have difficulty dating the photograph but my aunt Betty and Uncle Bryson being in the centre gave me a clue and after a bit of detective work I was able to establish that the year was 1975 ... they were attending the marriage of their son, my cousin, Graham, to Bernadette ... for some forgotten reason I could not attend. Shame really ... my family always threw such fabulous wedding parties :)

Now it's not a hard and fast rule I've imposed on myself but I am trying to use up any bits left after making a page ... if only to keep the snippet mountain manageable!
So here's the card I made with some of the leftovers and snippets for Pixie's Snippets Playground - Di will like it I'm sure ... it's pink :)

I used pink cardstock to make a tent shaped base and then just cut the paper into suitable sized chunks, edged with faux stitching in black, to create the layered look. The topper and greeting label are both from the kit too - there was a couple of sheets of these included. All the embellishments - ivory spider web, satin ribbon in two shades of pink, gem swirls - were all found in the stash mountain!


Almost a card for nothing!

Time for lunch here so I'm off to make a sandwich and have a much needed cuppa.

Thanks for visiting and leaving your comments - otherwise I might believe I'm just talking to myself ... something I find myself doing more and more as I get older anyway :)

Happy Crafting,
Materials used: 
Scrap Page - American Crafts smooth cardstock, turquoise; Crafters Companion Printable Light Card - whit for labels; Hot Of The Press Botanical Etchings patterned paper kit; Ranger's Tim Holtz Old Paper distress ink; VersaMark; Special Occasions stamp as mentioned; Alphabets - American Crafts Amy Tangerine Thickers white foam letters and Jillibean Soup Whipped White Alphabeans; Punches - Stampin' Up's It's Only Word label punch and 1¼" and 1" circle punches; Woodware tiny daisy and small leaf; adhesive pearls from stash.
Card - Pink cardstock from Papermill Direct; leftover paper, topper and greetings from the HOTP kit used on scrap page; fine black pen for faux stitching; ivory spider web trim, satin ribbon in two shades of pink; K& Company Swirl Adhesives from stash.