Saturday, 30 October 2010

Woodland walk and surprise haul

Today has been one of those lovely autumnal days so we've been out walking in the Woodland Walks which are very near our home. The trees are looking gorgeous at the moment so just had to let you all see them.


And here is my haul:


Yes, leaves. Looks like the nature table at school - that's taking me back a good number of years!

So what's this collection for you may be wondering. Well, I was watching a programme on Create and Craft TV (Once Upon a Stamp) yesterday and was fascinated to see just what the demonstrators (Robert and Gordon) were putting through the Cuttlebug to emboss paper and card.  Lace, wire mesh, seaweed, etc., and leaves they had picked up on their way into the studio! That was it, I was on a mission to collect leaves and they do make a really pretty picture - love the red ones (no surprise there as red is my favourite colour). 

Also in this haul are some tiny cones which I think will look a treat on cards. They could be sprayed and glittered up or left just as they are.

That's it I'm off to play for a wee while before Strictly comes on.

Bye for now
Elizabeth


Friday, 29 October 2010

A Salutary Lesson ... what happens when you are in too much of a hurry

You know how sometimes you can make a mistake and you think that you've ruined a project but when you look again somehow it's not so bad. Well, that's just what has happened to me. I have started on the poppy tag I promised myself, it's not finished yet but I thought you might like to see what I did wrong!

Here's how my tags all start out:


I use this template to cut out another tag just the same (I save all the cardboard that comes into our house). This one is cut from the back of one of those stiffened envelopes for posting photographs. I then cover them with design paper, in this case it's some of my Cosmic Shimmer/cling film coloured card, like this.


I then stamped the front with black ink, firstly, with a stamp that has writing, hearts and splodges on it - no idea what it is called - and secondly, with an ivy border pattern (bought in 1996 in Boston when I was a student and not used until now!), then finally I over stamped randomly all over with a small leaf stamp from a Basic Grey set (no name to this one either). So far so good. I then stamped the back of the tag, this time with just the ivy border and the leaf. The next part of the stamping was to over stamp with the leaf, again randomly, with Versamark and emboss with silver and here's where I made my mistake. I just went ahead stamping on the back of the tag not realising that the ink would still be a tad damp.

It should have looked like this:


Close up it looks like this:


As you can see it worked out perfectly on the front side. Here's what happened on the back:


As you can see some of the embossing powder adhered to the black leaves - not a lot, but enough! My heart sunk and then I decided to go ahead with the heat gun and see what it looked like after that - if it was too bad I would have to start again. But I actually liked the effect and have now decided to go with it - happy mistake! 


Still got more to do to the tag so will show you the project when it's completed.

Incidentally, because the light is just awful today - so bad I have had to have the lamp on all day - and because the resident photographer (moi) is really quite crummy at it, the background colour is looking very pink and purple when in fact it is much redder with just a hint of purple.

Bye for now
Elizabeth

Thursday, 28 October 2010

Purple and Black Christmas Card

Apologies for the quality of these photos - terrible camera work responsible. I just can't get the card in the right light to show the colour at its best but here it is - Tilda, a vision in purple!


The design is based (roughly) a sketch by Bev Rochester (All the Things I Love) on her All My Sketches site - you can see it here.

Tilda is coloured with Promarkers and I can remember that I used Lilac, Lavender and Plum for her clothes and parcel and Ice Grey 1 and 2 for her boots. For her skin I used Ivory, Blush and Soft Peach and her hair is a mix of Caramel and Ivory if I remember correctly (I know I should make a note at the time but I always forget).

Because the photo isn't so good the flowers & leaves don't look so much purple and silver (which they are) but blue/silver!!! I spritzed them with Cosmic Shimmer and dipped in Versamark then Silver embossing powder (see my previous post for more details). Large size roses and black crystals from Wild Orchid Crafts and the leaves and small roses, black satin ribbon and purple organza ribbon from my local haberdashery store. I've wrapped the stems cut from the small roses, they come in bunches, round the end of a paintbrush to get a corkscrew affect. I did the same with the end of the branch of crystals. Another idea from the wonderfully talented Bev Rochester. I'm not sure you can see these very well in the photo.


You can just see the card I spritzed with Cosmic Shimmer and gave the cling film treatment to. I love this technique - it gives a different look each time and the mica settles into the most gorgeous random patterns. I was pleased at how the design paper looks too so I've added it in panels to the back  and inside - no sentiment inside yet as I haven't decided who is going to be the recipient.


I really wasn't sure about this colour combo but now that the card is completed I am really quite chuffed with it and I won't be so unwilling to try unusual combinations in the future.

I'm entering it in the following challenges:

Magnolia Stamp Lovers - Purple and Black
Teresa of Crafting All Day on Docrafts  - Sketch Challenge

That's almost it for now but I thought you might like to see the boss who has just popped in for one of her periodical checks.


This is Bonnie who is my constant companion. She was a rescued cat that we adopted just over two years ago now. She was thought to be nine years old at the time making her eleven or thereabouts. Apart from a couple of missing teeth she is in great shape and quite a character - at times a real naughty tortie!

Bye for now
Elizabeth

Wednesday, 27 October 2010

WOYWW - Wednesday 73

Another What's on Your Workdesk? Wednesday and peering out of my window it  isn't promising - looks like another dismal day in paradise! For anyone who has just popped in and wonders what this is about please take a peek at Julia's blog, Stamping Ground and all will be revealed. I'd like to say a big thank you to everyone who visited my desk over the last week and left such lovely comments. I did manage to take a peek at all your blogs - at least the ones where the link wasn't broken - and lingered to look at your projects so if I didn't leave a comment I apologise - there are only so many hours in the day :(


Today my desk is a bit of a purple explosion. Yesterday I completed a card with a lilac and white theme which turned out not too bad so today the plan is to push my boundaries even further and make a purple and black card.  Behind Tilda - a vision in purple - is some white card I have coloured with Cosmic Shimmer (a mix of Purple Violet, Twilight Black and Rich Gold) using the cling film technique. I've used this technique a few times now and just love the effect although it does not show up very well in the photograph. Behind that is a black paper with all sorts of spots on it - kinda suggestive of snowballs - which  I thought would fit in very well with the theme. I sprayed the roses and leaves with Purple Violet and Twilight Black last night and they are dry ready to use this morning.

Just to the left and almost out of shot is my new Tim Holtz book, Distressables 2 The Journey, and beneath it is the latest edition of Scrapbook Magazine - both full of inspiration. At the back of the desk is the usual mess. You might just see Tilda lurking in one of the plastic containers - this time a vision in blue. As you can see, I really am trying to break out of my comfort zone with these non-traditional colours for Christmas. To the left of my Chicken box there are a couple of sentiments - these are embossing/stickling experiments that didn't quite work!

Well, that's the state of my workdesk today - I'm off to have some breakfast now - and will be back to finish the purple card later.

Bye for now
Elizabeth

Tuesday, 26 October 2010

Another Tilda card - lilac and white Christmas

I don't associate a lilac and white colour scheme with Christmas but apparently it's very fashionable so I thought I would have a go at making a card in those colours. Apologies in advance for the photo quality - the light is awful today! In fact it's been another dreary, rainy day here in Ayr.


I love this Tilda stamp and really enjoyed colouring her in with Promarkers. I used a technique for colouring her little dress that Laila demonstrates on a Lily of the Valley video and this is my first shot at colouring hair black - the most difficult colour to get right I think. I'm not very happy with her shoes but will keep practicing! The edge is distressed with violet ink and then I took my Versamarker pen round the edge and dusted with silver embossing powder. I did the same with the sentiment inside the card and embossed the star in the middle to give it a bit more sparkle.

For this card I just decorated the inside this time and not the back:


This photo does not do the design paper justice - it's a gorgeous Washi type paper, white and silver. I purchased the paper and the 10 mm ribbon to make the white/silver lurex bow from Ribbonbox - it is made up of organza ribbon which has two pull up threads in it to make a very pretty bow.

I will be entering this card into the following challenges:

Papertake Weekly Challenge - Sparkly and bright
A Spoonful of Sugar - Let's get punchy
Totally Gorjuss - Challenge #53 - Sparkle

Materials used:
  • Card stock: white base card, mauve pearlescent card
  • Design Paper: white/silver leaf design from Ribbonbox
  • Stamp - Magnolia Christmas Party Tilda - coloured with Promarkers; digi sentiment from Sentiments 4 You
  • Punch - Martha Stewart Round the Page
  • Other items used: Heat It Up silver embossing powder; Whispers ink pad in Rio Purple; Tim Holtz applicator; doily; ribbons: purple and white patterned organza ribbon from stash and the ribbon bow from Ribbonbox; pearl trim; silver and pearl bell ornament from Crafty Bitz; purple glittery brad; flat backed pearls; twigs with silver balls (part of my find from the local 'poundshop'); silver corner peel-offs.
Hopefully I've listed everything - I usually realise after I've posted that I've missed out something!

I'm still no expert at making these cards - they always seem to take me an age to design and choose the materials.  The quickest part for me is choosing the stamp and colouring it in. But, I really like the finished card and think the time spent well worthwhile.

Off to have my dinner and then to start another one and maybe it will feature some purple too.

Bye for now
Elizabeth


Sunday, 24 October 2010

Santa - another 4" x 4" card plus a few ramblings

I have a confession to make - I'm not making much progress with my 4" x 4" cards. I've been away from my workdesk over the weekend, visiting family and popping into my favourite craft shop, Rosebuds in Cumnock. Just to pick up a few essential items, you understand! Adhesive (ran out of my favourite) and a few more Promarkers, of course :)

I've discovered on the Lily of the Valley site demo videos on how to colour in with Promarkers and an article giving advice on which colours are the most useful, e.g. for skin, hair and fur - you can see them here. I found the videos really helpful and I printed out the colour charts so my purchase of Promarkers will be less random in future.

While I was in the shop I got to meet some other card makers who were busily producing Christmas cards for the forces out in Afghanistan. Well, not exactly for them but cards that they can send to their loved ones at Christmas. They don't have anywhere to buy cards to send home - no Clintons where our forces are stationed - so this is the only way they can get cards for their loved ones while they are stuck out there away from home. As an ex soldier myself (yes, think Private Benjamin and you'll get the picture) I think it's a brilliant idea and will be donating several of my cards to this cause. As far as I know it's a local project but should any of you be interested I would be happy to get more details.

And here, finally, is the latest in the 4" x 4 series I'm making - series sounds grand, doesn't it?


I followed the same formula - took the design paper, BoBunny 'Believe', round the back and decorated inside then trimmed with peel-offs as I did in the previous card. The 'Happy Christmas' is a red peel-off from Anita's.


It's in my favourite colour combo, red and green. I decorated the front with a big red bow (20mm organza ribbon), a gorgeous Santa embellishment trimmed with white pom-poms and glitter (GCS International) and finished it all off with more white pom-poms from my stash - these are leftovers from several crafting sessions I had with my two youngest grandchildren a couple of years ago, and before I started making cards, so I forget where I got them but I think it might have been Tesco's. 

The result is a cheery little card that a child or even a male recipient might like.

I did some stamp colouring last night whilst watching TV (we're addicted to Strictly Come Dancing) so will be using them in my card making today.

Bye for now
Elizabeth

Pinklilac's Blog Candy

Linda at Pinklilacs has something to celebrate - her husband has been ill with cancer and after enduring months of treatment the disease has stabilised! So to celebrate she is giving us 4 opportunities to win a blog candy.


The photo above is of the Christmas themed candy on offer but there are 3 others to look at so please check out Linda's blogspot and read all about her husband there.

I have another 4" x 4" card to post later so, in the words of Arnie, I will be back.

Bye for now
Elizabeth

Friday, 22 October 2010

A tiny card - 4" x 4" square

My husband recently presented me with the comprehensive Christmas card list for this year and I realised that I'd better get my skates on or I would have to - shock, horror - buy some cards!! Thinking about what to do about the situation I remembered that I had a pack of envelopes that measure 4.5" x 4.5" square and some 8" x 8" white card which is the basis for several really small cards, i.e. 4" x 4" - a bit of a challenge for me as I usually make much bigger cards with lots of detail, flowers, ribbons, and bling.

Well, here's my first attempt and you can see I have used the Sugar Nellie stamp that was on my desk on Wednesday.


Close up of Santa image
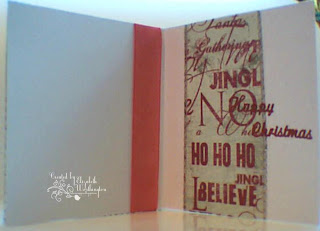
Although this card is tiny and so needed to be kept simple and not over embellished, I couldn't give up everything - I needed a cute stamp, lace and bling. I took the  paper round to the back as a finishing touch and also decorated the inside of the card.
Back of card showing paper and peel-off

Inside of card

Materials used:
  • Stamp: Sugar Nellie - Santa in Chimney coloured with Promarkers; Sentiment by Basic Grey - stamped in Versamark and embossed with Heat It Up embossing powder in silver. 
  • Design paper: Docraft A5 Paper Pack Penelope and Percy
  • Other: Santa's outfit edged with Fluffy Stuff and silver glitter, chimney edged with white glitter; paper lace from Siesta Craft Christmas collection and the box embellishment by GCS International, Gold Label Peel-off stickers  by Craft Creations; 3-D foam dimensionals.


I'm still learning to colour in with the Promarkers so the sack and the chimney gave me something to think about. It has helped that I've been watching some very clever demos on You Tube including the Lily of the Valley demos which are brilliant.
I'm pleased with the result - cute but not skimped. I'm off to make a few more now.
Bye for now,
Elizabeth

Wednesday, 20 October 2010

What's on Your Workdesk Wednesday - 72

Wednesday already - I don't know where the rest of the week has gone! So here's my desk this morning - I worked until the wee small hours so eventually I just abandoned the mess and went to bed.


You can see the graduation card for my daughter - I have to write my message in it yet so it's still there, waiting.  Last night I stamped out another Nellie Sugar, Santa in the Chimney, I tried it on silk art paper but couldn't get it right, so gave up and stamped on my usual card - that worked okay. I have choose some papers so I I have a selection out - as usual too much choice is making it even harder to select. The pack on the top is Indian paper - a present from a friend - and underneath is a pack of glittery paper from Ribbonbox - they are really pretty.

On my other desk - yes, I have two - I attempted my first watercolour image. The swatch card is an idea I got from watching Sharon Douglass on TV for keeping track of Aquamarkers and watercolour pencils. The stamp is another gift from a friend. Poppies are my favourite flower and as it is close to Remembrance Day I plan to make a tag. As no one I know now would appreciate a card for the occasion I am going to make a tag to hang here in my room.

For all you who think my room is tidy here is the real and awful truth:


And for those of you who are wondering what WOYWW is all about take a look at Julia's blog -  Stamping Ground - and join in the fun if you dare!

Bye for now
Elizabeth

Tuesday, 19 October 2010

Graduation Card

One of the projects that I've been working on over the last couple of days is this graduation card for my daughter, Juli - her graduation ceremony is next month :

She will be wearing a black gown with a hood trimmed in blue and white so I've used these colours in my design and kept the design simple - held back on the flowers this time but went to town on the silver embossing and couldn't leave out the bling altogether so added three sparkly stars because she is a star!
Materials used:
  • Card stock: black card for base, royal blue card for matting and white card - some of it is swiss dot card (I think this is by Bazzil) used for the lace trim and the inside label.
  • Paper: Graduation by Hot of the Press
  • Stamps: Grad Anya - a digital stamp from The Greeting Farm, Sentiment and Champagne Glass part of SWALK collection from Crafters Companion
  • Embellishments: blue satin ribbon, rhinestone stars


I've just acquired my first Martha Stewart punch - Punch Around The Page - so I just had to use it to make the lace trim for this card - can't get a new toy and not play with it:)

For inside the card I borrowed an idea from a really talented lady, Bev, who can be found on her blog All the Things I Love - I just love this woman's work!


I just hope my daughter likes her card as much as I enjoyed making it for her.

Bye for now
Elizabeth

Monday, 18 October 2010

Saturday at Ayr Beach

Today started of well enough when dh and I trotted down to the community centre to attend Brenda's Weekly Torture Session, aka Brenda's Mature Movers, but since then it has deteriorated to dreich (Scots for dreary), damp and dismal! Such a change from the weekend - Saturday, particularly, was gorgeous. So here to cheer me up are a few reminders of a perfectly lovely day:


I tried to get a good shot of the swans - they were swimming in single file on their way up to the river estuary where they normally live - but they were just too far out. In the background is the Isle of Arran.


This shot is towards the Heads of Ayr and was taken some time after the first because, as we were so near the town we had to pop into the craft shop, as you do! Once I had done my usual browse and purchase, some sticky tape and two stamp pads that I really, really needed, I just had to reward my dh for his patience:


Latte at the Savoy - in Ayr that is :)

Still working on a couple of projects which I may reveal later.

Bye for now
Elizabeth

Sunday, 17 October 2010

Sugar Nellie Xmas Card

At last I've made a card with one of my new Sugar Nellie stamps. The idea would be that it would be simple and quick and it would have been had I not messed up Mr Snowman's hat - never mind, I'll get it right next time.


I stamped the image onto plain white card stock and coloured with Promarkers.


The digital sentiment is from the Christmas Circles set from Sentiments 4 You


Of course I had to bling it up with Stickles and a star shaped peel-off in the centre of the sentiment.

Not much to show for a few days but I've been busy with other, as of yet, unfinished projects which I may reveal at a later date. And, yesterday was such a fine day that my DH and I played hooky and went to the beach! Well, when you live as close to the see as we do it's too much of a temptation.

Bye for now
Elizabeth
Thursday, 14 October 2010

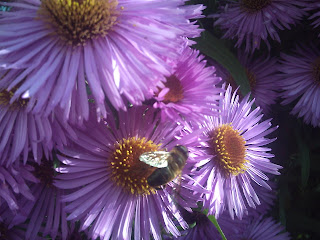
The Very Tall Aster

Brenda commented on the aster photograph and as I mentioned in my reply that this is a particularly tall specimen I thought perhaps you would all like to see just how tall it is:


And for those of you unfortunate enough not to live in bonnie Scotland here are some of our hills to feast your eyes on. This view was taken on Sunday at Carsphairn on the Galloway Tourist Trail:


Unfortunately, I haven't been crafting today - had other more pressing work to do - but hope to get something done this evening so this is short and sweet for now.

Bye
Elizabeth

Wednesday, 13 October 2010

It's a Cracker

As promised here's the completed cracker shaped card made for the Tilda challenge on Docrafts - it's Incy's  this week:


Materials used:

  • White card stock measuring 8" x 8" - fold in half and cut out to shape of cracker - I used the Crafters Companion embossing board as my template.
  • Patterned paper - 'Ho Ho Ho' from my stash, sorry I've forgotten make and where purchased!
  • Stamp - Christmas Tilda coloured in Promarkers
  • Embellishments - white scalloped diecut - put through the Cuttlebug and embossed with the Ice Crystals folder; Woodware's Fluffy Stuff; Papermania's silver glitter; Crystal Stickles; green organza ribbon (from my stash).
Close up of Tilda:


I edged Tilda's hat and all round the diecut with Fluffy Stuff, shook a little fairy dust over it - well silver glitter actually - and really like how it turned out.

Onto the next project - not decided what that is yet.

Bye for now
Elizabeth

WOYWW - Wednesday 71

Good morning to all,

I've not taken part in WOYWW before - the mess my worktop is usually in I hesitate to show it in public! But here it is:


As you can see I'm working on a cracker shaped card and I've chosen my Tilda stamp for this project. The box in the background is really an egg box, hence the chickens, but when it became redundant in the kitchen I bagged it for keeping bits and bobs that had no real storage place anywhere else. In the red tray is a piece of plastic mesh saved from a pack of plums - I thought it had possibilities but not too sure what yet! To the right of the egg box is a brightly coloured bucket which was a 'poundshop' find - I keep some scissors and my pliers in it.The stuff dangling over the desk are hung from the brackets that are holding up a shelf, just out of shot where I keep all my cardstock, patterned paper, boxes of embroidery floss, ribbons and lace, fibres, adhesives, and a folder for clear stamps, and so much more. Oh, you might just spot the nelliesugar stamps I bought recently - they are there until I have had a play with them:)

That's my desk today.

Season of mellow fruitfulness

I love this time of the year and can't resist going outside and snapping away. We had a trip to Kirkcudbrightshire to visit friends at the weekend and these photos are from their garden - just gorgeous:)


Right, I'm off to finish that cracker card - will show it later when done.

Bye for now
Elizabeth

Tuesday, 12 October 2010

A Tilda card in Pink & Gold

Here's the card I have just completed. I began it for a challenge, the theme of which was pink and gold. However, I didn't finish in time for that challenge so adapted it for the Just Magnolia challenge which is '2 x 2' - that is use only two of everything, e.g. papers, ribbons, flowers, etc.


Materials used:

Eastern Treasure Hand Made Craft Paper - these papers are made in India and are quite unusual. I've had a pack for a long time but did not find a use for them until now.  Some pieces are embroidered, some are like Washi but the papers I chose for this card are embossed with gold flowers and dots.

Versamark & Heat It Up Embossing Powder in Gold - after I cut the papers out I embossed all the edges with the gold powder after using the Versamark
Tilda image coloured with promarkers, decorated with Stickles - Yellow on the parcel and Fruit Punch for the trim on her dress - and then distressed with Pretty Colour stamp pad in pink and edged  in the same way as the papers.
Embellishments - The flowers are white cherry blossom from Wild Orchid Crafts, edged with pink Promarker, rubbed with Versamark on the petal edges then dipped them into the gold embossing powder; the two twigs with pink 'pearls' are 'poundshop' finds - they come in big branches which I cut down to size


I added two  E. Prima flat-backed gold pearls to the image and wrapped two organza ribbons together to make the bow - plain pink ribbon and a lovely gold organza ribbon with hearts on it.


All in all, I'm pleased with this card - it gave me the opportunity to use some of the Indian paper at last. I bought it when I started scrapping and found that I could not be sure that the composition was suitable for archiving so it's been lingering in my stash - unloved and unused - until now!

Now on to my next project which hopefully I won't take so long to complete.

Bye for now
Elizabeth