Friday 29 April 2011

Week 17 Christmas Card - Popcorn and Souffle

Good Evening All,


No prizes for guessing how I spent much of my time today - I just love a wedding : ) You don't have to be a Royalist to enjoy the spectacle. The bride was beautiful, her gown was stunning, the bridegroom was handsome in his uniform and the ceremony was perfect.

After it was all over I was back up to my craft room to make this week's Christmas Card! I know, from the sublime to the ridiculous :)

Crafty Hazel gave us a very hard task this week. She asked for a 'touch of Easter for Christmas'. Specifically: 'use either the colour yellow - little or a lot (you can use other colours as well, as long as yellow is visible) and/or an oval shape on your card.'

This really had me thinking and mainly what I thought was, 'I can't do this.' I almost considered skipping the challenge this week until I remembered Crafter's Companion's character, 'Souffle', Popcorn's little friend. So here's my interpretation of Hazel's challenge.


There's yellow - lots of it - and there's an oval. The image of Popcorn and Souffle is decoupaged - this fact doesn't show up well in the photos though.


Most of the materials came from a Crafter's Companion Make Christmas Cards pack. All I added was the tartan ribbon,, the white cardstock (to make an A5 size card) for the base and some gold card for layering.


The inside and back are decorated with leftover design paper - the edge of the lemon paper decorated with my one and only Martha Stewart punch - and some topper from the pack.


Inside

Back
Really a very quick and easy card to make.

I'm entering this card for the usual challenges:
  • Crafty Hazelnut's Christmas Challenge #17- A touch of Easter for Christmas
  • Snoflakes Christmas Card Challenge on Docrafts

Must hurry to get this submitted so I'll say happy crafting to you all.

Thursday 28 April 2011

Last Week's Christmas Card - Week 16 - Carol Singing

Evening All,


This should have been completed last week but the holiday kinda took my mind of it. So here it is at last. The theme for the week was singing/songs so I used one of my favourite digital images - Princess Singing Carols.


Coloured with ProMarkers - I'm sure I could colour her differently but somehow she suits pink ;)


I distressed both the snowflake and the image with Tim Holtz' Spun Sugar - my new favourite ink pad and used Camel's Hair (don't you just love that name) seam binding to embellish. The gorgeous papers are from one of my favourite digital suppliers, Bearly Mine Designs - love how they all co-ordinate so well, e.g. the music note paper has touches of pink which goes well with the pink in the snowflake paper.


The insert was created using just the pink paper and left it blank - I won't know until nearer Christmas who will be the recipient.


I carried the music note paper through to the back.

Materials used:
  • Cardstock: pink card 5"x5" base and matting; white card for stamp and greeting banner
  • Paper: Digital papers from Bearly Mine Design, Christmas Delights, CD11 & CD23
  • Stamp: Princess Singing Carols from Digi Stamp Boutique coloured with ProMarkers:- Rose Pink, Blossom, Ruby, Olive Green, Pastel Blue & Ice Grey 1; Hero Arts, Magic Holiday greeting
  • Embellishments: Camel's Hair seam binding from The Ribbon Girl; die cut snowflake; Tim Holtz distress ink, Spun Sugar; iridescent glitter; pink flat-backed gem; gold embossing powder
So now that's one down and one more to go to bring me up to date although right now I've no idea what the next card is going to look like. The challenge is to use yellow and/or an oval shape. I think I'll have a rummage through my papers and see if I can get some inspiration from them.

Happy crafting to you all,

Wednesday 27 April 2011

WOYWW - Week 99 - my apres-holiday clutter

Good Afternoon Everybody


My apologies to you all for being MIA for some considerable time. I've been on holiday folks! And not doing a lot of crafting. Hence the state of my desk - the photograph is how it looked this morning because I've just dumped stuff on it to be tidied up when I got a moment. Boxes - there's a lot of them lying out. There's my box of coloured ProMarkers - I have another with the greys/skin tones/skin accents tucked away - and the pens I used on my last project are still lying out to be listed. On top of that is a box of handmade flowers, another of toppers, and at the back there's a box that used to be full of business cards but now contains miniature postcards and cigarette cards - to use for toppers too. Beside that is a box of stamped images ready to be coloured. The best box is a new one received from a friend and decorated with art nouveau ladies portraying the four seasons. It had fruit & lemon biscuits in it but, now that it's empty, I've bagged it for storage because it is so pretty - don't know what I'll store in it but I'll think of something : ) The last two items are poly-pockets containing all the materials to make a couple of cards some time.

A few hours later and this is what my desk looks like now.


Yep, ready for action!

And if you are wondering why you've been privy to these before and after piccies and what on earth WOYWW is all about please hop over to the Queen of Desks, Julia's site - Stamping Ground - where you can take even more vicarious pleasure in snooping through tons of other workdesks from around the world : )

Now I'm off to do a bit of snooping of my own and see what you have all been up to while I've been away.

Friday 22 April 2011

My Mother in 1946 - Scrapbooking My Family History

Good Afternoon to You All,

And Good Friday to you all too. I hope your Easter holiday has got off with a bang and that you have all been enjoying this fabulous weather. For Easter, it's amazing!


I've been meaning to scrap this lovely photograph of my late mother, Margo, since forever and last night, after seeing Glimpsing the Past, Angie's, beautiful layout of her mother, I finally got around to making a start - and finished it today. Taken just before her 19th birthday and a few months before she married my father this, sadly, is the only surviving photo of her when she was this young. She had the most amazing green eyes, which I didn't inherit unfortunately, thick black hair, a beautiful complexion, and was entirely too glamorous for words.


The design paper is Prima, Fairy Flora Collection, "Pixie Garden" and was chosen because the colours reflected those in my mother's dress - I know this is a sepia print but the dress was wine and gold and the string of pearls, you can just about spot, were pink. I remember both well, especially as I cut my teeth on the pearls! My mother was an expert needlewoman and she saved her war time coupons to buy the fabric for this dress. She also made her wedding outfit but sadly there are no surviving photos of my parents on their wedding day.

The gorgeous wine coloured flower and ribbon is from The Fruit Pixie, as is the gold flower trim. Other ribbons are Anna Griffin, including the gold one down the right side which I pleated onto DS tape. The butterfly came from an old necklace and all the other embellishments are from my stash - which means I can't remember where I got them : (

Wishing you all a very happy holiday once again.

Wednesday 20 April 2011

Blooming April + Our Wildlife Corridor

Good Evening Everyone,


Today has been glorious and too good a day to spend indoors - especially here on the west coast of Scotland, an area notorious for its wet climate. So I took a wee stroll round my tiny plot with my camera at the ready. The first thing I spotted was this auricula. Years ago the Under Gardener built an auricula theatre so that I could indulge my passion for these little beauties. Sadly, this is the only one I have - our local garden centres/nurseries don't seem to cater for auricula lovers. However, this one rewards me with it's pretty crimson and cream flowers year after year. Here are a few more of the flowers in bloom now.

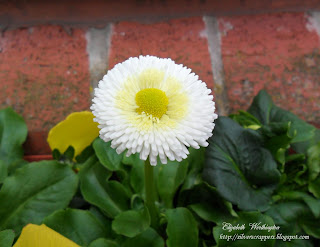
Bellis in a window box

Wallflower among the poppy leaves

Pot grown Pieris Forest Flame

This Pieris has never had so much blossom on it - truly the best it has ever done in the 13 years it's been growing.


Red/white striped tulip

Sadly, I've forgotten the name of these tulips but they have survived in a pot over the last three very harsh winters. We have lost another pot and I do mean lost - I've looked all over the garden and it's nowhere to be seen. I suspect the Under Gardener got carried away with some over zealous clearing up in the autumn : (  

Golden Hop

And last but not least - our wildlife corridor.

The wild flower border
Last year we took over this unloved patch which is not strictly in our garden but borders on the communal path behind our house. It's owned and neglected by the local council but as our bins are kept there we kept it tidy. After seeing a programme on the desirability of creating wildflower areas to provide a wildlife corridor it seemed a good idea to plant this patch up with wildflowers. The soil is really poor as it is under some huge fir trees but we dug it over as best as we could - difficult work because it had been trampled on for years. I mixed up lots of packets of seeds, mostly wildflowers but a lot of annuals and even some perennials too, and broadcast them over the patch. Watered them in and left the rest to mother nature. Last summer it was covered in poppies but this is the first spring and look at the wallflower - I didn't expect that! The smell is divine and the insects are loving it too : )

If you've got this far, thank you for staying and I hope you enjoyed seeing my blooming garden!

Take care and good night.

Till May is Out

Good Evening Everyone,


I just had to share this with you because it is so beautiful. I passed this hawthorn/mayflower on the way home from the hairdresser this afternoon and as I had my camera with me I couldn't let the opportunity pass to catch this beauty before it fades. The blossoms are just a frothy mass and highly perfumed - not caught in the photo are all the insects that were buzzing round, probably drunk with the nectar. When I was a child my grandmother often quoted the old adage, 'ne'er cast a clout, till may is out'. Then, I thought she was referring to the month of May, now, I know she meant the mayflower : )

Just a quick post but I'll be back later.

Tuesday 19 April 2011

Some Bunny Loves You

Hello Everyone,


An Easter card for my little grandchildren, Alun and Shari-Ann, who are still young enough to enjoy bunnies and butterflies. The others are far too old for such childish things : )

If you are a follower of this blog you might recognise the image and the green paper. They are part of my Robyn's Fetish prize from my recent CHNC win - this cute image is Babette Bunny and the pretty green floral paper is Coney Island Summers 02. I coloured the image with ProMarkers, including the background after watching Leonie Pujol demonstrate it in the Craft Clinic on TV. The wee butterfly's wings are glittered up.

The yellow glitter card is a Doodlebug Design, 1921 Bumblebee Daydream, which I had stashed away for months - it just didn't seem suitable for any project I was working on and glitter card is notorious for being difficult to adhere anything too. However, I've discovered glue gel and problem sorted! The scalloped edge on the design paper was created with scissors that were a freebie with a magazine - but I've forgotten which one.


The greeting is another of my MCS Professional creations - what would I do without it. The greeting is from the Loving Critters set by Paper Garden Project.


The verse inside is another from my trusty tome, Words for Every Occasion by Judith Wibberley and the insert was created on the computer.


The back is simply decorated with a strip of the design paper.

The base card is from Stampin' Up - Wild Wasabi - and the flowers are Prima with one of the textured brads from Papermania Special Brads green pack.

Right, I'm off to have lunch with the EM down at the beach as it is such a lovely day and too good to miss. Hope you all have a lovely day too.


Monday 18 April 2011

Poppy Picture - An experiment with recycled plastic

Good Evening All,


I've been experimenting again. This is loosely based on Debbi, The Crafty Cuttings of Wiccababe's tutorials - see here - showing what could be done with Promarkers and plastic. (Apologies for the glare from the flash.) When I did this one I did not have any blending solution so I tried the technique using Aquamarkers instead. As you can see it was not a great success. I shoved it to the side, as we do:) But whenever I was looking through my bits and bobs it kept turning up so I finally decided to try to make something of it, and you see the result.

Materials used:
  • a piece of clear plastic (from a Promarker container) cut to size;
  • Aquamarkers in various colours;
  • Sheena Douglass poppies stamp; black ink pad;
  • Promarkers to colour popies;
  • 4 clear flat-backed crystals (coloured with red Promarkers);
  • white card for matting and layering.
I've framed it and it's going into the smallest room - now fast becoming my gallery of turkeys!

Thought I'd let you see the contents of a package that arrived on Saturday from Helena at Poppy's Cabin.


Helena sells a wonderful selection of doilies and trims in a variety of sizes and shapes. I spotted the pink ones and thought they would come in handy - of course the other items just fell into my basket!

I'm off to watch a bit of TV before calling it a day so here's wishing you all a good night.


Spring is in the Air - An exercise in frugality!

Good Afternoon All,


I hope you all had a great weekend and have been enjoying some spring sunshine. It's been lovely here this morning but has now gone a bit overcast and cooler.

This card started with leftover gingham paper from a card, entitled Taking a Dip, I made earlier for my sister's birthday today. I'm trying to be frugal! Yes, I know, difficult, but surely not impossible :)

The yellow card base is from a pre-made pack bought cheaply from The Works - still being frugal! And the two complementary papers are from the Artsy Collage Textured Papers booklet by Hot Of The Press which I have had in my stash forever, ignored and forgotten. It was time to resurrect them - the frugal theme continues! I cut the papers using Kiwi Lane Tiny Sentiments templates - I don't use these often enough and yet I love the shapes you can get with them and the effects you can achieve.


The leaves were made with leftover green card cut to shape using Kiwi Lane Tiny Nature templates, stamped with VersaMark and heat embossed using Sheena's WOW embossing powder, Lime Light, then edged with Heat It Up silver embossing powder.

After several attempts at producing a butterfly this is the one that I liked the best. I began by stamping the butterfly (a free stamp from Craft Stamper magazine - still being frugal, you see) out in black ink onto a small piece of white card, cut it out, heat embossed it with Ultra Thick Embossing Enamel (UTEE) in platinum, then stamped again directly onto the UTEE. While it was still warm I shaped the wings a little. The topper is finished off with two pieces of pearly twigs - my pound shop find last year and a very economical purchase.


The sentiment topper is made using My Craft Studio Professional, a Bearly Mine Design digital paper, Spring Blossom 01 and a free sentiment from Sentiments4You. Inside and back are decorated to match.


Inside
 
Back

The final embellishment is some silver card candy. I'm really pleased with this card because I've been able to use up some bits and bobs leftover from previous projects, use the templates that I have had stashed away for some time, and try out a new technique with the UTEE too. Nothing new was purchased for the making of this card : )

I'd like to enter this card into the following challenges.

Totally Paper Crafts: Springtime
Top Tip Tuesday: Spring has Sprung!
Rainbow Lady's Challenge: Springtime 

I spent the weekend visiting my daughter and family and popped into my sister's with her birthday present. She is 57 today and amazingly cheerful about it too! Well, she is still younger than me :) As a result, I've spend very little time here in the craft space and precious  little crafting has been going on over the last few days, so must crack on and see what I can accomplish this week.

Happy crafting to you all,

Friday 15 April 2011

Going Round in Circles - Week 15 Christmas Card

Good Morning to you All,


Loads of circles on this week's Christmas card - because Hazel of CNHC has asked for them. And all I can say is thank goodness for circle punches. The design is based on last week's sketch at Fab 'n' Fun Challenges.

This is my interpretation.


This card used a lot of bits and bobs from other projects - this is good because I feel guilty about all the leftovers and rejects I'm amassing! Some of you will have spotted that the Tilda here was one that lurked around my desk for sometime awaiting some inspiration on my part. She has been coloured using Promarkers and a a touch of glitter has been added.

The sentiment topper was made with My Craft Studio Professional using the digi punch to cut out a circle of digi paper, cut out the centre circle then add a plain in blue and, finally, a sentiment was superimposed before printing out.  The other circles were either die-cuts or punched from some of none too successful experiments in embossing techniques.


The starry  backing is not paper but card so when it came to making the inset I didn't have any paper to match. To overcome this problem I scanned the leftover piece of the card and, once again used the trusty digital punch in MCSP to cut out a circle to leave a white space to write on.


As usual the back got decorated too,


Materials Used:
  • Cardstock: Stampin' Up! Bashful Blue for 6"x6" base; Payper Box Star pattern card; pearlescent card for some of the circles; smooth white card for Tilda and die cut for matting.
  • Paper: Bearly Mine Designs November Freebie 03 digi paper; white copy paper to print out topper & insert
  • Stamps: Tilda with Christmas Cracker from the So Jolly Collection, coloured with Promarkers; Sentiments 4 You, 'Merry Little Christmas' sentiment
  • Other Miscellaneous Items: Blue circles from Papermania's Penelope & Percy A5 Paper Pack; iridescent glitter for Tilda and the topper; blue satin ribbon and snowflake trim from Funky Farms Scrapbook Barn
I'm entering this card for the usual challenges:
For me this is a card with a difference - I've never made a card using a sketch before but I really enjoyed coming up with my own interpretation. Hope you like it too.

Happy Crafting,