Friday 28 February 2014

Friday Smile - Week 58

Evening Everyone ...

... later than intended ... I did start to write this post this morning but I got sidetracked by the much neglected housework and shopping :)

It's Friday and Annie, A Stitch in Time, as ever, has invited us to share whatever has made us smile this week. For me, this week, has been all about spring - or, at least, signs of, and plans for, spring in the garden.
First up is my hellebore plant, again! After reading some advice in Gardeners World Magazine that suggested these plants benefited from cutting away their leaves, I did just that and it worked ... look how the blooms are just, well, blooming! Love those gorgeous flowers :)

Next up some shots of other spring blooms.
An unknown Azalea
Crocus
Primulas
The EM created the pot holder himself after spotting something similar on the wall of a Cornish cottage :)
And here are two recently purchased roses just waiting to be transplanted into a flower bed that hasn't been dug yet ... the ground is still too wet. The pink one is in memory of my late mother ... the name of the rose is the same as her favourite perfume, Coty L'Aimant. And the orange one is for the EM ... well, he is simply the best :)
And finally, one of the few things that cheered me up while I was poorly, our seed order from the Cottage Garden Society seed exchange arrived. All I have to do now is sow them and wait impatiently patiently to see what gems are in those little packets of miracles :)

Now, that's an awful lot I've had to smile about recently, I hope you have also found a lot to put a smile on your face too.

Have a wonderful weekend.

Wednesday 26 February 2014

WOYWW - What's On Your Workdesk Wednesday 247

Morning WOYWWers, Followers, Everyone,

After weeks -  yes, weeks! - of being unable to participate I'm happy to be back! It's been too long and the withdrawal symptoms have become too much to suffer ... I just have to join in the best weekly crafty get-together in blogland :)  No idea what this WOYWW thing is? Just pop over to Julia Dunnit's place, the Stamping Ground, where a full explanation is available - it's a fun and friendly way to see the desks of fellow crafters - and just a touch addictive!
My desk has seen very little action this last few weeks - the bug that tried to see me out, and failed miserably, sent my mojo into the doldrums, albeit temporarily. What got me back was yesterday's Rudolph Day challenge - missing that would mean that there would be a lot less C-cards in the box and I'd hate to be scrabbling to make them at the last minute ... shudder! ... that doesn't bear thinking about. (You can see the finished cards up in the right hand corner of the photo - scroll down to see more about them.)

The rest of what you see on my desk today is intended for some cards that are still in the planning stage ... that simply means I don't have a clue where I'm going with the design ... some inspiration wouldn't go amiss :) The idea for the topper came out of the many hours spent laying on the sofa watching endless hours of crafting telly in a bug induced state of idleness. When I wasn't dosing I picked up several crafty ideas, this one for creating stamps from embossing folders and mouldable foam was one of them. Anything that extends the use of folders and creates more stamps seems a good idea to me. You can see my first stamping attempts under the foam and in the green toppers. That's my box of inky sponge bits back there and the box at the front is full of sequins, the contents of a mahoosive bag found in our local pound shop.
I wouldn't normally show this, too ashamed, but here's a shot of what is to the right of the workdesk - it's the materials for my Christmas Journal! Yep! It's still a work in progress. Everything's there, paper, cardstock, photographs, embellishments, etc., I just need to find the time and get on with it ... maybe tomorrow :)

I'm off to add my link now and hope to visit as many desks as possible.

I wish you a wonderful WOYWW.

Rudolph Day Cards - February

Hi Everyone,

I hope this finds you well and enjoying the week so far. Me, I'm on the mend ... the cough is still a bit of a problem, mostly at night, but otherwise I'm feeling much more human again. And well enough to get down to a bit of crafting at last :)

Which brings me to the pair of cards I have to share with you this evening - made for February's Rudolph Day Challenge over at Sarn's, Stamping For Pleasure, but, coincidentally, fitting in with Hazel's challenge over at Crafty Hazelnut's Christmas Challenge 165 - to use a sentiment - and Pixies Crafty Workshop Week 113. That's the one hosted by Di that encourages us to use up our snippets and admittedly I've just used the teensiest snippets for the ribbon tags, but every little bit helps keep the snippet mountain manageable :) I'm so grateful to these wonderful ladies - if it wasn't for their efforts my Christmas card box would be empty and the snippet box would be overflowing.
Being ill means that you have plenty time, too much time, to become something of a couch potato and telly addict. In my case that means watching a fair bit of craft television which is where I saw Sue Wilson, Creative Expression, make a strikingly coloured card that had me thinking that I could do something similar.
So, the topper for my both my cards was made with the following steps.

Step 1: sponge the card with three contrasting colours of inks - Ranger's Iced Spruce, Evergreen Bough and Festive Berries - the brighter the better.

Step 2: spritz water over the inked card and dab with a paper towel to remove some of the ink ... creates a splotchy effect.

Step 3: Once the ink has dried dab randomly with Twinkling H2Os - Sea Spray, Just Peachy, Celedon - and leave to dry.

Step 4: The Penny Black Winter Bough was stamped with VersaMark, aiming for even coverage, and then heat embossing with white powder - Docrafts Papermania Seafoam White.

Step 5: Sprinkle the edges with powder from the Stampendous Frantage range - teal/gold mix - and heat emboss. That's all the inking and embossing done.

To finish the card I first stamped and embossed the greeting, a Stampendous Holiday Messages stamp, in white, die-cut a ribbon tag - I've had this set of Spellbinders dies for about 6 months and this is the first time I've used one - and threaded it with some beautiful teal organza ribbon. Attach the topper to the front of a plain white card base. The double bow was created separately and then attached with glue gel.
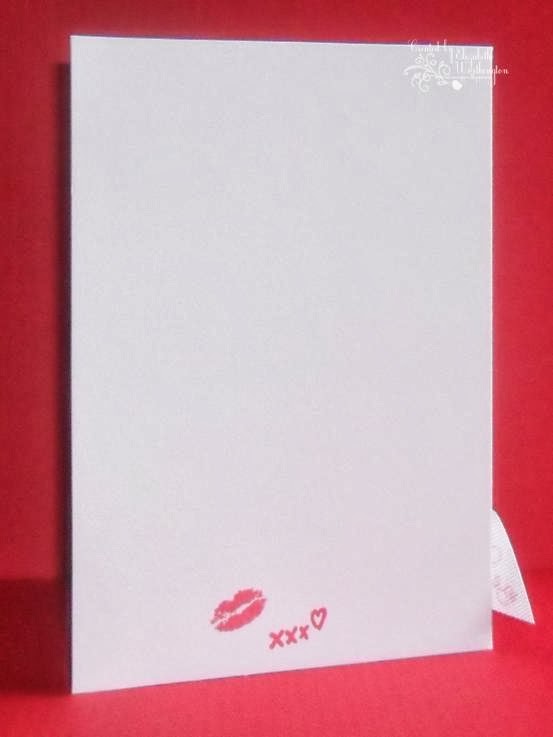
The inside and back are stamped with the Winter Bough stamp in Evergreen Bough distress ink.

I hope I've described the method well enough - I've tried to keep it simple - but if not, contact me and I'll do my best to clarify.

I'm off to bed now ... it's long past my bedtime.

Take care and stay safe.

Friday 21 February 2014

A 50th Birthday Card

Hi Everyone,

I've not been around for almost a week ... one of those nasty viruses is to blame ...  and there's been absolutely no action in the craft room! I'm still feeling less than 100% but thought I'd check in with a card that was completed before the bug hit.
Made for our fellow crafter, and WOYWWer, B-J's very significant birthday so, of course, the colours used are based on her favourites - lilac, lime green and turquoise - and as she loves them, a dragonfly had to be included.

The main piece started out as a square of white cardstock ... it's actually pearlescent card but I worked on the reverse side ... as recommended by Sheena Douglass. This bit of card has been subjected to just about every technique you can think of. First, a colour base was created by sponging it with ink in the three colours - Adirondack Brights Citrus, Rangers Shaded Lilac and Peacock Feathers distress inks. Next, water was sprayed over it and after leaving for a wee while it was dabbed with paper towel to create a lovely watermarked effect. Once dry, I decided I wanted some more inky interest on it so I inked up a Chicken Wire mask (Clear Scraps) with the Peacock Feathers which I then placed inky side down on to the card and passed it through the Cuttlebug, using just the plate configuration for die-cutting, not embossing ... this transfers the ink without embossing. Next up was the Thistle mast (Imagination Crafts) - I inked up only the insect/flourish corner detail on this mask ... those wee winged beasties look awfully like Scots midges to me :) ... using Shaded Lilac. That done, texture was added to it by dry embossing using a Fretwork mask (That Special Touch). The final touch was to apply silver gilding wax (Pebeo) around the edges.
The dragonfly was made using a Stamps Away stamp, VersaMark, silver embossing powder (Heat It Up) and, though it's not too clear in the photo, it's painted with H2Os in Royal Satin, Sea Spray and Just Peachy (from the Summer Fun set).
More of those pesky little midges made their way on to the inside :)

Other Materials Used:
Cardstock: American Crafts lime green for base; Core Color Core'dinations VaVaVoom lilac for matting and layering; Neena Solar smooth white for stamped topper and inside of card
Stamps: Sheena's A Little Bit Sketchy Only Words - Through the Rain for the sentiment; the numbers were included in a giveaway from Jo, Jozart last year -  NBUS, but deserved to be used much sooner so thanks Jo :)
Die for Topper: Spellbinders Nestabilities Labels Nine - the lilac mat was made by tracing around the die and cutting out.

I dipped into the snippets box for the Neena Solar for the topper so I'm skipping over to visit Di and the playmates at Pixies Snippets Playground - Week 112

I started to write this post up on Wednesday ... two days - that has to be a contender for the Slowest Post Ever Written Award :) It's just taking me a bit longer than usual to throw off this bug, one minute I feel perkier, the next I have to lie down for a while ... very frustrating!

So, I hope this finds you fit and well and having lots of crafting fun.

Take care and stay safe,


Friday 14 February 2014

Be My Valentine

Happy Valentine's Day Everyone,

I wish you all a fabulous love-filled day, with plenty of treats ... even if it is that you are treating yourself :) I haven't received a card yet ... do you think the EM has forgotten? If he has, it will be a first. Anyway, here's the card I made for him.
Because he's worth it ... even if he is getting forgetful in his old age :)

It's also one for Pixie's Snippet Playground because, apart from the base, it's made from snippets and stash left over from other projects. And I've had the ribbon for at least 3 years ... I used a tiny piece back then and put the rest away.

The heart shaped aperture is cut out from the white card using one of the dies from the Homespun Heart X-Cut set from Docrafts. I then embossed it using my all-time favourite folder, Lattice from Crafts Too You, and wrapped a length of the ribbon round the card, taping it down at the back.

To put the card together, a snippet of Bazzill Basics Tomato card was adhered to the card front, in just the right place. Next the embossed/die cut piece was stuck down, using dimensional foam dots, ensuring that the red card showed through the aperture.  For the final touches, a faux bow was attached to the ribbon and a red crystal gem was added to the knot. Three more crystal gems were added to the red heart and the front was completed.


Needless to say, the inside and the front had to be given the Valentines treatment - hot lips, hearts and kisses - what more could the EM want :)

I'm taking the EM out for a spot of lunch for a Valentine treat ... still no sign of a card but I'm not fussed ... he's a man who thinks that shows of love and affection shouldn't be confined to just one day of the year.

Have a wonderful day everyone,

Wednesday 12 February 2014

Follow Your Heart - A Card Inspired By ...

Evening Everyone,

I hope you are all indoors, safe and cosy, while we sit out the storm. My mantra for now is 'no matter how long the winter, spring is sure to follow' ... I just hope it can be sooner rather than later!

On to today's share, a card using snippets - well, any excuse to pop over to Pixie's Snippet's Playground again - and inspired by a lovely card spotted on LeAnne Pugliese's blog, Wee Inklings, way back in July 2013 - see the original here - and a scrap of card on which I'd tried out the Flower Background stamp from Stamp's Away.
I'd firstly used the piece of card to mop up some Broken China distress ink left on the craft sheet after another inky session some weeks months ago. Then later I'd over-stamped with the Flower Background which was inked up with Memento Markers using Bahama Blue, Rose Bud and Bamboo Leaves.

So now, to make the topper I used a die from Docrafts X-Cut Nesting Dies Homespun Hearts. The black mat is a faux die, made by tracing round the same die on to a snippet of smooth black cardstock, and cutting out by hand.

The blue cardstock, American Crafts, was cut to fit the front of the A5 size white scalloped edge card base. It's barely visible on the photograph but there's a panel stamped across the card - stamp from Docrafts Boofle Urban Stamp Textured Backgrounds ... the one that looks like a piece of knitting.

The sentiment, stamped in Memento Tuxedo Black ink, is from Sheena's A Little Bit Sketchy Only Words - From The Heart collection.

All the other materials are OGooS too. I'm still sticking to my resolve to use it all up before purchasing more ... just polishing up my halo :)

This is a busy cardmaking week for me ... two birthdays and Valentine's day, as well as a couple of challenges to make for, all keeping me busy.

The EM has finished painting the dining room walls now so we can call that room done. Next on the agenda is the kitchen.

Update on the barometer tapping - the glass is way down again :(  No surprise really ... we've just watched the news and seen the reports of the terrible devastation the storm is wreaking throughout the UK so, if you are at all affected by any of these extreme weather conditions wherever you are, please do keep warm and dry, be careful and, above all, stay safe.

Monday 10 February 2014

Tis The Season

Evening Everyone,

I hope that you all had a good weekend and that you even got a bit of crafting time too.  I did manage to fit in some scrapping ... and long overdue it was too. Last week I finally got around to uploading almost all the photos from 2013 - about 400 - on to Photobox and got them developed. The delivery of such a huge amount prompted me to actually start putting together some scrap pages, particularly of the Christmas shots. This had me rummaging through all the old Christmas stash and unearthing leftover scraps of patterned paper which cried out to be used to make a card for Hazel's challenge this week - Crafty Hazelnut's Challenge 163 - where the remit is to use a die-cut or a punched shape.
I've used a Hot Of The Press die-cut that also dates from last year. The embossed patterned paper in green and red is from the Papermania Noel collection. I used a snippet of black cardstock to form the base of the belly band and one of my two treasured Martha Stewart's punches to create the decorative edge. The flower, a red Prima daisy, is not your traditional Christmas flower but after I smeared glue over it and dipped it into iridescent glitter it looked pretty festive. The organza ribbon, ecru lace, black beading and red gem brad all came from stash too.

I'm also entering into Craftyhazelnut's Christmas Challenge Extra where it's always anything goes.

And, of course, I'm also off over to Pixie's Snippet Playground - Week 111 - having used so many snippets and leftovers, I just have to join the others there :)

That done, I'm off to bed ... got to get my beauty sleep :)

Take care, stay safe and happy crafting.
PS: If you read my last post, you might like to know that the 'glass was up' today and the forecast for Ayr changed from stormy to rain! What a difference a day makes :)

Saturday 8 February 2014

Stormy Weather

Afternoon Folks

When I was very young, about 4 or 5 years old, I was lucky enough to enjoy, for a year or two, living close to my maternal grandparents. I was in and out of their home about as much as I was my own and one of my most enduring memories is of my grandpa and his barometer. It was huge - well, that's how it seemed to little me at the time, and hung on the wall in the hall close to the front door. Every day he would lift me up in his arms and let me tap the glass, then he would adjust the needle upwards or downwards, depending on where the needle settled. That done he would then announce to the family, 'the gless is doon' or 'up', ... his way of saying that the barometer indicated a change in the weather.
All these years later, we have this, much more modestly sized, barometer ... presented to the EM on his retirement after some 30+ years service ... hanging in our hall. Just like my grandpa taught me, I tap the glass every day and adjust the indicator noting whether the 'glass is down or up'. Yesterday it was set at the top end of 'Change', edging towards 'Fair' and if you have seen yesterday's post, Friday Smiles,  you will have seen that it was a lovely day. The weather forecast, however, was for rain today. What the forecast did not prepare us for was this ...
... never have I seen the glass this far down!

Needless to say, the weather has been abysmal today - high winds and rain all day and very definitely stormy - proving, if proof were needed, the accuracy of our barometer.

I'll finish by saying that I hope those of you who are enduring extremes of weather, be it storms, floods, freezing snow or, even in some places, scorchingly hot, are safe and that no harm will come to you.

Take care and stay safe.

Friday 7 February 2014

Friday Smiles

Evening Everyone,

Annie, over at A Stitch In Time, brings us a post on Friday's which cheers us up by sharing what's been making her smile and invites us to leave a link to do the same. And because it has been a good day here I'm happy to do just that.
First up is this super photo of my great-granddaughter, Rhian. It's her first day at nursery. And looking forward to the experience too ... doesn't she look so cute with her little satchel on her shoulders and that fabulous flower on her hairband. Her mummy tells me that when the time came she didn't want to come home!

Checking out the shrubs at the bottom of the garden I discovered this old bird's nest ... with it's plastic carrier back lining, it could be the only fully waterproof nest in the country!  Out little bird friends never cease to amaze :)
And here's their new home ... at least we hope so because my DH, thinking that they might like to move into something a tad more comfortable, spent the best part of yesterday making this cute 'des res'. And as I can see it from my craft room window I will be keeping a check over the next few weeks to see if there is any interest. Oh, and check out that blue sky ... did I say it was a beautiful day here? It's only temporary, the forecast is for yet more rain tomorrow, but it was nice while it lasted.

Well, that was my happy day and now I'm off over to Annie's to check out what has been making you all smile today.

Take care and stay safe.

Thursday 6 February 2014

Patchwork Card - With Love

Hi Everyone.

Still having problems staying online and my provider doesn't seem to have come up with a definitive answer, and therefore a solution, to the problem either so just nipping in while I get the chance!
This card is for Pixies Snippets Playground - Week 110 because it used up the scrap of patterned paper leftover from  the Peony Triple Layer Card created a week or so ago and posted here.

Using a Stamps Away Patchwork Template made this a super simple card to put together. The red cardstock base is 5½" square, made by tracing round the outside edge of the template.

Next, the template was placed on to the piece of patterned paper, the inside edges were traced round and the shapes cut out to create the patchwork.

The easiest way to put the pieces together is to lay the template down on the base and place the shapes in using the template as a guide. I did sponge the edge of each shape with Ranger's Black Soot distress ink before gluing them into place.

Just for a complete change I chose to use two stamps instead of the usual - that is, usual for me - one. The 'With Love' stamp is from Sheena's A Little Bit Sketchy Only Words, From the Heart collection and, an old favourite, the 'Flowers Are Poetry' is from Hero Arts. Both were stamped using a Memento Tuxedo Black ink pad.

The final touch is the decoration in two corners - those crystal gems have been in my stash since Adam was a boy!

Just because I have had limited opportunity to blog, comment or snoop, doesn't mean I haven't been busy. Definitely not! It's all go at Casa Worthington :) For example, I finished off a little pile of hexagons to send in support of the charity drive, Crochet for Kidneys, mentioned on Lunch Lady Jan Fabric Frenzy here.
I wish it could have been have been more but I have RSI, the result of all those years of typing for Britain I guess, and too much crochet has a way of triggering an episode. However, I'm sure every little hexagon helps :)

Yesterday was spent arranging some of our vast book collection on newly built shelves ... yes, the EM has had his handyman overalls on again and put up shelves in the two recesses in the dining room :))

Just a few piles to start with ...sorting all the books kept me busy for an hour or two!

 Getting there :)
Job done :)

Those were the last boxes left to unpack after the move. Not bad, it's just taken us 12 weeks to get to this stage!!! Progress indeed :)

Right, hope to be able to post again soon ... access to Internet allowing. In the meantime, I hope you are all well and having a good week.

Take care and stay safe wherever you are.

Sunday 2 February 2014

Gremlins in the Works

Hi Everyone,


I'm still experiencing problems with my Internet connect which can best be described as intermittent. I've tried time and time again to leave comments but keep getting cut off, or a box comes up telling me the server refused to accept my comment ... all very frustrating.

Despite trying everything recommended by Sky, etc., I think it's time to call in the experts. I may be some time!

Happy blogging everyone,

Saturday 1 February 2014

Patchwork Quilts and Textile Art Exhibition Part 2 ...

... the part with the photos of Rosie Furlongs crochet work. (Warning - yet another photo-heavy post)
Love the combination of bright colours in the squares and border and the black/white bands.
The mix of oranges, blue and black in this one work really well in this lovely throw.
The little creatures are crocheted separately and then attached to the squares. Again the combination of colours makes the perfect child's blanket.
There was only a few crochet pieces displayed among the quilts, all incredibly inspirational ... I'm now looking at what I crochet in a different way ... especially how I chose colours.

Also scattered around the exhibition were a few super quilted wall-hangings.
The quilt that this blue seaside themed piece is displayed is made entirely with check, plaid and gingham fabrics - another idea to pinch :)

I thought that you might also like to see a few more of Rosie's cushions ... more food for thought :)
Rosie seems to particularly like seaside and fish themes judging by the number of pieces that included them on display.

If you want to visit Dalgarven Mill to view the quilts you better hurry because, sadly, tomorrow is the final day. And it is certainly worth seeing.

I hope you are having a good Saturday and that the weather is being kind to you. We are having bright spells interrupted by showers but it could be so much worse. The news about the south of England is still not good, so if you are facing the possibility of yet more flooding my heart goes out to you, and let's hope for an end to the awful rainstorms - surely it has to stop sometime.

Take card, stay safe and happy crafting,