Thursday 30 June 2011

Yesterday a Lily, Today, Poinsettias - Week 26 Christmas Card

Evening All,

A huge welcome to my new follower, Chadsgirl510, sorry, couldn't find your real name. I hope you enjoy visiting this blog and feel free to comment on my posts - I really appreciate the feedback. Now onto this evening's card.


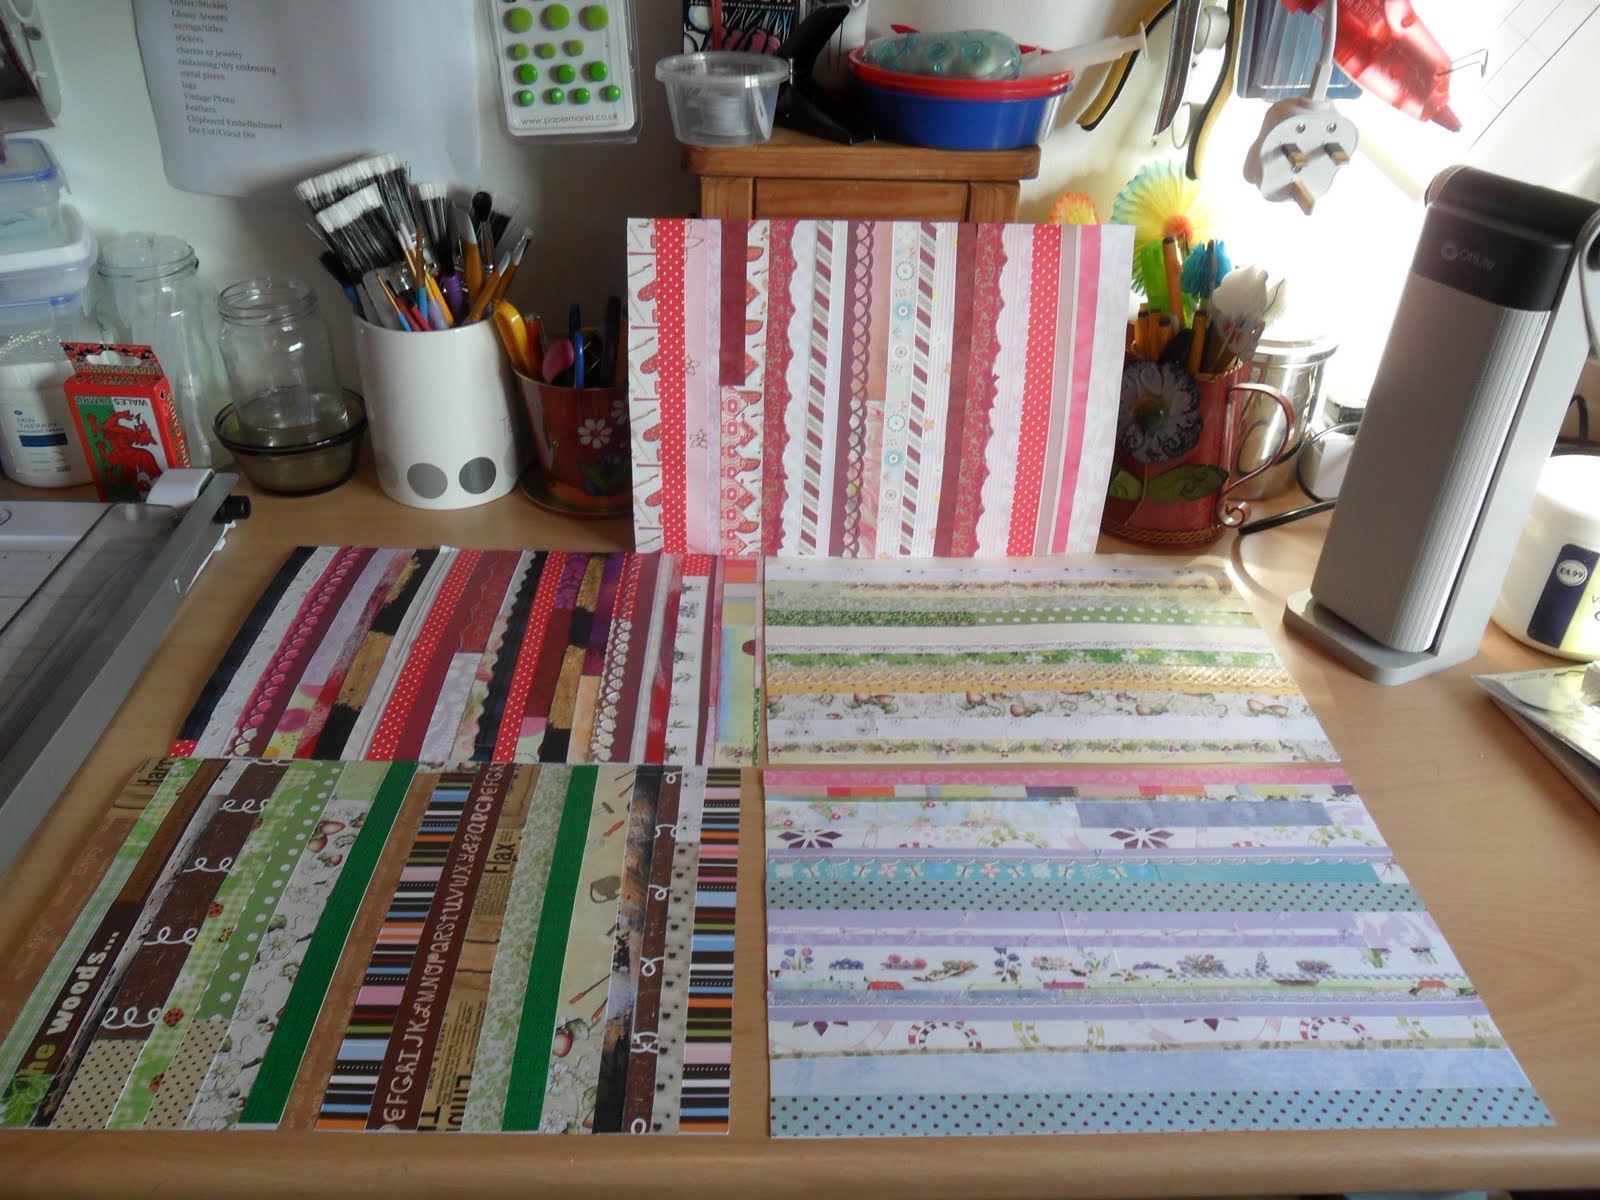
This card had me thinking  - yes, I know, not much of that going on usually but this card triggered the thought that we must all have design papers in our stash that we find difficult to use. This double-sided 12"x12" sheet was one such for me. The problem was that the big flower image, gorgeous as it is, covered about two-thirds of the surface so what to do with it. I couldn't cut it down to make several cards. I couldn't scrap on it - it would have been a tragedy to cover up the image with photos and embellishments. Periodically, I took it out, stroked it, admired it, then put it back in it's folder and on the shelf again. However, this weekend, during a visit to the garden centre, I found a pack of 8"x8" kraft card blanks - a card size I've not made up to now - and it was then I had a light bulb moment, this size of card would be just right base for my treasured DP.


After the card base, matting and layering card, and DP edges were distressed with a combination of  Fired Brick and Black Soot DIs, I stamped the Christmas Wonder stamp (this is fast becoming one of my favourite sentiments) to the left, where there was less of the pattern . . . on reflection I think I could have stamped a little higher.  For the flourish around the top and left edge I just inked up the handle on the Candle Holder image . . . stamped with both the first and the second 'generation' of ink to add more interest.


The flowers are from the reverse side of the paper, I just cut them out, inked the edges with Fired Brick and layered them up using glue gel. I gilded the centres of the flowers using a Zig 2 way glue pen, leaving the glue to become tacky and then adhering the gilding flakes to it and, finally, I sprayed them with Spray & Shine to give them a lovely gloss finish. Black gems were added in the corners for the finishing touch.


I've finished off the inside and the back with strips of the leftover DP, using the reverse side, edges brushed with the red DI. I'm not sure I would want to write on kraft card so I will probably add a rectangle of smooth white card inside for my message.

Materials:
Card: 1 x 8"x8" docrafts Papermania kraft card blank; 1 A4 sheet each Papermania textured card, dark red & smooth card in black for matting and layering 
Design Paper: 1 x 12"x12" sheet docrafts Papermania Poinsettia Duo patterned paper
Stamps: Claritystamps, Christmas Wonder (No.50) & Candle Holder (No.56)
Ink Pads: Archival Ink, Jet Black; Tim Holtz Distress Inks, Fired Brick & Black Soot
Other materials: Ink Dusters; Zig 2 Way Glue;Crafty Notions Gilding Flakes, Sunshine; Crafter's Companion Spray & Shine; black gems from stash

I'm submitting this card to the following:

Crafty Hazelnut's Christmas Challenge - Week 26: Anything Goes
Deep Ocean Challenge Blog - Challenge #2: Flowers
Just For Fun - June's Fifth Week - Anything Goes
Hooked on Craft - Challenge #2 - Show us Your Flowers

So a card with a story and a question - how many of you, like me, have gorgeous paper tucked away in your stash simply because you can't bear to cut it up, or can't think what would be the best way to use it? I bet there is more than a few of you.

I look forward to hearing your precious paper stories.

Happy crafting,

Wednesday 29 June 2011

WOYWW - Week 108 + My Favourite Lily Blooming at Last

Good Afternoon Everyone,


There's lots on my desk this morning - I think I've found my messy streak at last! That's because I was working on this week's Christmas card when the postman delivered my latest edition of the Craft Stamper. Needless to say the makings of the card were abandoned until the mag had been read and digested - I'm just too easily distracted : )

Under the magazine there's the paper intended for another card which will feature the cute little baby sitting on the easel (actually there's two - one coloured in pink is hidden behind). There's also a sheet of cream card lined up for a scrapbook page of the sea view photographs taken on holiday.

I've been increasingly drawn to vintage work I've seen recently on so many of your blogs so I raked out the book you can just see at the top of that pile - Vintage Greeting Cards by Maryjo McGraw. I've had it for sometime and, yes, I have looked through it before but not studied it deeply until now. Ms McGraw has packed the book full of techniques - some I would simply never have thought of - ever. For example, using brown shoe polish as an overlay to age photographs, or using a patterned paper napkin as a background or that a fragment of sea glass, the stuff we can pick up from the beach, will make an interesting embellishment when adhered to a photograph.

Some of you might be wondering why there's a roll of  aluminium insulating tape balanced on top of my tub of gilding flakes. Well, the EM spotted it in one of his favourite haunts - the building suppliers. He recognised it as one of the materials seen on a recent steam punk themed TV demo and thought it would probably be a handy addition to my crafting arsenal . Most women get flowers, I get aluminium insulating tape  - and I'm definitely not complaining!

Well, that's me for today but, before I go over to Julia's Stamping Ground to hop amongst the workdesks of the world, I thought you might like to see this photograph of my favourite lily, taken just this afternoon.


This pot of lilies that sits on the deck and last year it didn't do too well, but this year it has gone mad!  There's been dozens of buds just waiting to pop for simply ages so we have been awaiting the grand opening with baited breath - you see, we'd forgotten what colour these lilies were. They are simply the most gorgeous deep red - fabulous!

Happy Crafting,

Sunday 26 June 2011

Easel Card for Granddaughter's 8th Birthday

Good Evening,

My youngest grandchild, Shari-Ann will be eight years old tomorrow and I do not know where the years have gone and how she got to be so old! It seems like just yesterday she was born, but she is still our little pride and joy : )


For a birthday treat we took her to the biggest book shop in Ayr town where she had her pick of the books. We had a lovely time browsing there and here she is in the coffee-shop afterwards. Shari-Ann loves animals, her ambition is to be a zoo-keeper when she grows up, so not surprisingly her final choice of  books featured animals, one is about two kittens and another is about a dog called Best Mate.


After the visit to the bookshop it was on up the coast to Largs to enjoy her first experience of tea at Nardini's.  Here she is with her dessert - a horn of plenty filled with all sorts of luscious things including black cherries. The weather was a bit miserable but we had a most enjoyable day.


And here's the card I made for her. At one time everything had to be pink but her taste in colour is developing so I thought I could be daring and give her yellow and lilac. Because her birthday comes shortly after the longest day I went for a really summery theme. The Tildas came from my stock of images coloured on holiday and the gorgeous design papers are digitals from Bearly Mine Designs.


The toppers with the birthday greeting and her name were computer generated - the number 8 and alphas are from a freebie set from Scrappy Bug at Free 2 Scrap - a wonderful digital resource if you have not already discovered it.


I made the flowers using yet another freebie, a button flower stamp given away with a magazine. After stamping, using a purple ink pad, on to the leftover DP, I cut the flowers out, pinched the petals, layered them and adhered a button to the centre - a simple and inexpensive way to make flowers.

Shari-Ann loved the card and plans to keep it out on display in her bedroom forever!

I'm submitting this card to the following:

Bearly Mine Challenge No.13 - Summer is Here
Deep Ocean Challenge Blog #2 - Flowers
Magnolia Stamp Lovers Challenge - Buttons

Materials used:

Papermania textured card, lilac (base),; pearlescent card, yellow (layering); Bearly Mine Design digital papers, Spring Blossoms lilac floral & Simply Dots yellow dotted; Scrappy Bug Digital Kits (free) Alpha from Sky's the Limit set; Stamped images, Tilda with Cute Skirt & Cherry Tilda; ProMarkers; Flower stamp (free with a magazine); Whispers ink pad, Rio Purple; Anita's Christmas Ribbon, lilac; Yellow & lilac buttons from stash.

So that's it - after a lovely day I'm off to plan what to do next and find some time to check out a few of your blogs. I hope you have all had a lovely weekend whatever you've been up to and that the week ahead is a good one for you.

Happy Crafting to you All,

Friday 24 June 2011

Wings for Week 25 - Blue Christmas Fairy and Bob the Robin

Afternoon Everyone,

Well, that's the house vacuumed, mopped, dusted and polished ready for the weekend. It's a job we do every Friday morning so you'd think The Boss would be used to it by now, wouldn't you? But, no, she gets into quite a feline tizz and stalks off in high dudgeon every time the vacuum is switched on or a squirt of  polish is spritzed in her vicinity. She'll be back, when she judges the coast is clear, to settle down in the sunniest spot, but only after she has given me quite a telling off  - just another weekly ritual : ) Anyhow, I can now get down to posting the last two cards I've made.

Blue Christmas Fairy


This card developed from the theme for Craft Hazelnut's Christmas Card Challenge this week, which is 'wings'. It's a very girly card - loads of gems, glitter and gleam. All that shiny stuff makes it very difficult to photograph so apologies for the quality of the pics ... blame the photographer - she's such an amateur.


It wasn't planned but much of the materials for this card came free. The card was won and the paper and stamps were free with magazines last year.

Taking my colouring box on holiday has certainly paid off because this little fairy is another that I coloured then. I thought she looked quite a sad little  figure so dressed her in blue. I left her wings to be sprayed with Cosmic Shimmer and have the gems added. The diamante corner flourishes were the devil to fix - not only were they very sticky but it also took a bit of manoeuvring to place them.

Materials used:
Papering textured card, mid blue (base); smooth white card (topper & greeting); holographic card (matting & layering); Design papers, Scrapbook Magazine's free scrapbook kit; Fairy, snowflake & greeting stamps,Cardmaking & Papercraft Magazine free set; ProMarkers; Adirondack Earthtones ink pad, Stonewashed; VersaMark; Heat It Up embossing powder, Silver; Cosmic Shimmer Mist, Pearl Mist; Diamante corner flourishes and blue gems from stash


Bob the Robin


Still on the 'wings' theme I thought Bob the Robin (another image from my colouring box) fitted the bill even though he has only one wing in view. I have to thank Lyn (Spyder) of Spyders Corner for this great digital stamp. Having made one ribbon flower this week I just had to make another.


The little worm doesn't look as though he is in any kind of danger from cheerful Bob.


The DP with foiling has been wrapped round to the back of the card.


Leftover strips of DP has been used to decorate the inside.

Materials used:
Papermania's textured cardstock, dark red for the base, mid green for matting, smooth white card for embossed topper & digital stamp; Papermania's A Silent Night paper, 2 sheets (one foiled); Cuttlebug embossing folder, Ice Crystals; Spyder's Corner digital stamp, Bob the Robin; Promarkers - caramel, blush, ivory, ruby, ice grey; Fluffy Stuff; Martha Stewart decorative edge punch; Anita's Christmas Ribbon, dark green; Papermania Special Brad from green set; Card candy, red.

Both cards are being submitted to the Crafty Hazelnut Challenge - Week 25 - Wings

This has been a mammoth post - for some reason my screen keeps freezing -  so I'm giving in gracefully and calling it a day. At least blogger is letting me upload photographs ... today's silver lining : )

Happy crafting,

Wednesday 22 June 2011

WOYWW 107 - What's On My Desk ...?

Good Morning to you All

Blogger is playing up today and won't let me load the photograph this morning. Pity, because for once I have loads on it ... proving I can do clutter occasionally. After playing around with gilding flakes yesterday - the card I produced can be seen in my Midsummer Day post here - I took out the materials to try making an 'Out of Africa' scene (another Barbara Gray inspiration). However, before I could start on this I was reminded (Outlook reminders work to keep me organised!) that I have a birthday coming up on 27th of this month and there's a New Home card to make too. So I got out the Cuttlebug, various embossing folders to sift through, and some of the images I coloured whilst on holiday that I'll be using this week. So my desk is looking very cluttered - not it's usually pristine self at all.  And you can't see any of it!!!! Another gremlin has hit the works and stopped play.

I'll try again later to add today's desk piccie but in the meantime I leave it to your very fertile imaginations to picture the mess that is my desk today ;)


Yippee: I can upload photographs again!!!
For anyone still wondering what I blethering on about and what WOYWW is all about, please pop over to Julia's place, Stamping Ground, and join in the weekly, and now mammoth, blog hop around the crafty desks of the world. I'm off to do the same and hopefully blogger will have been kinder to all you WOYWWers out there.

Happy Crafting,

Elizabeth

Boohoo - can't even add my signature today ;(

Tuesday 21 June 2011

Midsummer's Day with Frosted Leaves

Evening All,

Inspired by Barbara Gray, I've been trying out her technique using acetate, double-sided clear adhesive sheet and gilding flakes to make this card.

Of course, it's another Christmas card ... made on Midsummer's Day! I had to watch the recording of BG making the card to remind myself of what to do.  She used her new Allium stamps and a different colour of gilding flakes so I had to put on my thinking cap and find a substitute. The flakes were easy, I have two colours, I'd already used one so time to use the other - Frosted Leaves. The stamp was a wee bit more difficult - I could see that the stamp had to be fairly solid and a good size. In the end I opted for my favourite Penny Black, Winter Bough, and a sentiment from Claritystamp. It reads:

May the wonder that is
Christmas
Touch the child within
Your heart

The technique requires you to stamp onto adhesive - this is not so easy and I managed to mess up a couple of times and even this is far from perfect. Not surprisingly the stamps stick to the adhesive and have to be carefully prised off to avoid smudging. The Allium stamps would probably have made it a lot easier...sigh! However, once the stamping is completed the rest is fairly easy. After the archival ink dried the sheet of acetate is positioned onto this stamping. Once that is done you flip it over, remove the protective covering and apply the gilding flakes, burnishing them in until it all is smooth. Best not to sneeze, as I did, when doing this - the flakes have a life of their own : (  Once that is done it was easy enough to put the card together.


You can see the effect of the gilding quite well in this close up. I found a lovely metallic trim in my stash which, together with the gold ribbon, picked up the colours in the gilding. The ribbon flower is my first attempt and I'm fair chuffed with it - it's something a bit different.


I'm a great fan of Bearly Mine Design digital papers, have a wee few sets in my digital arsenal, and luckily found this great paper which co-ordinated perfectly with the colours in the gilding.

Here's a list of the materials used for anybody who has a fancy to try this out for themselves:

Card: White A4 for base; Gold embossed A5 & black A5 for matting and layering
Stamps: Claritystamp, Christmas Wonder (No.50); Penny Black, Winter Bough
Insert: White A4 copy paper; Bearly Mine Design digital paper, Christmas Delights (CD 18
Other Materials: Claritystamp clear acetate sheet & double-sided clear adhesive sheet ; Gilding Flakes, Frosted Leaves; Archival Ink Pad, Jet Black; Anna Griffin silver metallic trim; Anita’s Christmas Ribbon, gold; Dovecraft Jewel Brad.

I'd definitely try this technique again but with a different stamp - one that was even more solid.

One of the things I love about summer is the opportunity to cut and bring flowers in from the garden. So, yesterday while I was pottering in the sun I snipped a few bits and pieces and popped them into a lovely jug which I found in a smashing little shop in Porthmadog called Genius. Hearts were quite a theme in the shop and love those on this jug.


Lady's Mantle (Alchemilla mollis), orange hawkweed and a couple of pieces of a lovely red shrub I have growing in a pot - I've had it so long I've lost the label and forgotten what it is called but the leaves are the most gorgeous deep red colour. I'm not a flower arranger but I do like to put my flowers into pretty containers - cheers the place up.

Shame about the weather for Wimbledon - hope it clears up soon so that we can all enjoy the games. I'll be watching Andy Murray and wishing him success this year.

That's me for now - time for a cup of tea.


I'm entering the card into the following challenges:


Southern Girls Challenge - Anything Goes


Monday 20 June 2011

Recycled Rabbit - Christmas Card Week 23 + The Auricular Theatre all Spruced Up

Evening All,

So how many of you spotted the mistake I made with the Christmas Card week numbers  - I'm further behind than I thought. So, now scrabbling to catch up, here's my offering for Week 23.


This was a relatively quick and simple card - well, it was quick once I had gutted a bought card received last year and trimmed round the cute wee bunnies image, and once I had created the insert by digitally punching into a Bearly Mine Design paper from the fabulous Christmas Delight Pack (CD03).


Some green card (Papermania Textured) for the base, a small piece of leftover gold embossed card for matting, gold card candy and a card topper greeting. This last is from a packet bought some 18 months ago when I was new to card making and before I discovered that I could produce better looking greetings by other means - ah, I live and learn ... too bad I make myself poorer in the process :)

I mentioned in my last post that I was intending to get into the garden over the weekend as it was looking sadly neglected. Well, as Robert Burns would say, the best laid plans . . .  go aft a-gley! The weather stopped play and so, apart from a quick trip to the garden centre to stock up on potting compost and plants, nothing was done until today.  Also, we discovered that the auricular theatre, which had been lovingly constructed by the EM some years ago, was now very much the worse for wear - rot had set in, no doubt due to all the Scottish rain we've endured. So, nothing else for it, the EM put on his handyman overalls and trotted off to B&Q for materials to repair the theatre - and here it is repaired, treated with wood preservative and looking good. Didn't he do a grand job?


Here it is after I'd re-potted the plants.


There's couple of verbenas, a geranium and a really pretty tiny yellow trailing petunia (on the top shelf). The snail and the tortoise, bought to amuse the grandchildren when they were tots, have now found a home there, the jug is a souvenir from the Peak District where we used to live, and the wee cottage is a reminder of a fabulous sojourn in Eire some years ago now.  It's still looking a bit a wee bit bare so another visit to the garden centre is scheduled for some time this week - methinks, I'd like a few more of those petunias and maybe another geranium or two.

 Hope you all had a great weekend - it was Father's Day yesterday so I hope you all had a great day of celebration. We don't celebrate now because, sadly, both our fathers died young but I've enjoyed seeing all the Father's Day cards you've been making.

Right, off to start another project, not a Christmas card this time - I fancy doing a bit of experimenting.

Happy Crafting,

Saturday 18 June 2011

Sneaky Tilda - Week 22 and an untraditional Christmas card

Good Crafternoon,

This is the first card I've made with one of the stamps I coloured on holiday. I was experimenting with ProMarkers and decided I wanted a soft effect on this one.


I forgot to note down the colours used but as far as I can remember I used blush, ivory, soft peach and possibly caramel. I edged the topper with gold pen and layered it onto the peach DP with small dimensional squares - attaching it at a 'jaunty angle' so the flowers on the DP weren't obliterated.


Hadn't a clue what I was going to do with her but found this lovely floral/lace DP in my stash and thought it was perfect - not strictly a Christmas pattern but I liked it so much I decided the throw the rule book out and just go for it! I teamed it up with a paper lace with snowflakes - a suitably winter touch, I thought. It does say that the lace is self-adhesive but I've had it in my stash for so long that any stickiness there might have been has long gone. So I used some DS tape which gave me the opportunity to sprinkle some fairy dust - well okay, iridescent glitter - over the lace which gave a lovely effect.


This little LOTV greeting is stamped in Memento Rich Cocoa - I thought black would be too stark and wreck the look I was aiming for.


I found these Prima flowers and buttons in my stash and thought they worked perfectly as an embellishment.


As usual, the back and front got decorated with strips of the two papers - I find it impossible to leave them blank now. So there it is, something a bit different for Christmas. What do you think? Does it work using the softer colours?

Here's a list of the materials used for those interested:

White card for base; Wilkinson C&C cream floral DP; Papermania's Henbury Lane Poinsetta peach print DP; Sneaky Tilda stamp coloured with Promarkers; Lili of the Valley greeting stamp; gold pen; Memento ink pad, Rich Cocoa; Siesta craft lace border; iridescent glitter; Prima flowers from Essential Flights of Fancy & Shabby Chic Solid packs; peach coloured buttons from stash.

I trust you are all well, your weekend is going well too, and the weather is rather better where you are than it is here in Ayr - we've had showers off and on all day :(  I was planning to go into the garden today and do a bit of tidying up - it looks a bit overgrown from neglect - but it's too wet. So I'm off to the garden centre instead to find something colourful for the auricular theatre which is looking a bit sad at the moment. I'll let you see it when I've prettied it up again.

Happy crafting,

Thursday 16 June 2011

Serendipity Papers - Follow Up to WOYWW 106

Evening Everyone

Serendipity Papers
One of the benefits of playing along with WOYWW each week is the wealth of tips, wrinkle and ideas that many of the WOYWWers freely impart each week. And yesterday was no exception. While hopping round the desks of my fellow WOYWWers I landed on Mary Ann's post in which she showed her serendipity circles and explained how they are made. I had never heard of them before but they are such a brilliant (and frugal) way of using up all those strips of paper left over from various scrapbooking and cardmaking projects. Up till now the only use I've found for the strips is  the occasional trim on a card, otherwise they just linger unloved in a box gathering dust.  So I set to and, after colour sorting, I got out the Pritt and spent a relaxing couple of hours sticking them onto some thin and not so good white card - a purchase bloomer until now! I got 5 A4 size sheets altogether - not bad for something that I might have ended up tossing in the wastebasket one day.  I just have to  punch the circles out and add little embellishments as Mary Anne has done and I will have some very pretty and money-saving toppers. So thanks for a great idea Mary Anne.

Now I'm off to investigate the work of Tim Coffey as mentioned in Beatrice's post - apparently he does something interesting with a cereal box and a hot glue gun :)

Happy Crafting,

Wednesday 15 June 2011

WOYWW - Week 106 + PIFs

Good Afternoon Fellow WOYWWers, Followers and All,

What's On Your Workdesk Wednesday


No, not my desk this week, there's nothing to reveal here, so it's What Was on Your Workdesk Last Wednesday instead. We had a couple of stormy evenings whilst in Wales so I got out my emergency craft pack - well, you didn't really think I'd last a whole ten days without doing something crafty, did you? Now, crafting on the dining table was okay . . . but what a bother it was having to clear everything of the table each night in readiness for breakfast next day! As many of you will know, I'm one of the neatniks of the crafting world but when I'm working on a project I've learned that it pays me to keep all the materials out on my desk. (If only because it helps when I'm putting together the list of materials used for the finished project - I have the most appalling memory these days!) I now realise just how thoroughly spoiled I am having not only a dedicated craft desk, but also my very own craft room. So hat's of to all you crafters out there who work on the dining/kitchen table - you deserve a medal.

And, if you are reading this and don't know what WOYWW is all about then follow this link here which will take you to Julia's blog, Stamping Ground, where you will find links to a huge variety of crafty people, and their favoured crafting tables (or, as in Helen's case, crafting floor space!).

PIF from Sioux


Don't you just love this tag which the lovely Sioux has made - it was waiting for me when I got home on Sunday. It's just so gorgeous. The textured finishes on the ballerina and the wings are very tactile - I keep stroking bits of it. Clearly a great deal of thought has gone into the composition, not only is there 'WOYWW'  but also the date of the second anniversary 'June 1' and even the word 'deux' - fitting in nicely with the ballet theme too.  If you would like to know how the tag was made follow the link to Sioux's post above. Thank you so much Sioux - I'm absolutely delighted to have this fabulous gift from you.

PIF to Beatrice


This is the wall hanger I created to celebrate Week 104 which I just managed to get in the post to Beatrice , just before I went away . . . phew!

As you can see it's an Alice themed hanging with characters from the Polka Dots Wonderland stamp set and the colours were sort of dictated by Alice's dress - can't get away from blue there. I cut a piece of mount board for the base and covered it back and front with some Crate paper from the Sweet Branch Collection called 'Flutter' - though you can hardly tell after I treated it so badly by stamping it randomly - stamps from various sources, e.g. Polka Dots, Tim Holtz & Anita's - in black, and then giving it a coat of gesso to tone the stamping down.

The WOYWW letters were computer generated, adhered to card, then embossed with 3 coats of platinum UTEE which I stamped into with the word stamps from the Wonderland set - great fun to do. I stamped the characters from the set out, in some cases several times, i.e. the Mad Hatter's hat & the Queen of Hearts strawberry tarts, and coloured them with ProMarkers before cutting them out. They were then adhered to the hanging and the hat and tarts were 'decoupaged'. This just left the embellishments, pearl trim, ric-rac braid, WOC cherry blossoms, rose leaves and a blue heart-shaped crystal spray (there's a lot of hearts in this piece), roses and purple heather spray - well it couldn't be made in Ayr and not feature something Scottish, blue seam binding and a heart shaped silver charm and a key (out of shot here).

I thoroughly enjoyed making this piece but worried that it would not be to the taste of  the eventual recipient. We all have such different crafting styles, and I'm still such a beginner in a lot of ways that I did hesitate about taking part in the PIF celebration. However, I'm glad I did, and Beatrice assures me that she does like the wall hanging, much to my relief. I'm now planning to make something similar for my little granddaughter, Shari-Ann, whose birthday is coming up soon.

This post has taken rather longer to write than I thought but I did have a lot to catch up on.  We are getting a new gas hob fitted this afternoon - to replace the old electric one. The EM hates how long it takes the plates to heat up and prefers the controllability of gas so soon he really will be 'cooking with gas' : )

Off for a much needed cup of tea now but will be back to check out as many desks as I can manage later.

Happy crafting to you all,

Tuesday 14 June 2011

Postcard Notecard - Vintage Style

Good Afternoon to You All,

I made this card last night just to get myself back into the crafting way of things again. Though, to be honest, I did suffer from the occasional withdrawal symptom whilst away. And I did return home refreshed and raring to go so, after all the dreary but necessary chores, unpacking, etc., it wasn't too difficult to get going again.


The postcard topper was one I had, in true Blue Peter style, already prepared. I applied a wash to the watercolour paper with diluted shades of Twilight Blue and Straw Yellow AquaMarkers before stamping the Penny Black's Keepsake stamp. The flowers were water coloured with Twilight Blue too then I distressed the edges with a combination of Tim Holtz's Stormy Sky and Pumice Stone  distress ink pads.

Onto a base of brown card (Stampin' Up's Soft Suede) I've adhered two papers from docrafts V&A Quilts linen paper pack. The yellow card (SU's Saffron) is embossed with docrafts V&A Hanoverian folder and distressed with TH's Pumice Stone and Brushed Corduroy ink pads. The vintage ladies, from Crafty Individuals Miniatures 'People & Places' pad, are matted on to SU's Marina Mist card,  distressed around the edges with Brushed Corduroy and attached using dimensional squares. Card candy in yellow and brown provide the final touch.


The insert is computer generated after scanning the V&A papers. To decorate the back I just folded one of the DPs over from the front.


I must admit I like the look of vintage collage so this card really pleases me. However, after admiring it for a while, the EM did ask me when I was likely to use it, what occasion would it be appropriate for and who would I give it to! Well, I'm not sure - I'll put it away in the box with the rest and maybe one day I'll find a use for it.

According to a certain TV shopping channel Christmas crafting begins today - even though we are still in 'flaming June' and midsummer is still a week or so away!!! Of course, for some of us it started the first week of January and because of my resolution I now have quite a stash of Christmas cards already prepared. However, I've fallen behind by a week because of the holiday so I'll need to get a wriggle on to catch up. So much to do and so little time :)

The EM is at the dentist this afternoon, having a tooth removed, so he'll be needing a bit of TLC afterwards so not sure when I'll be back in my craft space - we'll see how he does.

 Right I'm off to get some lunch now.

Wishing you all a great day.