Showing posts with label templates. Show all posts

Thursday, 9 May 2024

Visiting Alfie - Rainbow Challenge No.2

Hello Everyone,

I'm back with the second layout for the Facebook challenge mentioned in yesterday's post. The colour to use for this layout was blue which I found more difficult than expected. I have lots of material in shades of aqua, turquoise and teal but very little in what I call real blue. So I scraped the bottom of the barrel for this one. 

I love the photo, dated 2019, of Alan feeding carrots to Alfie the donkey. One of last taken before he caught Covid and became to ill to drive. Alfie was living alone at the Ballantrae garden centre by then, his last companion had sadly died, so we visited him as often as we could back then. 

The challenge includes a sketch. I always find sketches inspirational even if I don't stick rigidly to them. This one included a heart shape which did prove a problem. I still haven't unpacked my large die-cutting machine - it's in the shed in one of the last boxes somewhere and, in all honesty, I'm in no hurry to tackle the unpacking just yet. There's too much stuff and nowhere to put it so it can stay in the shed for now.

Fortunately, already unpacked is this set of templates. It's ancient! It's what we scrappers used before dies and die-cutting machines became available. Yes, I've been scrapping that long. Twenty-eight years or so. The advances I've seen in papercrafting in that time is, well, amazing! The largest heart shape wasn't really big enough but I made it do. 

The papers used are from Heidi Swapp's 'Set Sail' collection except the floral one which is from Hobbycraft's 'British Garden' paper pad. Embellishment items for clusters from various sources, some old (e.g. 2017), some new. 

That's me done wittering tonight. I'm getting the 'time for bed' look from the resident furry nag. After all she has a 4am start in the morning!

Take care, everyone,

Elizabeth 

Wednesday, 16 January 2019

What's On Your Workdesk Wednesday - Week 502

Hello Everyone,

I'm so happy to be here after last week's health scare. I thought I'd somehow dislocated my jaw. Lockjaw was mentioned in A&E at one point. Scary!!! I couldn't even talk, it was so sore. Think how awful that would have been for the EM - nobody to chat too him!!! Happily, after a few days I regained movement in my jaw and with that I was able to talk again ... happily for us both. So on to the shot of What's On My Desk today.
It's dull and rainy here so the photo isn't the brightest. A bit messy this morning too. There's the usual pile of scrappy papers and card at the back and to the right the box containing card blanks - all pretty normal for me. Messy yes, but normal. It's the stuff at the front that's not normally there. That pile is the result of a shopping spree at The Range - with a gift card from Christmas still burning a hole in my pocket it had to be done as soon as I was well enough.
Apart from stocking up on the basics - adhesives, card blanks, etc., not shown - there's a wee selection of embossing folders, stamps, washi tape, twine, a couple of paper pads and two greeting dies. And now I'm itching to play with it all.

While I wasn't up to much else, I spent a lot of hours watching YouTube demos and even managed to finally finish off a scrap layout begun before Christmas. Watching a video from the very inspiring scrapper, Kathy Sonnier McElfresh - ScrappyKathy - I noticed that she kept tabs on her layouts with labels containing important information and adhered to the back. As I sometimes struggle to remember vital stuff - e.g. supplies used - when writing about a layout, especially if it is some time since it was made, I thought Kathy's labels were a great idea. So I designed my very own.


The finished label is a bigger than Kathy's because I've included quite a few blank lines onto which I can record all the supplies used in the making of
the layout.

Trimmed down they could also be used to record information about any cards I make too. For an oldie like me, whose memory isn't what it used to be, these labels are going to be a boon.


I'm including the JPEG version of the labels here so please feel free to use them too.


No final book bit this week. Until a couple of days ago the pain in my jaw radiated out and into my ear making it very uncomfortable to wear my buds so I'm just catching up now. Normal service to be resumed next week - hopefully!

Take care everyone and have a wonderful crafty week.

Tuesday, 8 November 2016

Cardmaking - Little Green Fir Tree

Hello Everyone,

Hope your day has turned out to be a good one. A very warm welcome to my newest followers, Megan and Karen.  Thank you to you all for taking the time to check out my blog, I really appreciate it.

I have another quick and easy Christmas Card to share today ...
... and it's another one that features one of the stencils I was playing with last week. And, again, I think it's a card that is suitable for both a male or female recipient.

There really was not much to the making of it but here is how it was done.

  • I had already inked up the beginnings of the topper, using Lawn Green Gentle Blend (Pinflair) and the Fir Tree stencil from Imagination Crafts on a scrap of white card but I decided it needed a bit of bling. First, I squeezed some clear glitter glue (a very old one that came free with a craft magazine) along the edges of the tree 'branches'. Then once that had dried I glued gold stars here and there over the tree. (The stars are the kind of confetti you find strewn on tables at parties or, as happened to me, come in a birthday card and get scattered all over the carpet when you open the envelope!)
  • Next I matted the tree topper onto a piece of Snow Green Background Card (old stash from Kanban), wrapped twine (more stash) around the two layers and then adhered it all to a Kraft card base measuring just 4" x 5¾" (yet more old stash). The twine is quite thick so I used dimensional sticky tape to stick the topper down, otherwise it would not have lain evenly and wouldn't have looked good at all.
  • The final touch is the computer generated greeting which was printed and punched out with a 1¼" circle punch (Stampin' Up). The matting was created by punching another circle from the Snow Green card, cutting it in half and sticking them to the back of the greeting leaving a little edge showing. (Hope I've explained that clearly enough).

Goodness! It took longer to write up the steps than it did to make it - it really was a very quick make.

I feel that I should explain the old stash thing. After a sort out of all the stuff I have stashed away - I know, I do a lot of sorting out, sigh - it became clear, crystal clear, that I probably had enough to last me for life. It's embarrassing! So I'm digging deep and making a determined effort to use all that old stash up. I really don't need any more new cardstock or pretty patterned papers as they become available ... I will resist temptation. Really! I will!

I'd like to submit this card to the following challenges:

Sunday, 6 November 2016

Sunday Snippet Card - Silver Fir Tree

Afternoon All,

I'm back with another card made from the toppers from the session I had last week with stencil templates.


This is another that I think will do very well for a male recipient because it isn't too 'girly'.

How it was made.

  • for the fir tree topper I took a snippet of white card, some silver Buff-It Craft Polish (Pinflair) and the smaller of the fir trees in an Imagination Crafts Stencil Templates. (These stencils do not come with the name on the packaging so I'm calling it Fir Trees.) Using a palette knife, the silver Buff-It was applied to the stencil and left to dry naturally. 
  • once the tree was completely dry, the topper was trimmed down and matted on to a piece of midnight blue card. This card has a very shiny surface - sorry, I have no idea of the manufacturer.
  • next a base was created from white cardstock cut to create a non-standard size card measuring 5¾" x 6¼" ... non-standard to enable me to fit the topper which measures 5½" x 2¼" to the card front. 
  • next, another piece of the blue card was cut just a smidge smaller all round than the card base and adhered to the front. Then a piece of the patterned card cut even smaller was layered on top of the blue. Both the blue and the patterned paper are very old stash - bought several years ago at the craft show in Glasgow - which is why I have no maker's information to share.
  • to finish the topper was attached to the left side of the card front and three silver enamel dots (from The Story Of Us by Simple Stories) to the top right corner. 

It's a very simple card - there's really not too much going on - but it was quick to make and with only about 50 days to go to Christmas and being well behind with my cardmaking, quick and simple is good.

I'd like to submit this card to the following challenges:

Snippets Playground week 254

Crafty Hazelnut's Christmas Challenge # 306 Vintage or Anything goes

CHNC challenge extra for November 2016

Merry Christmas Challenge #5 - Anything Christmas goes

Hope you are having a perfectly lovely Sunday.

Thursday, 3 November 2016

Cardmaking - Christmas Wreath

Hello Everyone,

I hope you are having a lovely day. Thursday afternoon is a good one for me because I go along to the craft club. Today I had a great two hours crocheting whilst enjoying, as usual, the very entertaining and interesting craic from all the lovely ladies who attend the club :)

Once I got home I decided to spend a bit of time cardmaking and this is the card I made.
This card was made using one of the templates I picked up at the SECC show on Saturday - you might have spotted it, and the beginnings of the topper, on my desk in yesterday's post. Because it was a quick and easy make I'll not do a step by step of 'how I made it but list instead the supplies used.

  • Cardstock - a scrap of white for topper; a 12x12 sheet of green (maker unknown) cut to form a 6" square base; red (Bazzill Basics Tomato) for matting the topper.
  • Template - Christmas Wreath from Imagination Crafts
  • Inks - Tim Holtz distress inks, Festive Berries, Fired Brick, Crushed Olive, Evergreen Bough, Shabby Shutters
  • Embellishments - Red Berry Nuvo Crystal Drops; Red & Green enamel dots from Studio Calico

I didn't use any dimensional adhesive on this card which means it can be mailed without costing a fortune in postage.

I'd like to submit this card to the following challenges:

CHNC challenge 305: anything goes as long as it's Christmas

CHNC challenge extra for November 2016

Now I'm off to do some couscous to have with the chilli stew I left cooking in the slow cooker - love my slow cooker.
Happy Crafting,


Wednesday, 7 August 2013

Experiments with Gelli Plate Printing

Afternoon Folks,

First, an apology to Julia over at the Stamping Ground and all my fellow WOYWWers for not participating this week. I won't be here for the weekend and, as I am the slowest blog hopper on the planet ... I'm usually still visiting desks as late as Monday in an attempt to catch up ... better that I don't.

However, after watching a Barbara Gray (BG), ClarityStamps, masterclass on Create and Craft TV (recorded last weekend) I finally plucked up the courage to try gelli plate printing and I thought you might like to see the results. Of course, I didn't think, until after I was well into the experiment, to take photographs so what follows isn't a step-by-step documentary but it should give you some idea of the process.
To begin, I collected all the items BG recommended - tubes of acrylic paint, brayer, masks and items for creating pattern and texture, including a few stamps, copy paper, various types of cardstock - smooth, textured, watercolour - cut to measure 6.5" square, plus various smaller pieces to try out too, and, of course, the gelli plate ... mine is the 6" square size.
Just a few of the masks, stamps and other items I used for texture, e.g. the netting that oranges come wrapped in, sequin waste, bubble wrap and even a strip of trellis border punched with an EK Success punch. Note, this photo was taken after I'd covered everything with paint :)
Here you can see how the masks, etc., can be laid on the inked plate to create the patterns. With this one, the sequin waste didn't lie flat so I had to adopt a surprise attack mode, hover with a sheet of copy paper above and quickly but gently press down on it ... this method worked remarkably well :)
After starting slowing with just one colour of paint, I got bold and started to mix it up a bit. This has to be done with a light brayer ... go in heavy handed and mix it too much and you get mud ... the contents of my wastepaper bin is a testament to this! This mix is pretty. The following photos show a selection of results.
Pretty :)
By not cleaning the gelli plate, the results can be quite interesting too. You can see some black has merged with the yellows in one piece and orange in another.
By placing a small rectangle of card on the paint first and then the full 6.5" square on top you get this effect. The blank area is perfect for stamping on and the smaller piece is patterned too so can be used in different projects.
This piece has been decorated with the Butterfly Meadow by Crafter's Workshop ... I think I should have turned it upside down for this colour mix but it is still lovely.
 Stamping works well too, these are a selection from Docrafts and Sheena Douglass.
And it is possible to lift paint from stamps after stamping on the gelli plate ... a spritz of water gave this impression.
Even the build up on copy paper, after pressing on top of the templates/masks, etc., and cleaning the brayer, developed a nice pattern.

And after all that, I now have a pile of patterned card just waiting to be used to make projects ... I just have to think about exactly how.

As I said at the top, I'm away for the weekend ... to Aberdeenshire. It's my son's birthday on Friday so we are going to help celebrate. It's raining up there today so I hope it cheers up and the sun comes out for our visit.

In the meantime, I have some packing to do and I might even find some time to sneak into the craft room and do something with one or two bits of those gelli prints :)

Hope you have all had a lovely day, whether WOYWWing or not, and happy crafting,

Friday, 2 December 2011

An 8 x 8 scrap page - Jennifer at the Christening

Morning Everyone,

Life at Casa Worthington is slowly getting back to normal, the EM is getting a little better every day, and I'm squeezing in a bit more crafting time too.


This is my first Guest Design Team member submission for the month of December on the Scrap our Stash Challenge Blog. It's an Anything Goes challenge this month so I thought this page fitted the topic very well. It's yet another 8 x 8 layout  - I'm finding that when time is short this is the page size that's just right for me - it can be quickly made using only one photograph and needing fewer embellishments.

My daughter, Juli, had her four oldest children Christened at the same time in 1999 - gosh, that's 12 years ago, doesn't time just fly? Somewhere I have a photo of the family altogether in the church but haven't been able to lay my hands on it yet ... when I do, that will be another page to make. In the meantime, I love this photo of Jenny, aged 6, with her happy, gappy smile and pretty dress having fun at the Christening party.

For the base, I've used Core'dinations, Aged Wine, sanded lightly around the edges, and for the layout I've used a selection of papers from a Kay Miller Designs set, Simple Pleasures, that came free with Scrapbook Magazine. The colours in the floral designs echoed the colours in Jenny's dress perfectly and the ornate heart-shaped shapes together with the little ribbon bow were just the right embellishments.  I've used Kiwi Lane templates to cut shapes from the paper - Bracket 1 for the floral & pink check pieces and Paisley Place mini 2A for the pink wavy strip that can be seen going along the bottom of the layout. The computer generated journalling was printed on the floral paper before cutting out the bracket shape. The floral trim came with the set too - I just trimmed round it with scissors on one edge to add a bit of interest. All the paper edges were inked with some Tim Holtz's Victorian Velvet. The rest of the embellishments, butterflies, flower, gems, came out of my stash - the butterfly embellishments I found whilst on holiday in Wales earlier this year. To make the butterfly trail, I lightly pencilled in the shape I wanted and then used tiny sticky-backed gems to cover the pencilling.

It's another dull and dark day here in Ayr - yesterday we even had a shower of hailstones - ugh! I'm so temperamentally unsuited for this miserable weather :) Here in Scotland we've had enough rain in the last few weeks to make the farmers in the south of England green with envy! To cheer ourselves up, the EM and I have been planning next year's holiday. We are going on a road trip - now that's adventurous of us :))


We've posted the map of the UK up on a wall in the snug and the blue spots you can see are stickers indicating the places we would like to visit. Most are in the south of the country so that's where we are headed next summer - I can't wait :))

Right, I'm off to make a bit of lunch for us, fill the washing machine, empty the wastepaper baskets and so on - then I'll be back to craft a bit more.

In the meantime, I wish you all a happy day and keep crafting,

Monday, 18 April 2011

Spring is in the Air - An exercise in frugality!

Good Afternoon All,


I hope you all had a great weekend and have been enjoying some spring sunshine. It's been lovely here this morning but has now gone a bit overcast and cooler.

This card started with leftover gingham paper from a card, entitled Taking a Dip, I made earlier for my sister's birthday today. I'm trying to be frugal! Yes, I know, difficult, but surely not impossible :)

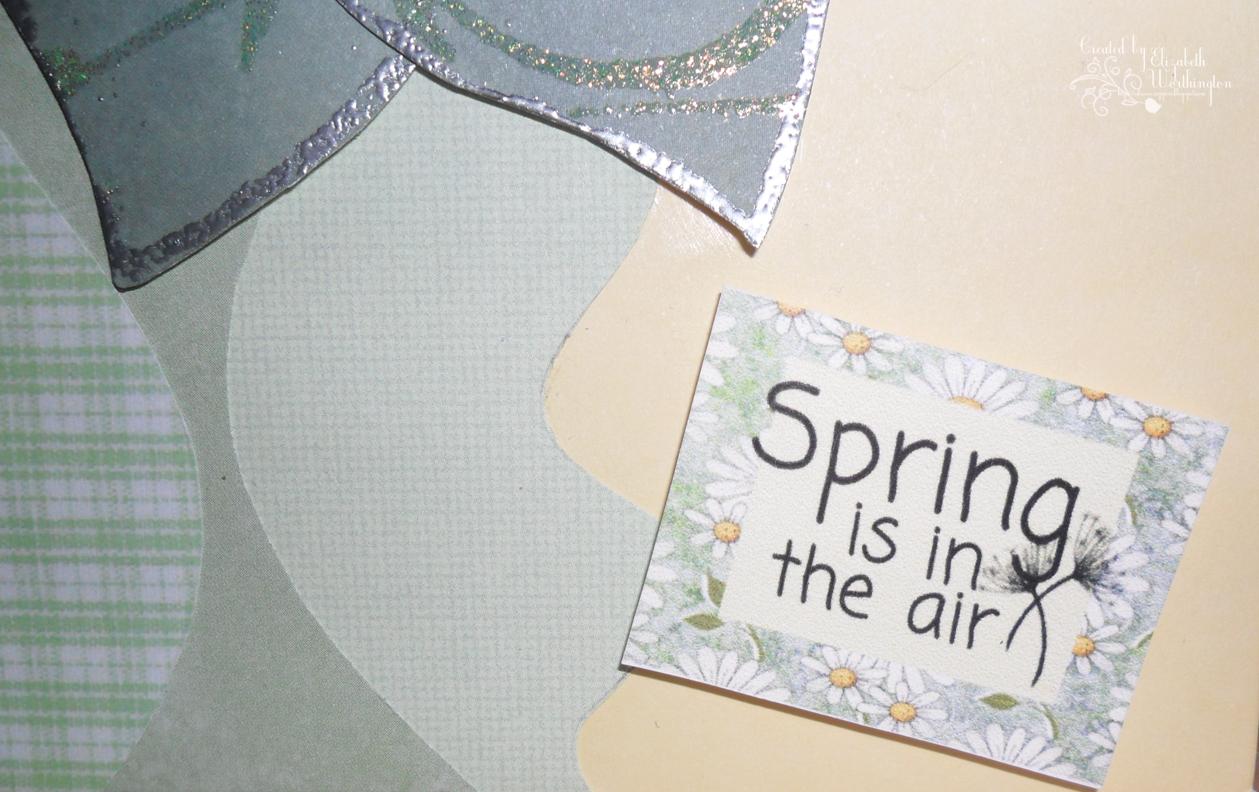
The yellow card base is from a pre-made pack bought cheaply from The Works - still being frugal! And the two complementary papers are from the Artsy Collage Textured Papers booklet by Hot Of The Press which I have had in my stash forever, ignored and forgotten. It was time to resurrect them - the frugal theme continues! I cut the papers using Kiwi Lane Tiny Sentiments templates - I don't use these often enough and yet I love the shapes you can get with them and the effects you can achieve.


The leaves were made with leftover green card cut to shape using Kiwi Lane Tiny Nature templates, stamped with VersaMark and heat embossed using Sheena's WOW embossing powder, Lime Light, then edged with Heat It Up silver embossing powder.

After several attempts at producing a butterfly this is the one that I liked the best. I began by stamping the butterfly (a free stamp from Craft Stamper magazine - still being frugal, you see) out in black ink onto a small piece of white card, cut it out, heat embossed it with Ultra Thick Embossing Enamel (UTEE) in platinum, then stamped again directly onto the UTEE. While it was still warm I shaped the wings a little. The topper is finished off with two pieces of pearly twigs - my pound shop find last year and a very economical purchase.


The sentiment topper is made using My Craft Studio Professional, a Bearly Mine Design digital paper, Spring Blossom 01 and a free sentiment from Sentiments4You. Inside and back are decorated to match.


Inside
 
Back

The final embellishment is some silver card candy. I'm really pleased with this card because I've been able to use up some bits and bobs leftover from previous projects, use the templates that I have had stashed away for some time, and try out a new technique with the UTEE too. Nothing new was purchased for the making of this card : )

I'd like to enter this card into the following challenges.

Totally Paper Crafts: Springtime
Top Tip Tuesday: Spring has Sprung!
Rainbow Lady's Challenge: Springtime 

I spent the weekend visiting my daughter and family and popped into my sister's with her birthday present. She is 57 today and amazingly cheerful about it too! Well, she is still younger than me :) As a result, I've spend very little time here in the craft space and precious  little crafting has been going on over the last few days, so must crack on and see what I can accomplish this week.

Happy crafting to you all,