Showing posts with label Gilding Flakes. Show all posts

Sunday, 13 April 2014

All's Right With the World Tag

Hello Everyone

And a happy Sunday to you all too.  We've had a pretty easy day of it today with neither of us feeling like doing much at all ... no crafting to speak of and it's much too cold outside to do anything in the garden.

As there hasn't been a lot going on in the craft room I thought I'd share this tag. The UKPC challenge last month was to create something using book pages - this tag is what I came up with. A lot of snippets and stuff that had been tucked away and long forgotten so I'll be submitting it to Pixie's Snippets Playground - Week 120.
Although it's not too clear in the photos the green cardstock base of the tag is covered with part of a book page, from an old poetry book, published 1950, entitled Poet's Quair, which was first stamped with a variety of flourishes and flowers (all items used listed below), next a layer of gesso was added before it was stamped again, this time with trailing leaves using adhesive and adding gilding flakes, and of course the sentiment.
The poem, Pippa's Song, was also taken from a book page and framed, using a scalloped square one from Bazzill Chips Shapes embossed with glittery lemon and lime WOW powders, to give it prominence on the tag. The frame was adhered to a snippet of patterned paper before being glued on to the tag.
The snowdrops were stamped on to an oval die-cut and painted with a pale green mica powder mixed with water. The butterflies were stamped on to scraps of the same patterned paper used to back the frame, cut out and decorated with a mix of pearls and gems.
The back is simply decorated with some gilding flakes and butterflies.

Materials:
- Base: smooth white card and green card
- Book pages: from the old poetry book
- Stamps - Leafy Swirl from Clarity Stamps; Snowdrops from Sheena's A Little Bit Sketchy Spring; Snowdrops, Leaf and Sentiment from Clear Impressions' Wild & Free collection; Papermania Urban Stamps Butterflies
- Paint - white gesso
- Shapes - square from Bazzill Chips Shapes; oval frame from Stix2 Oval Shapes set; square scalloped frame from stash
- Embossing Powders: Sheena's WOW! Easter Sparkle and Lime Light; Heat It Up Gold
- Inks: Archival Black; Ranger's Squeezed Lemonade and Shabby Shutters; VersaFine Olympia Green; Memento Tuxedo Black; Versamark Watermark
- Crafty Notions Adhesive and Sunshine Gilding Flakes
- Ranger's Perfect Pearls Interference Green
- Patterned Paper - Basic Grey Origins Seaweed Wrap
- Trims/Embellishments: fibres, ribbons, baker's twine and yellow pearls from stash; Anita's gems - yellow

My daughter popped round this afternoon ... she has asked me to shorten the gorgeous evening dress she has bought to wear to a ball in Ireland next month. She is such a titchy wee thing that she can never find clothes of the right length. I'll be tackling it with bated breath because it is a lightweight knit fabric, with a lot of stretch in it, and there's two layers to alter too ... now where did I put that packet of ballpoint needles!

But first things first, must go and watch Endeavour on TV now.

Hope you all have a lovely evening whatever you are doing.

Happy Crafting,

Friday, 17 May 2013

Blooming Wonderful ... Less Is More

Hello Everyone,

Well, I did it! I made a one layer card using a coloured card blank for the LIM Week 119 challenge at last. If you read my earlier post you will know that my first attempt met with disaster. Here's my second attempt.

The idea is the same - a stamped and embossed flower panel, flowers coloured with ProMarker, but this time it's on pink sorbet coloured card and instead of just embossing with powder, I've used gilding flakes too.

 A close up of the gilding shows just how pretty it is - the iridescent gems stones are pretty too.

This particular cardstock is quite absorbent so it was possible to stamp inside using VersaMark to get a watermark effect rather than use a coloured ink pad.

Materials used:
For the base - Papermill Direct smooth card, Pink Sorbet
Stamps - Dawn Bibby Designs Flower & Leaf set
For the stamping - VersaMark, Rangers Sticky embossing powder and Frosted Leaves gilding flakes
For the colouring - ProMarker, Baby Pink
Tools - Hougie Board, and some Post-Its to create the panel
Embellishments - iridescent gems from stash

It's been a glorious day here so we finally managed to top up our vitamin E reserves by spending an hour or so out in the garden. And whilst out there we took the opportunity to remove a few of these:


Shame ... they are lovely ... but, as they are a plant growing in the wrong place, they are by definition a weed and therefore just had to go!

And then I stopped to admire this:

My one and only auricular plant - gorgeous!

And then there's this:

The wallflower border. I wish this was smelly blogavision - the perfume from these is heavenly. So much so I just had to do this:

The lounge now smells heavenly too :))

This beautiful day would appear to be a blip ... the forecast is for worse to come over the next few days. Is it to be ever thus?

Hope you all had an equally wonderful day wherever you are.

Take care and happy crafting,

Thursday, 1 November 2012

Inspire - An Oriental Themed Tag

Hi Everyone,

The lovely crafters over at Anything But A Card have, for Challenge #5, challenged us to incorporate black into our project. This tag fits the remit as black has been included in the stamping, embossing and there's even black ribbon.


The pattern on the paper used to cover this tag has a mix of red, light brown and black which I've overstamped with grasses in even more black.


I've been playing around with embossing powders and glitters, frantage style, again! The paper was leftover from a recent scrapping session and as the pattern was inspired by the Orient, I decided to go with the theme ... it gave me an excuse to use the preloved bamboo and wild grass stamps picked up at a car boot sale ages ago :)

For the topper: the bamboo was stamped out in dark green on hammered white card, inked with Tim's Old Paper ink to take the starkness of the white, and then some of the leaves were just touched here and there with Zig glue to be finished off with gilding flakes. Finally, the topper was edged with a gold leafing pen.


I also had a bash at trying out a technique seen demonstrated by Mel Heaton on TV recently to make the dragonfly embellishment. Basically, you melt UTEE in an aluminium dish, then drizzle it on to a heat-proof craft sheet, heat again and sprinkle a mix of glitters on top, this settles into the UTEE. For this one I used platinum UTEE and mixed in several colours of EP too. Finally, while it's still hot, take an inked up stamp and press it into the mix. Clearly, it needs more practice, but I was pleased with my first attempt :)

Lots of materials used - here is the list: 
Recycled cardboard for base; paper from BoBunny Serenity Collection; Inks: Memento Tuxedo Black; Versafine Olympia Green; Tim Holtz DI, Old Paper; VersaMark Watermark Ink Refill; Stamps: Rubber Stampede Inc, Wild Grass; Posh Presents, Posh Bamboo; DeNami Design, Dragonfly; Krylon Gold Leafing pen; Embossing Powders: Platinum UTEE; Midnight Black; WOW Blueberry Regular & Burgundy Red Regular; Glitters: Wine; Copper; Silver Heliogram; White Iridescent; Snippet of white hammered cardstock; Gilding Flakes: Frosted Leaves & a Zig 2-way glue pen; Charms: coin, key, leaf, butterfly; ribbons: red satin; black organza; burgundy organza; raffia; Tim Holtz Chitchat Verbiages Charla 'inspire' word; red gems

Having used and impressive number of snippets, leftovers, and even recycled cardboard from packaging, I'm popping this over to Di at Pixie's Crafty Workshop too.

Now I'm off to watch the end of Pointless but I'll be in the craft space later ... I'm working on another scrap layout.

I hope you are all well and that you've had as good a day as I have.

Happy crafting, 

Friday, 30 March 2012

Butterflies & Dragonflies Pocket Photo Album

Evening All,

I'm very late today ... had another dentist appointment this morning. I thought it was just for a check on the root canal job done last week, but no! An old filling ... a very old filling ... needed to be replaced - is there no end to the torture our teeth give cause to??? Anyway that should be it for now :)

Here's another reason why I'm later today.


Looks like a card, doesn't it? Aha! ... but it's not, there's more to it than can be seen at first sight. Here's the inside:


It's an album with two pockets for photos. I've included two double-sided photo mats, but if these were omitted the pockets could just as easily hold gift vouchers, money, sachets of hot chocolate, tea bags or even CDs - the possibilities are almost endless :)

I spotted Dawn Bibby on TV recently doing a demo of one that was already cut out and ready-to-go and thought I'd try to make my own. It is made from one sheet of 12"x12" double-sided pattern paper, scored at 6" horizontally and vertically, folded and then a triangle cut away from the lower half of the sheet to form the pockets ... hope you can follow that explanation, but won't blame you if you can't, it's easier to do it than to explain it :) Once the sheet is folded in half again and the long sides of the pockets are glued down, using that really sticky DS tape, all that is left to do is to decorate it and make the photo mats if required.


In all, I used three sheets of coordinating papers from a lovely K & Company paper pack. The butterflies ... actually, they might be moths ... I cut out of one sheet, likewise the dragonflies/damselflies - you can tell I'm good at identifying insects, can't you :))  And the other sheet was used for the making the trim, toppers and photo mats.


This is the back - I didn't give the embellishments as much dimension on the back as the front so that it can be laid down flat.

Materials I used:

  • K & Company, Susan Winget's Nature 12"x12" paper pad
  • Tools: Hougie Board for scoring; scalloped-edge punch; tiny butterfly punch; scissors; guillotine
  • Adhesives: Red DS tape; photo glue; glue gel; a glue pen
  • Creative Expressions Gilding Flakes - Sunshine
  • Iridescent glitter
  • Embellishments: Marianne cotton lace and ribbon; lilac gems

It occurs to me that although I have made this project using three sheets of paper from the same pad it could just as easily be made from one sheet for the base and all the trims and embellishments could come from my stash mountain.

I think it would make a perfect little present so hope to find the time to make a few more ... now that I've made a practice piece, the next one shouldn't take me so long to do :)

I'm submitting this project to the following challenges:

Craft Us Crazy - Challenge 24 - Altered Items and/or Anything But A Card
The Joyful Stamper's, Inspire Me Fridays 52 - Anything Goes!

It's just as well the weather is cooling down again because tomorrow is Barbara Gray's workshop day. The EM is beating a hasty retreat and leaving me to hog the big TV in the lounge!

The most surprising and happy news I've had this week is that I'm to be a great-grandmother again. My granddaughter, Jenny, made the announcement last night - they are hoping for a brother for Rhian - and the baby is due some time around November, EDA not confirmed yet. Just in time for Christmas :)

That's me for today and if I don't get this published soon it will be tomorrow already.

I wish you all a lovely weekend, albeit a tad chillier in the UK that what we've become accustomed to.

Take care and happy crafting,

Friday, 5 August 2011

Out of Africa - gilding flakes again

Hello Everyone,

It's been a busy couple of days, keeping me from posting anything. However, here are the finished cards using the Out of Africa stamp set - some of you may have spotted the toppers on this WOYWW 110 post a couple of weeks ago.


The toppers were made following Barbara Gray's demo,using double-sided adhesive sheets, gilding flakes, mica powders, and the Out of Africa Clarity Stamp set with black archival ink, and simple matting on pearlescent card and layering on Papermania textured cardstock.

The larger (A6) of the toppers was just split into three, matted onto gold coloured pearlescent card and then layered onto a green card base. The smaller one started off the same A6 size but I got a fingerprint on the adhesive and that's a disaster - it shows through the mica :( Luckily the offending print was in the top left corner so I trimmed it off and matted the topper onto a pale gold pearlescent card and then layered it onto a brown card base.


The inserts are just white copy paper stamped with the warrior using Big and Juicy Spice ink pad.

And that's it - off to do a bit more blog-hopping, attempting to catch up after the last couple of hectic days.  I hope you are all well and that you have a great weekend coming up.

Thursday, 30 June 2011

Yesterday a Lily, Today, Poinsettias - Week 26 Christmas Card

Evening All,

A huge welcome to my new follower, Chadsgirl510, sorry, couldn't find your real name. I hope you enjoy visiting this blog and feel free to comment on my posts - I really appreciate the feedback. Now onto this evening's card.


This card had me thinking  - yes, I know, not much of that going on usually but this card triggered the thought that we must all have design papers in our stash that we find difficult to use. This double-sided 12"x12" sheet was one such for me. The problem was that the big flower image, gorgeous as it is, covered about two-thirds of the surface so what to do with it. I couldn't cut it down to make several cards. I couldn't scrap on it - it would have been a tragedy to cover up the image with photos and embellishments. Periodically, I took it out, stroked it, admired it, then put it back in it's folder and on the shelf again. However, this weekend, during a visit to the garden centre, I found a pack of 8"x8" kraft card blanks - a card size I've not made up to now - and it was then I had a light bulb moment, this size of card would be just right base for my treasured DP.


After the card base, matting and layering card, and DP edges were distressed with a combination of  Fired Brick and Black Soot DIs, I stamped the Christmas Wonder stamp (this is fast becoming one of my favourite sentiments) to the left, where there was less of the pattern . . . on reflection I think I could have stamped a little higher.  For the flourish around the top and left edge I just inked up the handle on the Candle Holder image . . . stamped with both the first and the second 'generation' of ink to add more interest.


The flowers are from the reverse side of the paper, I just cut them out, inked the edges with Fired Brick and layered them up using glue gel. I gilded the centres of the flowers using a Zig 2 way glue pen, leaving the glue to become tacky and then adhering the gilding flakes to it and, finally, I sprayed them with Spray & Shine to give them a lovely gloss finish. Black gems were added in the corners for the finishing touch.


I've finished off the inside and the back with strips of the leftover DP, using the reverse side, edges brushed with the red DI. I'm not sure I would want to write on kraft card so I will probably add a rectangle of smooth white card inside for my message.

Materials:
Card: 1 x 8"x8" docrafts Papermania kraft card blank; 1 A4 sheet each Papermania textured card, dark red & smooth card in black for matting and layering 
Design Paper: 1 x 12"x12" sheet docrafts Papermania Poinsettia Duo patterned paper
Stamps: Claritystamps, Christmas Wonder (No.50) & Candle Holder (No.56)
Ink Pads: Archival Ink, Jet Black; Tim Holtz Distress Inks, Fired Brick & Black Soot
Other materials: Ink Dusters; Zig 2 Way Glue;Crafty Notions Gilding Flakes, Sunshine; Crafter's Companion Spray & Shine; black gems from stash

I'm submitting this card to the following:

Crafty Hazelnut's Christmas Challenge - Week 26: Anything Goes
Deep Ocean Challenge Blog - Challenge #2: Flowers
Just For Fun - June's Fifth Week - Anything Goes
Hooked on Craft - Challenge #2 - Show us Your Flowers

So a card with a story and a question - how many of you, like me, have gorgeous paper tucked away in your stash simply because you can't bear to cut it up, or can't think what would be the best way to use it? I bet there is more than a few of you.

I look forward to hearing your precious paper stories.

Happy crafting,

Tuesday, 21 June 2011

Midsummer's Day with Frosted Leaves

Evening All,

Inspired by Barbara Gray, I've been trying out her technique using acetate, double-sided clear adhesive sheet and gilding flakes to make this card.

Of course, it's another Christmas card ... made on Midsummer's Day! I had to watch the recording of BG making the card to remind myself of what to do.  She used her new Allium stamps and a different colour of gilding flakes so I had to put on my thinking cap and find a substitute. The flakes were easy, I have two colours, I'd already used one so time to use the other - Frosted Leaves. The stamp was a wee bit more difficult - I could see that the stamp had to be fairly solid and a good size. In the end I opted for my favourite Penny Black, Winter Bough, and a sentiment from Claritystamp. It reads:

May the wonder that is
Christmas
Touch the child within
Your heart

The technique requires you to stamp onto adhesive - this is not so easy and I managed to mess up a couple of times and even this is far from perfect. Not surprisingly the stamps stick to the adhesive and have to be carefully prised off to avoid smudging. The Allium stamps would probably have made it a lot easier...sigh! However, once the stamping is completed the rest is fairly easy. After the archival ink dried the sheet of acetate is positioned onto this stamping. Once that is done you flip it over, remove the protective covering and apply the gilding flakes, burnishing them in until it all is smooth. Best not to sneeze, as I did, when doing this - the flakes have a life of their own : (  Once that is done it was easy enough to put the card together.


You can see the effect of the gilding quite well in this close up. I found a lovely metallic trim in my stash which, together with the gold ribbon, picked up the colours in the gilding. The ribbon flower is my first attempt and I'm fair chuffed with it - it's something a bit different.


I'm a great fan of Bearly Mine Design digital papers, have a wee few sets in my digital arsenal, and luckily found this great paper which co-ordinated perfectly with the colours in the gilding.

Here's a list of the materials used for anybody who has a fancy to try this out for themselves:

Card: White A4 for base; Gold embossed A5 & black A5 for matting and layering
Stamps: Claritystamp, Christmas Wonder (No.50); Penny Black, Winter Bough
Insert: White A4 copy paper; Bearly Mine Design digital paper, Christmas Delights (CD 18
Other Materials: Claritystamp clear acetate sheet & double-sided clear adhesive sheet ; Gilding Flakes, Frosted Leaves; Archival Ink Pad, Jet Black; Anna Griffin silver metallic trim; Anita’s Christmas Ribbon, gold; Dovecraft Jewel Brad.

I'd definitely try this technique again but with a different stamp - one that was even more solid.

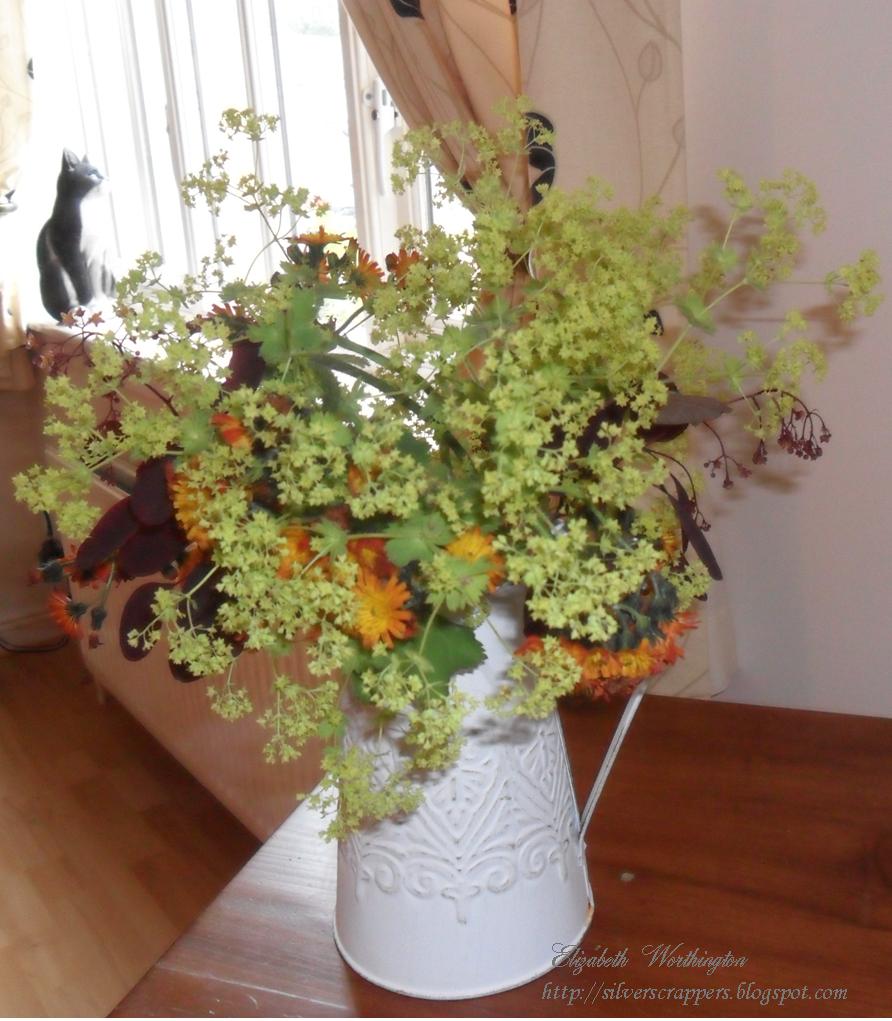
One of the things I love about summer is the opportunity to cut and bring flowers in from the garden. So, yesterday while I was pottering in the sun I snipped a few bits and pieces and popped them into a lovely jug which I found in a smashing little shop in Porthmadog called Genius. Hearts were quite a theme in the shop and love those on this jug.


Lady's Mantle (Alchemilla mollis), orange hawkweed and a couple of pieces of a lovely red shrub I have growing in a pot - I've had it so long I've lost the label and forgotten what it is called but the leaves are the most gorgeous deep red colour. I'm not a flower arranger but I do like to put my flowers into pretty containers - cheers the place up.

Shame about the weather for Wimbledon - hope it clears up soon so that we can all enjoy the games. I'll be watching Andy Murray and wishing him success this year.

That's me for now - time for a cup of tea.


I'm entering the card into the following challenges:


Southern Girls Challenge - Anything Goes


Monday, 16 May 2011

Gilded Card - first experiments with gilding flakes

Afternoon All,


The postman brought me a pot of gold last week, well, gilding flakes actually. I've been dying to try these after seeing a YouTube video of Sarah Lawrence of Crafty Notions - link here - demoing the deckle-edged effect. So on black card I applied and spread the glue, then sprinkled and rubbed in the flakes as instructed. The result was nowhere as good as Sarah's but it was my first time!

Not wanting to waste this first effort , however amateurish, I made this topper using up bits and pieces from my stash and adhered it to a ready-made ivory base card. I stamped Hero Arts' Wavy Stars, a favourite of mine, with black ink onto the gilded panel, then with VersaMark onto the black card which I then brushed with gold mica powder. The panel of music note card, although creamy in colour, was a bit too light for my liking so I embossed the edges with gold powder.


The inside and back are decorated with gold embossed stamping. As this card could be used for any number of occasions, I'm leaving the greeting/sentiment for now.

Materials used:
  • Card: Ivory Luxury 5.5" Square Card (140mm x 140mm); black card for gilded panel; music note patterned card from Payperbox.
  • Stamp & Inks: Hero Arts Wavy Stars; Stazon Jet Black; VersaMark Watermark Stamp Pad
  • Other Materials: Gilding Flakes Sunshine,  Light Gold Mica Powder Paints & Craft Adhesive, all by Crafty Notions; Heat It Up Gold Embossing Powder; two jewelled heart embellishments from The Works; black satin ribbon & gold raffia from stash box.
This was fun so, after this first foray into using gilding flakes, I'm now looking at other ways to use them. There's nothing like getting your fingers sticky and covered in gold stuff  ; )

After blogger getting into a tizz last week and being down for a couple of days it's nice to be back to normal again. However, I didn't sit twiddling my thumbs waiting for blogland to get back to normal. No, I took advantage of the enforced downtime and sorted out, chucked out, re-organised and cleaned the craft space and today it's positively gleaming. Even the EM got caught up in the flurry of activity and, after inspecting my handiwork and passing it as impressive, decided I deserved another shelf. So after a quick visit to B&Q, and donning his handyman overalls, the job is done.


Now there is less stash on the floor and more space for The Boss to curl up in - as you can see she likes to keep an eye on me while I play : )

Okay, that's it for today - got a lot to do and so little time to do it in so I'd better get a wriggle on.

Take cared all of you and happy crafting,