Hi Folks,
Here, by popular request, is the method (warning, this post is photograph heavy) for making the Christmas tree ...
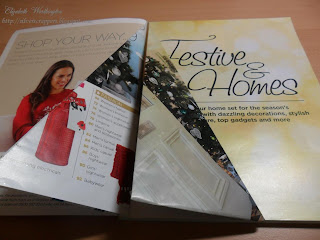
... from a supermarket catalogue like this:
Apologies for the glare on some of the photographs - the pages are made from shiny material and glare is really hard to avoid in the appallingly dull light at this time of the year.
Step 1: Open the catalogue and manipulate the spine to break it up and soften it.
Step 2: First Fold - bring the top right corner down towards the spine and run your finger down the fold to create a sharp crease, thus:
Step 3: Second Fold - bring the page over from the right side to the spine and again press with fingers to create a second crease, this:
Step 4: Third Fold - fold tail of page under and to back of page and crease, thus:
Step 5: Final Tuck - bring bottom folded section to front and tuck under folded page, thus:
Step 6: Continue folding each page in the same way, thus:
Eventually, the finished tree will look like this from the base:
Step 7: Adhere the two back pages together with double-sided tape to form the tree shape.
I hope I have explained the process clearly for you - any questions, please don't hesitate to contact me and I will do my best to provide an explanation.
I still haven't decorated my tree yet, but you could add glitter, beads, etc., whatever takes your fancy.
Have fun and happy crafting,


3 comments:
Thank you hun, now I know what to do I will definatly be having a go, I love paper folding stuff, xx
Oh wow Elizabeth - such a great idea! Off to rootle round for catalogues now :) Di xx
This is AMAZING Elizabeth. Wow! Im sorry I havent commented lately but Mr Blogger hasnt been updating me with your uploads for some reason. Its happened to a couple of blogs I follow. For some reason the update isnt coming through on my dashboard. Lee x
Post a Comment