Many thanks to everyone who left such lovely encouraging comments last week after the posting of my first Handy Hippo project – they were all most appreciated. I hope you are all having a good week so far and looking forward to a fun-filled weekend.
Today, I’m delighted to be sharing with you my second project and, even though we are now in February, it’s not a Valentine’s Day card. Instead it’s a card with a folksy feel, suitable perhaps for a baby or a tot, featuring patchwork, flowers and a whimsical little lamb.
Everything I have used here is available from Handy Hippo and if you would like to make the same project then simply click on the magic button below and it will take you directly to a shopping cart that contains everything you would need to make it. Once there, you can simply and easily remove any of the items that you already have in your craft stash.
It’s also easy to add any other purchase that you might like to your basket.
As I don’t have to list the materials I’ve used, Handy Hippo has done that for me, I thought it might be helpful if instead I give you a step-by-step on how it’s been made.
INSTRUCTIONS
- Trim a sheet of the blue card to measure 10” x 5”, score at 5” and fold to create a 5” square card.
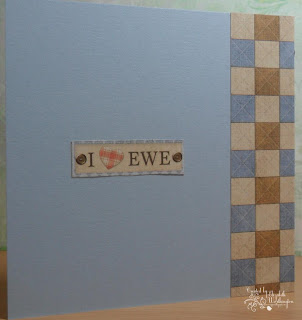
- Trim the ‘Quilted Squares’ patterned paper to measure approximately 6¼ ” x 5”, then adhere it to fit front and wrap around to the back of the card – trim if necessary.
- For the corner detail, the easiest way I found was to cut a piece of brown card measuring 4” x 3½ “, then cut through this diagonally to form a triangle. Then cut a piece of ‘Words’ patterned paper in the same way but just fractionally smaller all round. Glue the patterned paper to the card, leaving a small border of the brown showing.
- Cut and adhere a length of the lace along the diagonal edge, wrapping the raw edges underneath and securing them with the really sticky red DS tape.
- Now adhere the triangle to the bottom left corner of the card front - again with the red DS tape.
- Create the topper by cutting out and layering three matting layers, in brown card, patterned paper and blue card. Decorate with a length of lace and adhere the lamb topper strategically over the lace trim - I used glue gel to ensure the dimension was correct. Finish the topper by attaching a small brown button to each of the top corners.
- Adhere buttons to the centre of the flowers too and arrange them on the left side of the front of the card.
- Add the sentiment to the front bottom right using foam squares to give dimension.
- Decorate the inside and back with more of the toppers to complete the card.
Of course, I'll be here again next Thursday with another project but, in the meantime, I hope you all have an excellent week and a lovely weekend.
Happy Crafting All,


12 comments:
Cute card! I love the colors and your design!! Hugs, Lisa
I love it. Perfect for any child. Love the cute image and the sentiment.
Fantastic Elizabeth, thanks for sharing x x Hugs
What a beautiful card, just right for my Granddaughter who is 20 and still very whimsical :o)
Jackie xx
Morning Elizabeth
Another gorgeous project.
Love your paper choices and the cute ewe! Such lovely colours.
Beautiful inside and out as always.
Have a happy Handy Hippo Day!
Love Jules xx
Happy HH Day Elizabeth and gorgeous card! Another tip picked up here - super idea to wrap the paper round the spine of a card. Now, why had I never even thought of that one? Makes aligning easier I would think too?
Signed
Mrs Potato Head :)
xx
So cute ....but actually its almost a Valentine with a difference... would be ideal for someones cute young girlfriend. Great tutorial...and so is the flower one ...could you use silicone gel or is it the same?
btw ... the blue 'netting' is called mesh ... and its self adhesive which is handy...would work well on cards too xx
Super cute card here! Like it alot!
Such a cute card! HH must be very pleased with you indeed! xx
Hi Elizabeth,
This card is way too cute! Just love it.
Hugs,
Kay
Aw so sweet! I love everything about it best of all it makes me smile.
Hugs
Bernie
so gorgeous elizabeth.the image is adorable and i love the fab papers and colours :D
xx coops xx
Post a Comment