Happy Handy Hippo Monday!
Yes, it's Handy Hippo on Monday again this week ... and from now on I'll be bringing my Handy Hippo share on Mondays instead of Thursdays. For all sorts of practical reasons Mondays are better for me so I hope you'll enjoy the change too.
On to this week's share:
A square-shaped card, the background is created using floral peel-offs and distress inks in two shades of pink, after which the peel-offs are removed. The topper is created similarly but the peel-offs are left in place. It’s a simple technique that gives stunning results. The flowers in the sheet of peel-offs used are mixed in style and there are tiny butterflies and even tinier flower heads that are useful as fillers in the whole design. I think this is a technique that is quicker to do than it is to explain in words but I will endeavour to do my best ... so here goes :)
How to make the background:
Before sticking the peel-offs down it is best to pop them on to a tea-towel, or even on whatever you're wearing, to remove some of the tackiness. This will make it easier to remove the peel-offs after inking. It's also a good idea to mix the flowers up a bit, trying not to make it look too perfect and symmetrical, and have some of them falling of the edge, so to speak.
Top tip: before starting the inking, place a piece of copy paper the size of the card underneath the back of the card - this prevents the back being inked inadvertently as the card is moved around on your craft sheet - how do I know this, you might just wonder!!! Similarly, have a spare piece of paper/card to hand, use this to cover inked areas as you move round the card ... otherwise you might leave fingerprints on your card.
Starting with the lightest shade of DI, for this card it's Spun Sugar, and starting from the edges sponge - using a make-up sponge - over the entire surface. Don't aim for perfect coverage, it looks better if it has a mix of lighter and deeper areas of inking. Next, take the deeper shade, Victorian Velvet, and shaping a make-up sponge into a little ball shape, sponge the centres of the flowers - again it doesn't have to perfect and it doesn't matter if you go over the lines, it all adds to the desired finish.
Leave the ink to dry for a while and then carefully and slowly remove the peel-offs. Don't throw these away, stick them on to the back of the peel-off sheet, keep them to be used again.
Finally, sponge just around the edges of the card with the Pumice Stone ink.
The topper is created using the same method of inking but using a piece of pink card, measuring 2" x 3½", and instead of removing the peel-offs, leave them in place. Mat the topper on to gold mirri card cut fractionally larger and it's ready to adhere with the silicone glue gel.
For the greeting, stamp it on to a strip of pink card, ink edges with Pumice Stone, cut a 'V' shaped from the right edge and mat on to gold mirri card as for the topper and adhere to the front of the card.
Finish the design off by using a strip of white card punched with a lacy edge punch and sponge edged with Spun Sugar ink, adhered to left side of card. Using the ultra-high adhesion tape, stick two lengths of pink ribbon down on to the punched strip and decorate with white and pink pearls and a ribbon bow. Finally, add pearls to the top right corner and one to the greeting.
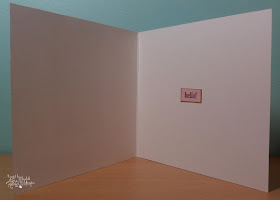
As you can see I've added a stamped 'Hello' to the inside - made in the same way as was the greeting on the front.
It’s easy to add to your basket any other purchase that you might like and if something is temporarily out of stock you can request to be emailed once it is back in stock.
Well, that was a bit of a marathon this week - as I said, takes longer to explain how to do the inking technique than it does to actually do it! However, the results are always well worth the effort so I hope you will give it a try.
I'll be back again next Monday with another project to share - hopefully, one that's easier to explain.
In the meantime, have a lovely Handy Hippo Monday and ...
Happy Crafting,


Brilliant card Elizabeth. I have so many peel off's that I have had for ages and wondered what I could do with them. Great idea.
ReplyDeleteA beautiful card, it's a long time since I used this method :o)
ReplyDeleteJackie xx
GREAT techniques. Thanks for sharing. Love this inky card xxx
ReplyDelete